Create Your First Image
Create Your First Image
The fastest way to start in DesignerBox is the AI Image tool. This guide walks you from a blank prompt to a finished image.
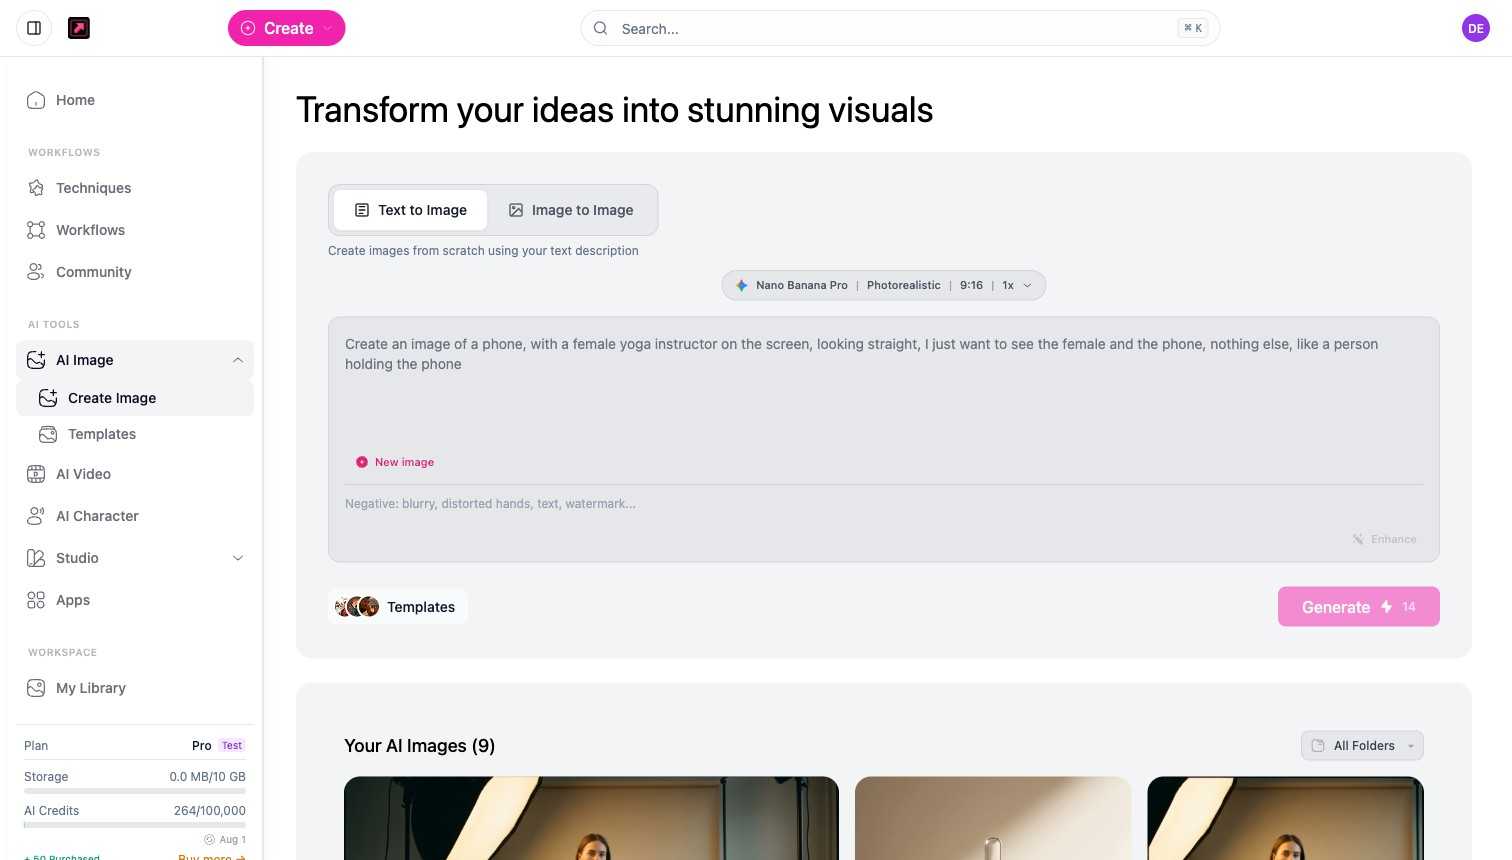
1. Open AI Image
Select AI Image from the sidebar. You will see two tabs:
- Text to Image - create an image from a written description.
- Image to Image - upload a photo and transform it.
2. Describe what you want
Type your idea into the prompt box, for example "a phone on a clean studio backdrop, soft daylight". Use the Negative field to list things to avoid (blurry, distorted hands, text, watermark). The Enhance button rewrites a short prompt into a more detailed one.
3. Choose your settings
Open the model selector to choose a model, an art style, an aspect ratio (such as 9:16 or 16:9), and a count (how many variations to make).
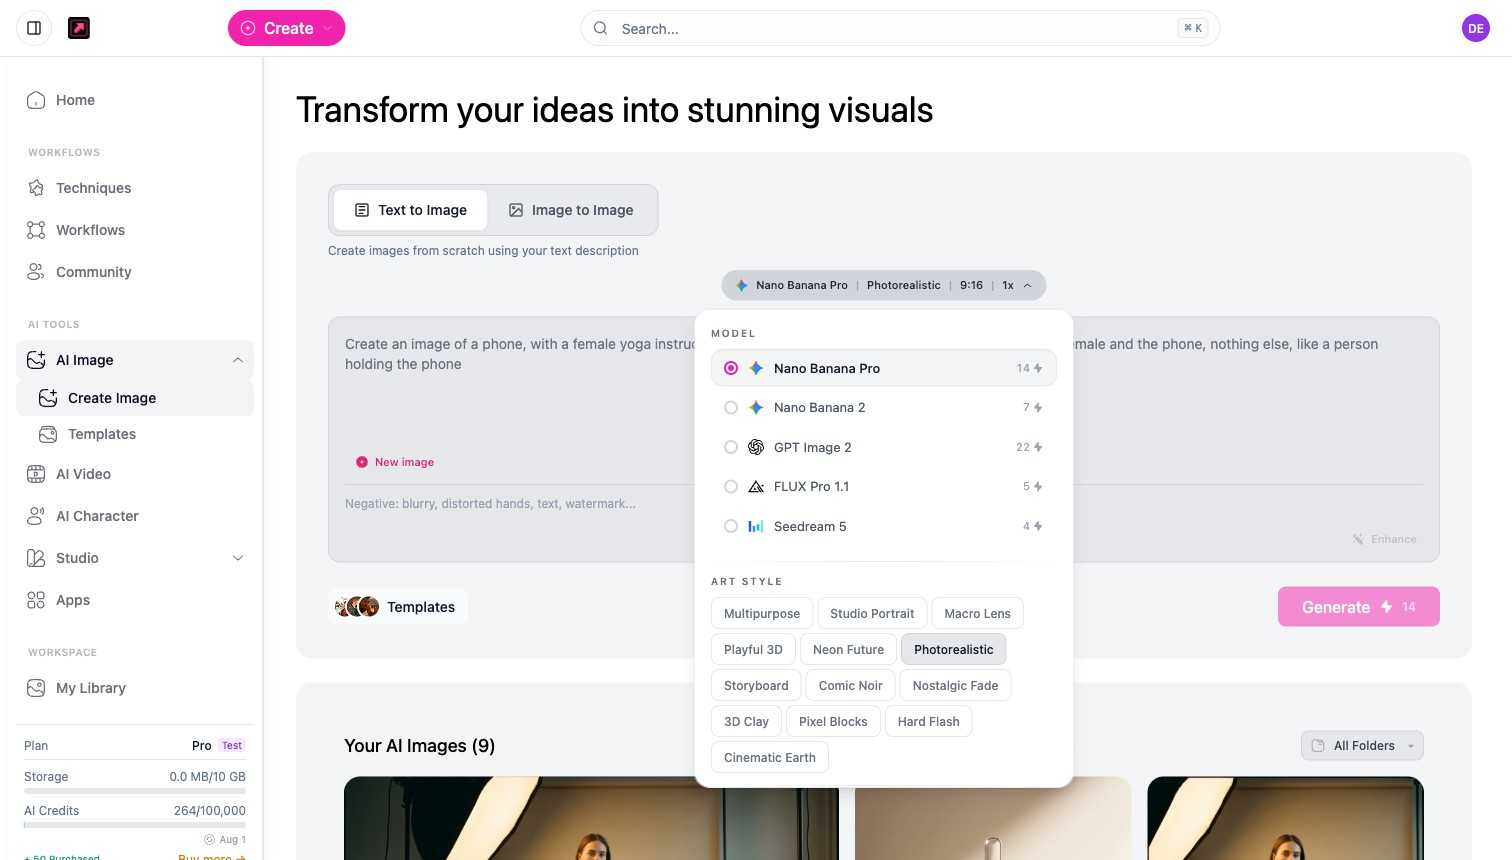
Models range from fast and cheap to high quality (for example Seedream 5 at 4 credits up to GPT Image 2 at 22), and art styles set the look (Photorealistic, Studio Portrait, Neon Future, and more). The composer shows the credit cost on the Generate button before you run, so you always know what an image will cost. For the full list, see AI Image.
4. Generate and download
Select Generate. New images appear in the gallery below the composer and in My Library. Open any result to download it or send it into a workflow.
Next steps
- Start from a ready-made recipe in Techniques and Templates.
- Learn the editing tools in AI Image.