AI Image
AI Image
AI Image is the core image tool in DesignerBox. Create a new image from a text description, or transform an image you already have. This page walks through the tool step by step, including the models and options you can choose.
Step 1: Choose Text to Image or Image to Image
Open AI Image from the sidebar. At the top of the composer, pick a mode:
- Text to Image - create an image from scratch using a written description.
- Image to Image - upload a photo and transform it while following your prompt.
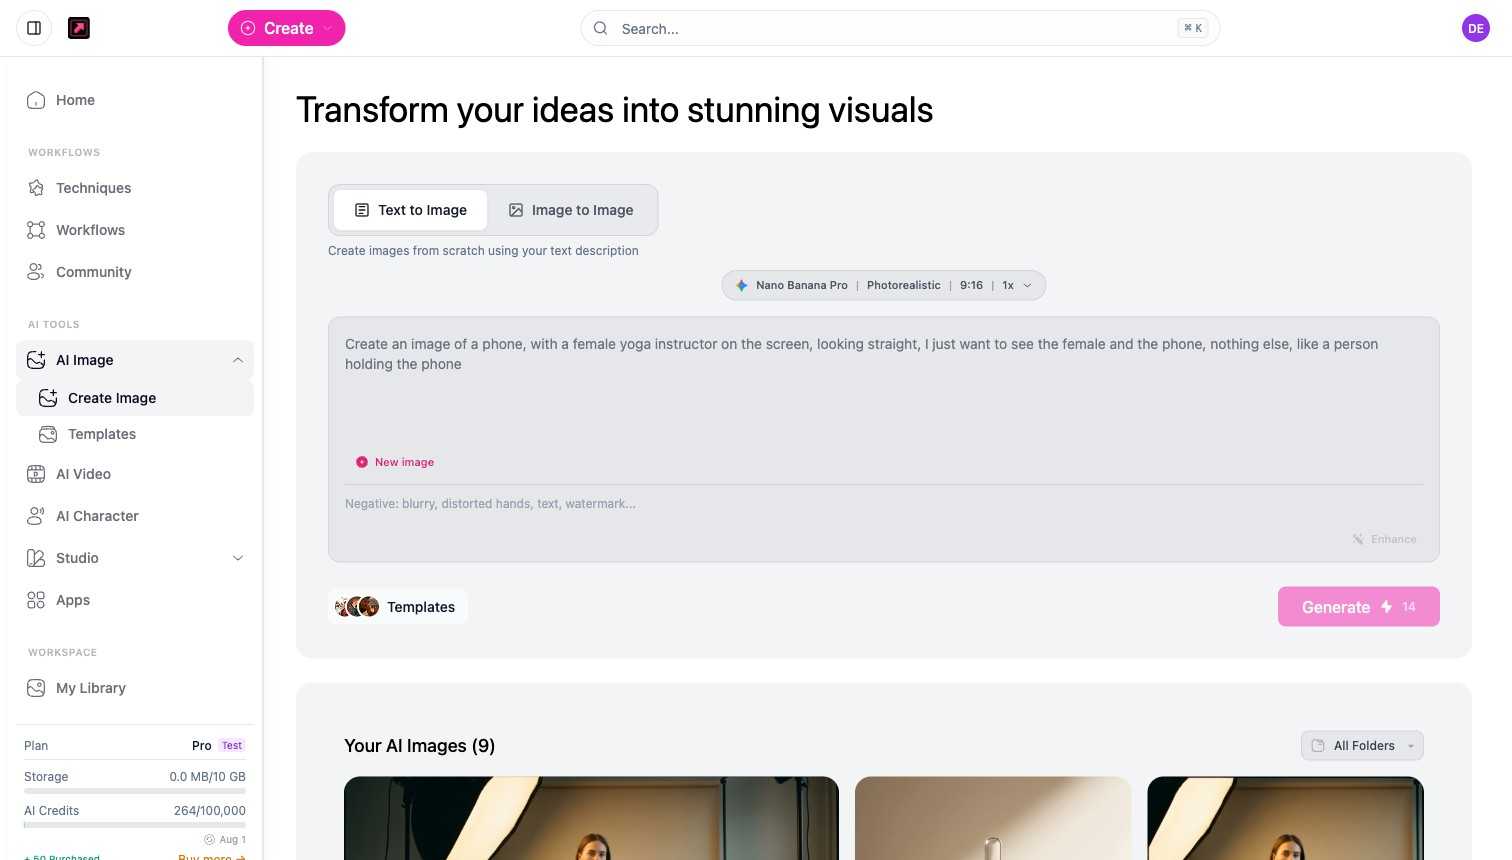
Step 2: Pick a model
Select the model button (it shows your current model, style, aspect ratio, and count) to open the options panel. Each model has a different look and a different credit cost, shown on the right of each option:
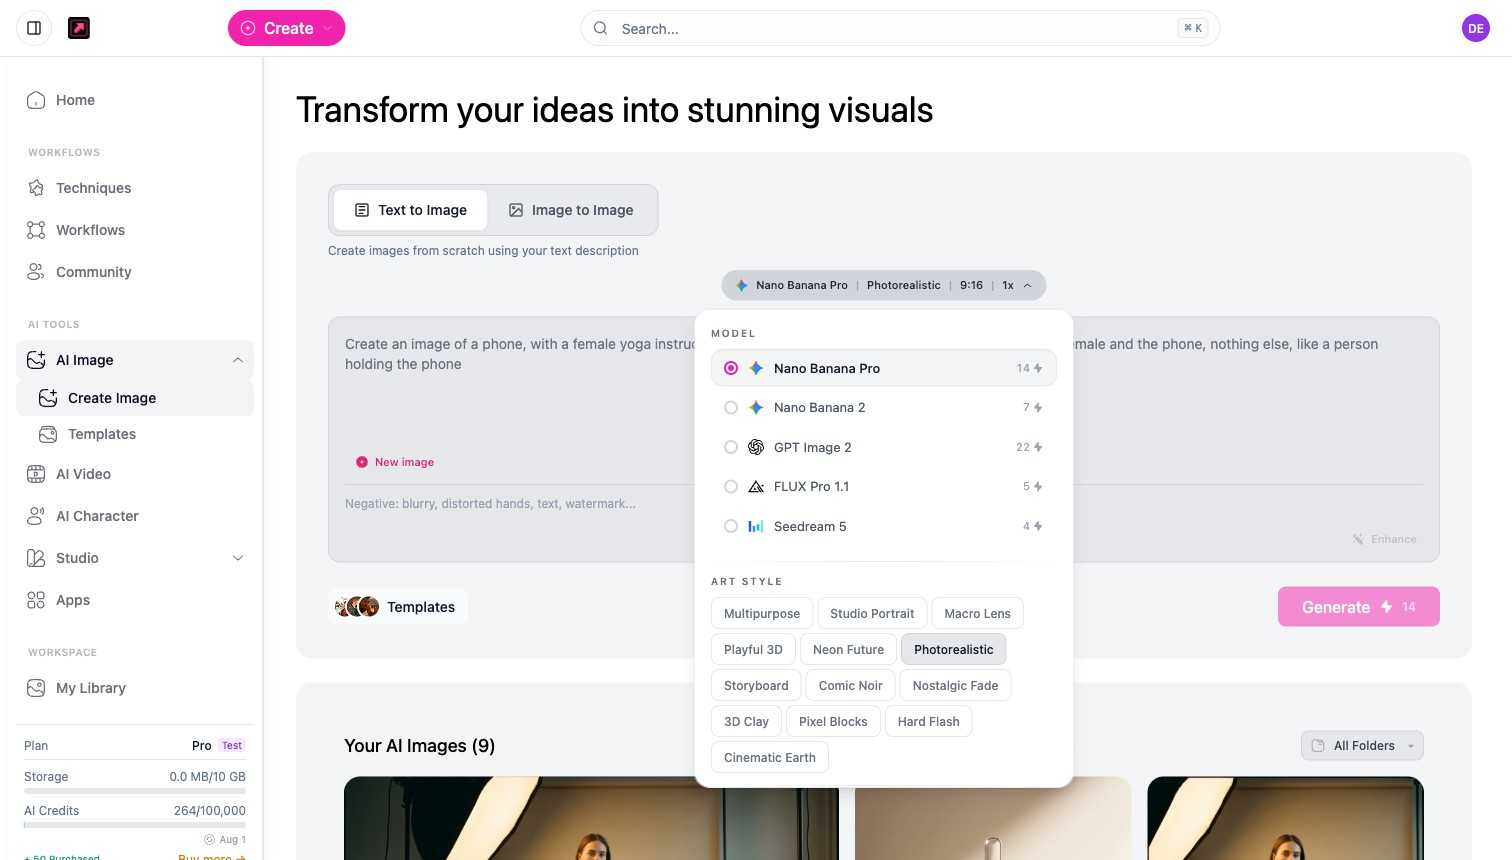
| Model | Credits per image |
|---|---|
| Nano Banana Pro | 14 |
| Nano Banana 2 | 7 |
| GPT Image 2 | 22 |
| FLUX Pro 1.1 | 5 |
| FLUX 2 Flex | 7 |
| Seedream 5 | 4 |
Pick a faster, cheaper model for drafts and a higher-cost model when you need the best quality. The exact cost always appears on the Generate button before you run.
Step 3: Pick an art style
Below the model list, choose an art style that sets the overall look. Options include Multipurpose, Studio Portrait, Macro Lens, Playful 3D, Neon Future, Photorealistic, Storyboard, Comic Noir, Nostalgic Fade, 3D Clay, Pixel Blocks, Hard Flash, and Cinematic Earth.
Step 4: Set aspect ratio and count
Still in the options, choose the aspect ratio (for example 9:16 for vertical, 1:1 for square, or 16:9 for wide) and the count, which is how many variations to generate in one run (such as 1x). Generating more variations at once costs proportionally more credits.
Step 5: Write your prompt
Type what you want in the prompt box. Use the Negative field to list things to avoid, such as blurry, distorted hands, text, or watermark. The Enhance button rewrites a short prompt into a more detailed one.
Step 6: Generate and review
Select Generate. The button shows the exact credit cost for your current model and count. New results appear under Your AI Images below the composer and in My Library. From a result you can upscale it (shown as an Upscale action with its own credit cost) or send it into a workflow.
Related
- Editing modes - inpaint, outpaint, style transfer, and background changes.
- Create your first image - a quick start.
- Plans, Credits, and Limits - how credits work.