
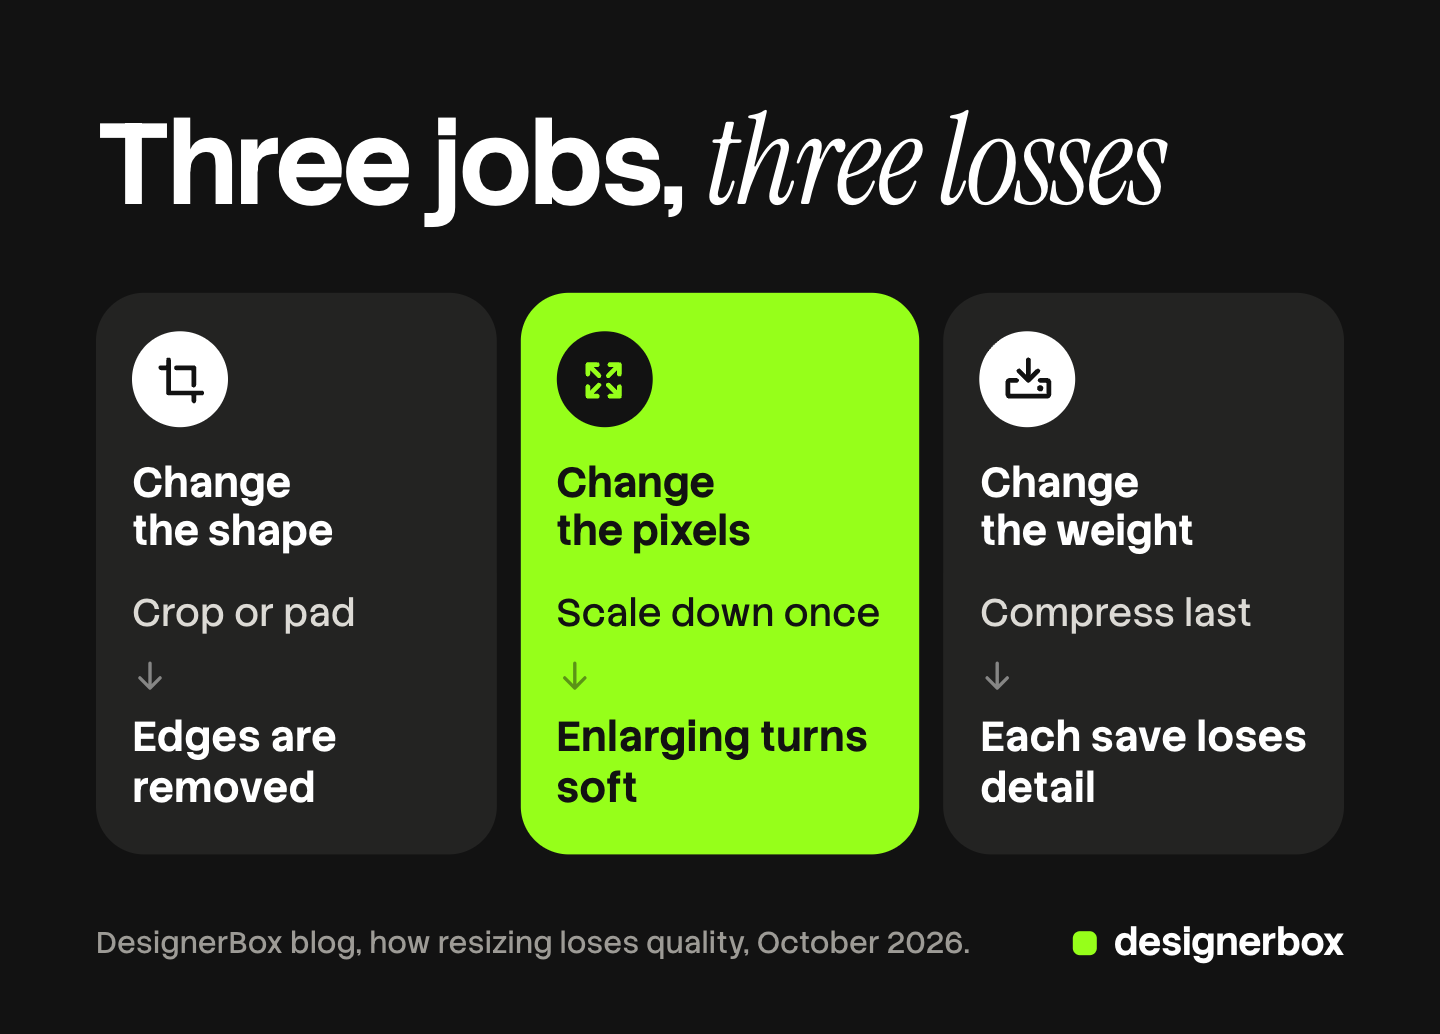
To resize an image without losing quality, work from the largest original and do three things in order. Crop or pad to the shape you need. Scale down once to the final pixel size. Compress and export once, as the last step. Making a picture smaller keeps it sharp. Making it larger, or saving a JPEG again and again, is where the damage happens.
Resizing is three different actions, and each one loses quality in a different place. This guide explains the three, the order that protects the picture, the current size rules for four sales channels, and what changes when the job is a whole catalog.
Key Takeaways
- Resizing covers three jobs: changing the pixel size, changing the shape, and changing the file weight. Each one loses quality in its own place.
- Scaling down is safe. Scaling up creates pixels that were never recorded, and Amazon tells sellers “Do not artificially enlarge small images” (Amazon product image guide, October 2026).
- Lossy compression cannot be reversed, so each new JPEG save discards more detail.
- The safe order is crop, scale once, compress last, always from the master file.
- For a catalog, pick one master size that passes the strictest channel. A 2048 x 2048 px square is inside the size limits of Shopify, Amazon and Google Merchant Center today.
How do you resize an image without losing quality?
You resize an image without losing quality by making it smaller, never larger, and by doing it once. Make every new size from the untouched original.
A digital photo is a grid of pixels, and each pixel holds one color. A smaller version needs fewer pixels, so the software blends neighbors together. A larger version needs more pixels than the camera recorded, so the software has to guess.
Blending is safe and guessing is the risk. Google’s developer guidance says it plainly: “when you scale up a raster image you’ll see jagged and blurry graphics” (web.dev, October 2026).
Three jobs people call resizing
Find your need in the first column before you open any tool.
| What you need | The operation | Where quality is lost |
|---|---|---|
| Fewer pixels, for example 4000 px wide down to 2048 px | Scale down (resample) | Almost nowhere. Fine detail is blended, which the smaller size could not show anyway |
| More pixels than the file has | Scale up (resample) | Everywhere. New pixels are estimated, so edges turn soft |
| A different shape, for example 4:3 to square | Crop, pad or extend | A crop removes the edges. A pad shrinks the subject inside the frame. A stretch distorts it |
| A lighter file, for example under an upload limit | Compress (JPEG, WebP) | In fine texture and around sharp edges, and again on every new save |
| A different format, for example PNG to JPG | Convert | Transparency is lost in JPEG, and lossy compression starts |
Scaling down and cropping remove information you chose to remove. Scaling up asks the software to add information it does not have. Compression sits between the two: one pass is hard to see, and repeated passes add up.
Why is scaling down safe and scaling up not?
Scaling down throws away detail that the smaller picture has no room to show. Nothing a viewer could see at the new size is missing.
The loss is real in one way: you cannot go back. A 2048 px file that you later need at 4000 px has to be scaled up. This is why the master file stays untouched.
Scaling up works the other way. The software spreads the existing pixels apart and fills the gaps with averages. Edges become soft, and fine texture such as fabric weave turns flat.
When a small file must work at a large size, that is a different job from resizing. An AI upscaler predicts new detail in place of averaging, and our guide to image upscaling and when enlarged detail can be trusted covers it.
How do you change image aspect ratio without distortion?
Image aspect ratio is the relation of width to height, written as two numbers such as 1:1 or 4:5. A 1080 x 1080 px file and a 2048 x 2048 px file share one ratio and differ in size. There are four ways to change the ratio.
Crop. You cut the edges until the shape fits. The remaining picture keeps its full sharpness. The risk is cutting into the product, or ending with fewer pixels than the channel requires.
Pad. You keep the whole picture and add space around it. Nothing is lost. The subject becomes smaller inside the frame, which matters where a channel sets a fill rule.
Stretch. You force the picture into the new shape. Every proportion changes, so a round bottle becomes an oval. Avoid it for anything a buyer has to recognize.
Extend. An AI model paints new background beyond the original edge. The original pixels stay as they were, and the added area is generated. Our guide to generative fill for extending a canvas covers when that area can be trusted.
Instagram shows why the ratio matters more than the pixel count. Instagram keeps a photo at its original resolution when the aspect ratio is between 1.91:1 and 3:4. If the ratio is not supported, the photo “will be cropped to fit a supported ratio” (Instagram Help Center, October 2026). An automatic crop does not know where your product is.
Ads raise the same problem, because one concept needs several shapes. Ad resizing for every platform size covers that case.
Why does a JPEG get worse each time you save it?
A JPEG gets worse on each save because JPEG compression is lossy. It makes a file smaller by discarding detail the eye is less likely to see. Each new save runs that process again on a picture that has already lost some detail.
MDN calls the process irreversible, and says such content “should generally not be further edited” (MDN Web Docs, October 2026).
The Library of Congress describes the practical result. Open a JPEG, change it and save it again, and you “subject it to another round of compression”. After several rounds “you would begin to see degradation in the image file” (Library of Congress, The Signal, June 2013, read October 2026).
Two rules follow. Viewing a JPEG changes nothing, and saving is what compresses. So edit in a lossless format such as PNG or TIFF, and export to JPEG or WebP at the end.
MDN notes that PNG is lossless and that JPEG has no transparency. It also says lossy WebP files are on average 25 to 35% smaller than similar JPEG files (MDN image format guide, October 2026).
The order that keeps quality: crop, scale once, compress last
The order matters because each step works on what the step before left behind.
- Keep the master. Store the largest original and never save over it.
- Crop or pad to the ratio. Fix the shape while you still have the most pixels.
- Scale down once. Go from the cropped master straight to the final pixel size. Two smaller steps resample the picture twice and gain nothing.
- Compress and export once. Choose the format and the quality setting last. Google’s guidance is to “try several JPEG quality levels” and compare the file size against what you see (web.dev, October 2026).
Here is one example with round numbers. Your master is 4000 x 3000 px, and you need a square for a store. Crop to 3000 x 3000 px, scale to 2048 x 2048 px, then export one JPEG. For a 4:5 post, go back to the master, crop to 2400 x 3000 px, and scale to 1080 x 1350 px. Our guide on how to edit product photos shows where crop, resize, sharpen and export sit in the full edit order.
How to resize an image, step by step
For one picture, any image editor does this well.
- Open a copy of the original file.
- If the shape has to change, crop or pad first.
- Check that width and height are linked, then type the new width in pixels.
- Export under a new file name, so the original stays as it was.
If you have no editor, the DesignerBox free image resizer runs in the browser with no sign up. Per its page, you set a pixel size or pick a preset, then choose to fit inside and add space or to fill the frame and crop. It takes 20 files at a time in JPG, PNG and WebP, and it says nothing is uploaded (DesignerBox image resizer page, October 2026).
Image size rules for four sales channels
These are the numbers on each platform’s own help page in October 2026.
| Channel | Size the platform asks for | Upper limit | Shape rule |
|---|---|---|---|
| Shopify | 2048 x 2048 px “usually displays best” for square images | 5000 x 5000 px or 25 megapixels, under 20 MB | None stated on this page |
| Amazon | 500 px minimum on the longest side. 1,000 px or more turns on zoom | 10,000 px on the longest side | Main image shows the product as 85% of the image |
| Google Merchant Center | 1500 x 1500 px or above recommended. At least 500 x 500 px for all products from January 31, 2027 | 64 megapixels, 16 MB | Product fills 75% to 90% of the image |
| Instagram photo post | 1080 px wide | Wider photos are sized down to 1080 px | Ratio between 1.91:1 and 3:4 |
Sources: Shopify Help Center, Amazon product image guide, Google Merchant Center Help and Instagram Help Center, all read in October 2026.
One master covers three of the four rows. A 2048 x 2048 px square is inside the Shopify, Amazon and Google limits. Instagram needs its own crop, because the ratio differs.
The fill rules are the part a resize can break. A pad makes the product smaller in the frame, so a padded file can fall under the Amazon or Google fill figure. Shopify also changes the file after upload, and the Shopify product image size guide covers what the store serves.
How do you batch resize images for a whole catalog?
To batch resize images, you apply one size setting to a whole folder. The method is the same as for one file. The risks are different.
Mixed shapes. One fill-and-crop setting cuts a tall bottle and a wide tray in different places. Sort the folder by shape first, and run each group with its own setting.
Mixed fill. One pad setting leaves a small product small, so the set looks uneven on a collection page.
Wrong source. A batch that reads last season’s exports compresses them a second time. Point the batch at the masters.
File count. A catalog of 200 products in 3 shapes is 600 files. Decide the naming rule before the run, so each file can be traced to its product.
Check the smallest and the largest source file first, because they show the worst cases. Our guide to which bulk image edits are safe in a batch covers the wider set of edits. Resize is one of the safe ones when the sources share a shape.
One standard for every product and channel
If you need one image resized, you do not need DesignerBox. The free resizer or any image editor is enough.
The job changes when resizing stops being the real problem. A resizer changes the frame and leaves the photo as it is. A pad cannot make 200 supplier photos look like one brand.
Anyone can make an AI picture. Making hundreds that still look like your brand is the hard part. In DesignerBox you save the steps once as a workflow, with your brand rules. A batch then runs that workflow over a sheet with one product per row, up to 200 rows. Row one and row two hundred have the same look. You see the cost of the whole sheet before you press Run.
For a single picture, the image editor can crop to the shape a channel needs. Per its page, each edit keeps the detail and the resolution of the edit before it, and you upscale as the last step. The editor changes one picture at a time (DesignerBox image editor page, October 2026). Our guide to the DesignerBox image editor and video editor explains how both work.
The honest limits: DesignerBox is not a bulk pixel resizer, and you still review every result. You download the results, or send them with a webhook or an S3 step. Every plan below Ultra is one seat. The free plan runs on sample products.
Uploading your own photos and the commercial license start on the Pro plan. AI video, virtual try-on, upscaling, the image editor and the video editor start on the Premium plan. Plans and credits are on the pricing page.
The same workspace makes the ad and the video from those images. The full workflow from the first product photo to the finished ad, in one subscription.
FAQ
Does resizing an image reduce quality?
Making an image smaller does not reduce the quality you can see at the new size. Making it larger does, because the software has to estimate pixels the camera never recorded. So resize down from the original, and export once.
How do I reduce file size without losing quality?
First check the pixel size. A photo that is wider than the place it will appear carries pixels nobody sees, so scale it down. Then export in a lossy format such as JPEG or WebP and compare a few quality settings at 100% zoom. Choose the lightest file where edges and fine texture still look clean.
Can you resize a PNG without losing quality?
Yes, when you scale it down. PNG compression is lossless, so saving a PNG again does not degrade it the way a JPEG save does. Enlarging a PNG still estimates pixels, so it still turns soft.
What does an AI image resizer do?
The name covers two different tools. Some enlarge a small picture by predicting detail. Others extend the canvas to a new shape by generating background around the subject. Both add pixels that were not in the original, so both need a check.
What size should I resize product images to?
Use the size each channel states on its own help page. In October 2026, Shopify says 2048 x 2048 px usually displays best for square images. Amazon turns on zoom at 1,000 px on the longest side. Google recommends 1500 x 1500 px or above (help.shopify.com, sellercentral.amazon.com and support.google.com/merchants, October 2026).
Sources
- Amazon product image guide: 500 to 10,000 pixels on the longest side, zoom at 1,000 pixels, “Do not artificially enlarge small images”, product as 85% of the image (sellercentral.amazon.com, October 2026)
- Shopify product media types: 5000 x 5000 px or 25 megapixels, under 20 MB, 2048 x 2048 px for square images (help.shopify.com, October 2026)
- Google Merchant Center image link attribute: 500 x 500 px from January 31, 2027, 1500 x 1500 px recommended, 64 megapixels, 16 MB, 75% to 90% fill (support.google.com, October 2026)
- Instagram photo resolution: 1080 px width and aspect ratios from 1.91:1 to 3:4 (help.instagram.com, October 2026)
- MDN Web Docs, lossy compression (developer.mozilla.org, October 2026) and the image file type and format guide (developer.mozilla.org, October 2026)
- Library of Congress, The Signal, on repeated JPEG saves (blogs.loc.gov, published June 2013, read October 2026)
- web.dev, Choose the right image format (web.dev, October 2026)
- DesignerBox free image resizer, image editor and batch (DesignerBox image resizer page, image editor page and batch page, designerbox.ai, October 2026)
- DesignerBox plans and license gating (DesignerBox pricing, designerbox.ai/pricing, October 2026)
Channel image rules were read on each platform’s own help page in October 2026, and platforms change them. Check the current page before a bulk upload. The pixel examples in this guide are illustrations.