
Codex MCP means connecting OpenAI Codex to a Model Context Protocol server, so Codex can call that server’s tools while it works. You add the server with one command or with a short table in the config.toml file. A remote server signs in with OAuth. The Codex CLI, the IDE extension and the ChatGPT desktop app share that setup, and you choose which tools must ask before they run.
Codex already writes the store page and the product grid. Then the work stops, because every image slot holds a gray box. Someone leaves the editor, makes the pictures elsewhere and copies them into the repo. An MCP server removes that trip. Codex calls the tool that makes the picture, in the same task that wrote the page.
This guide covers the config file and its keys, the four setup steps, the approval settings and the risks OpenAI names. It then shows what changes when the server is a creative production tool, with DesignerBox as the worked example. It is written for developers and technical marketers at brands and agencies who already work in Codex.
Key Takeaways
- One config, three clients. Codex stores MCP servers in config.toml. The Codex CLI, the IDE extension and the ChatGPT desktop app share that file on the same computer.
- Two kinds of server. A STDIO server runs as a local process from a command. A Streamable HTTP server is an address, and it takes a url key.
- OAuth is the default for a remote server. You run the login command once, approve access in a browser, and Codex stores the credentials.
- Approvals are set per server and per tool. The writes mode asks before every tool the server has not marked read-only.
- Codex makes stills on its own. Its built-in image generation uses gpt-image-2. A production server adds your product photos, your brand record and your saved workflows.
- DesignerBox has 74 MCP tools at one URL. Reading your workspace charges no credits, and every finished run reports what it charged.
What is Codex MCP?
Codex MCP is Codex working as a Model Context Protocol client. You register a server in the Codex configuration. Codex then reads the server’s list of tools and calls one when the task needs it. The server does the work, such as reading documentation, driving a browser or making a picture, and returns the result to the task.
MCP is “an open-source standard for connecting AI applications to external systems” (modelcontextprotocol.io, October 2026). The protocol has two transports. Stdio connects processes on one computer. Streamable HTTP reaches a remote server, and one remote server usually serves many clients (MCP architecture page, October 2026).
Codex supports both. OpenAI’s page lists STDIO servers with environment variables, and Streamable HTTP servers with bearer token or OAuth sign-in (Codex MCP documentation, October 2026).
For servers sorted by job, see MCP servers for marketing, by job. If you are comparing the two terminal clients before you pick one, Claude Code and Codex for marketing work covers that choice. This guide stays on the Codex setup.
Where does Codex keep its MCP servers?
Codex keeps MCP servers in config.toml, next to its other settings. The default file is in the .codex folder of your home directory. A project can carry its own file at .codex/config.toml, and Codex reads it for trusted projects only.

OpenAI states which clients read the file: “The ChatGPT desktop app, Codex CLI, and IDE extension share this configuration.” You set up a server once for all three.
ChatGPT on the web is different. It does not read the local Codex files. It uses MCP tools that come inside plugins, from the Plugins tab. The steps for that route are in how to add an MCP server to ChatGPT.
Each server is one table in the file, named mcp_servers and then the server’s name. These are the main keys OpenAI documents for each kind of server:
| Key | Server type | What it does |
|---|---|---|
| command | STDIO | The command that starts the server. Required |
| args, env, cwd | STDIO | Arguments, environment variables and the working directory |
| url | Streamable HTTP | The server address. Required |
| auth | Streamable HTTP | The sign-in fallback. The default is oauth |
| startup_timeout_sec | Both | Seconds to wait for the server to start. The default is 10 |
| tool_timeout_sec | Both | Seconds to wait for one tool. The default is 60 |
| enabled_tools, disabled_tools | Both | An allow list and a deny list of tool names |
| default_tools_approval_mode | Both | When Codex asks before a tool on this server |
OpenAI’s configuration reference lists no transport key for a server. The url key is what makes a server a Streamable HTTP server, and the command key is what makes it a STDIO server (Codex configuration reference, October 2026).
How to add an MCP server to Codex
You need the server’s start command or its URL before you begin. The four steps below use the CLI. The same server then appears in the IDE extension and the desktop app.
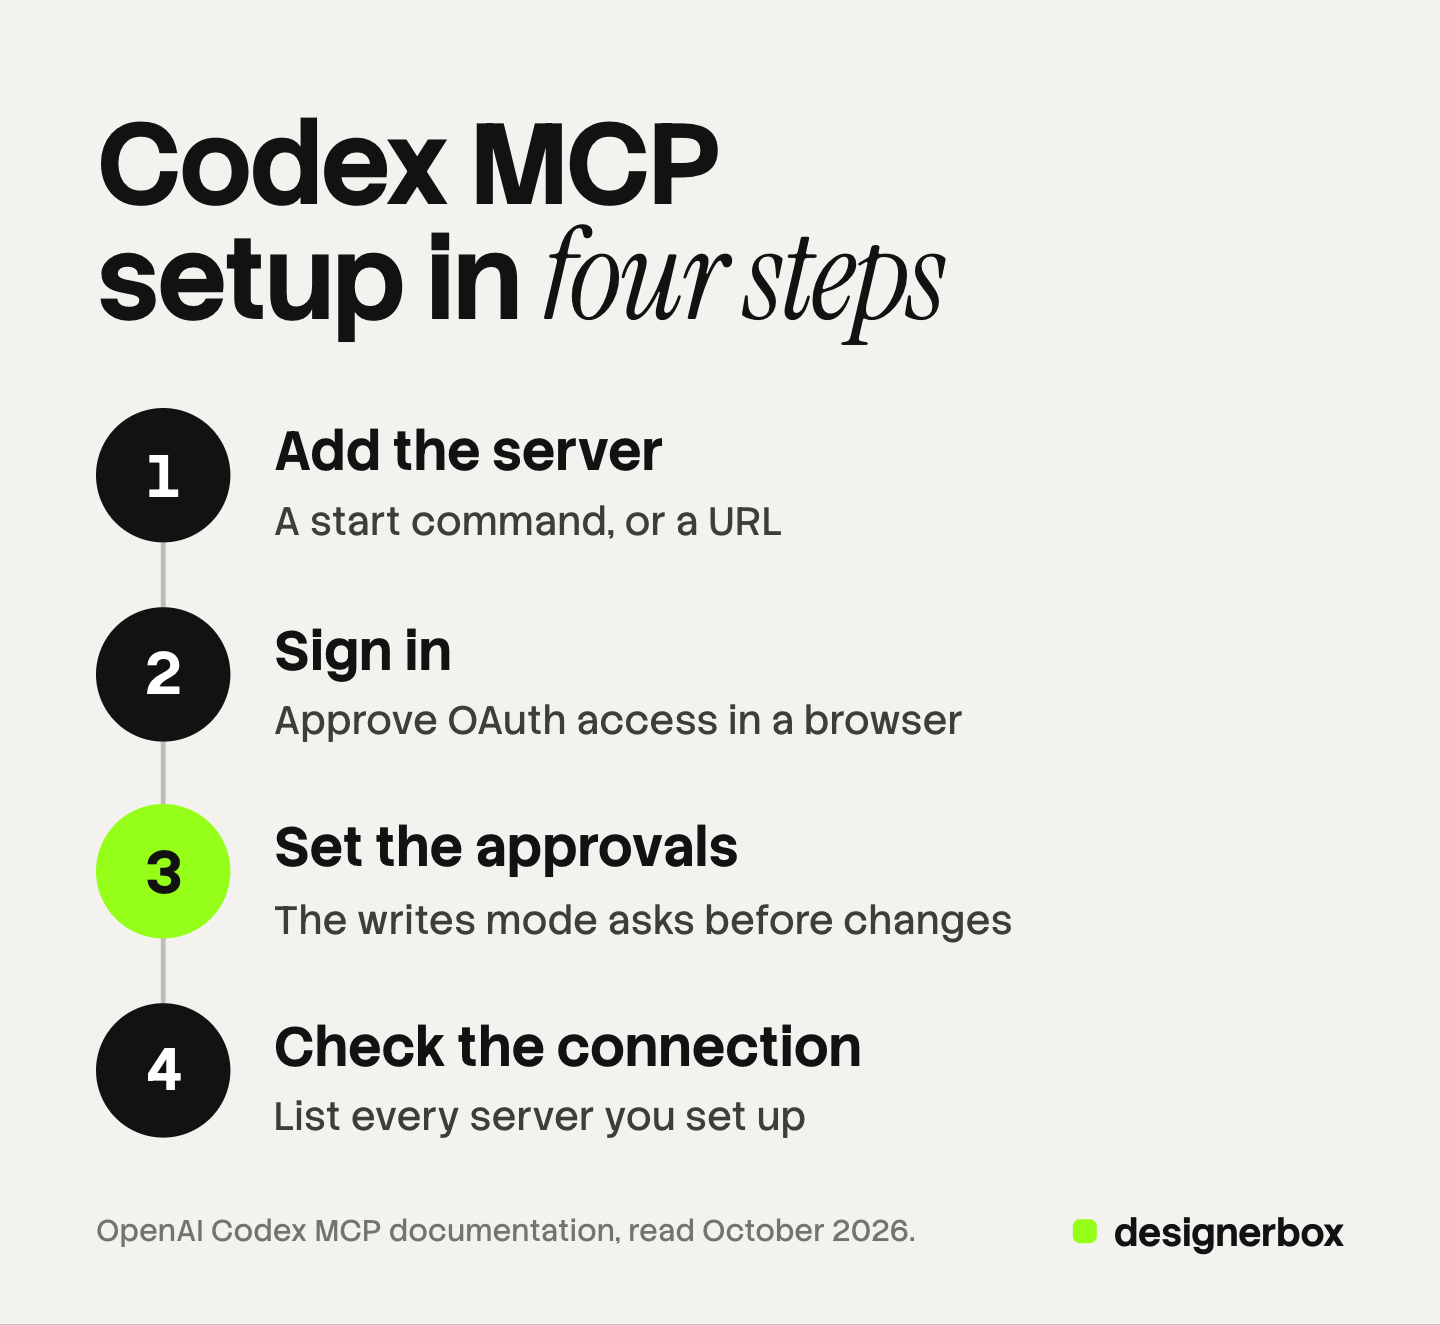
- Add the server. For a local server, give Codex the command that starts it. OpenAI’s own example adds Context7, a documentation server. For a remote server, pass the address with the url flag.
codex mcp add context7 -- npx -y @upstash/context7-mcp
codex mcp add example --url https://mcp.example.com- Sign in. For a server that supports OAuth, run the login command. Codex opens the server’s sign-in page in a browser, and you approve access once.
codex mcp login example- Set the approvals. Open config.toml and add an approval mode to the server’s table. The next section explains the values.
[mcp_servers.example]
url = "https://mcp.example.com"
default_tools_approval_mode = "writes"- Check the connection. Run the list command to see every server you set up. Inside a Codex session, type /mcp to see the active servers.
codex mcp listYou can skip the CLI. In the IDE extension, open the gear menu, select MCP servers, then Add server. Enter a name, choose STDIO or Streamable HTTP, and give the command or the URL. Save, then select Restart extension. The ChatGPT desktop app has the same screen under Settings, then MCP servers. Both lists show which servers need OAuth, and you select Authenticate to sign in.
What does Codex ask before a tool runs?
Codex decides this from two places: the approval mode you set, and the marks the server puts on each tool. OpenAI documents four values for the mode: auto, prompt, writes and approve. It defines one of them in a sentence: “The writes mode prompts for tools that aren’t marked read-only.”
You set the mode for a whole server with default_tools_approval_mode. You can then change it for one tool with a table named after that tool. OpenAI’s sample file sets one server to prompt and one of its tools to approve.
One rule holds whatever you set. A tool that carries a destructive mark always needs your approval, unless the same tool also carries a read mark (Codex approvals and security, October 2026).
Two more keys limit what Codex can reach. The enabled_tools key is an allow list of tool names, and Codex applies the disabled_tools deny list after it. For a server that spends money, start with the writes mode and a short allow list.
What risks does OpenAI name?
OpenAI’s security page says it directly: “Prompt injection can cause the agent to fetch and follow untrusted instructions.” It writes that sentence about web search and network access. The same risk applies to anything a tool returns into the task.
The pages add three facts that matter for MCP:
- The network proxy does not cover MCP. Codex filters the network traffic of commands it runs in its sandbox. OpenAI states that this filter does not cover MCP server connections.
- A server can connect with no sign-in. If no credential is found, Codex can connect to an HTTP server without authentication. Run the login command yourself, and check the server list.
- Project files need trust. Codex reads a project’s own config.toml for trusted projects only. Read that file before you trust a repo that someone sent you.
Two habits lower the risk. Connect servers you already trust with the data. Prefer OAuth, because you can cancel the access later.
Why connect an image server when Codex already makes images?
Codex makes images on its own. OpenAI’s page describes the feature as a way to make “UI assets, banners, backgrounds, illustrations, sprite sheets, and placeholders” next to your code. It uses gpt-image-2. You ask in plain words, or you include $imagegen in the prompt (Codex image generation, October 2026).
Image runs spend your included limits 3 to 5 times faster on average than similar turns without an image. For one icon or one placeholder, the built-in feature is the right tool.
The work changes when the picture is a real product. A store with forty products needs the same hero shot, the same light and the same crop on every one. That job needs the product photos, the brand rules and the approved steps in one place, where Codex can call them.
| The job needs | Codex on its own | Codex with a production server |
|---|---|---|
| Your real product photo | You attach a reference image to the prompt | Every asset in your workspace is readable by name |
| Your brand rules | You write them into AGENTS.md or the prompt | A brand record the workflow reads before every run |
| The same steps on product 41 | You repeat the prompt | A saved workflow runs the same way on the next product |
| A record of what each run spent | It counts toward your Codex usage limits | Every finished run reports the credits it charged |
The model can be the same in both columns. GPT Image 2 is one of the image models a DesignerBox workflow can pick.
DesignerBox in Codex
Anyone can make an AI picture. Making hundreds that still look like your brand is the hard part.
DesignerBox is AI creative production for brands and agencies. You build a workflow once with your brand rules and your products, then run it on every new product. The DesignerBox server has 74 MCP tools behind one URL:
https://mcp.designerbox.ai/apiIt runs over HTTP with OAuth sign-in, so there is nothing to install. Use the four steps above with this command pair:
codex mcp add designerbox --url https://mcp.designerbox.ai/api
codex mcp login designerbox
Or add the table to config.toml yourself, then restart Codex:
[mcp_servers.designerbox]
url = "https://mcp.designerbox.ai/api"
default_tools_approval_mode = "writes"
tool_timeout_sec = 120
Codex opens a browser tab, and you approve the DesignerBox sign-in once. The client then holds a scoped token for 30 days, and you can revoke it in your account (DesignerBox MCP page, October 2026). The DesignerBox for Codex page shows the same setup.
The last two lines are optional. The first makes Codex ask before any tool that is not marked read-only. The second gives one tool call 120 seconds in place of the default 60. That number is an example.
Your active brand profile loads when the session opens. Your logos, fonts and palette are readable from Assets, and a workflow reads the brand record before every run. Nobody has to paste the brand rules into AGENTS.md.
What Codex can make for the project
Codex can run four kinds of job on your account. One job is one picture, one edit or one clip. A workflow holds your steps in order, and each step returns its own result. An app is a workflow behind a short form, and Codex fills the fields and presses Run. A list of products runs row by row.
| The project needs | You write | The tool Codex calls |
|---|---|---|
| A clean cutout for the product grid | ”Using DesignerBox, remove the background from this product photo and give me a transparent PNG.” | remove_background |
| A second angle for the product page | ”Using DesignerBox, make a three-quarter view of this product from this photo. Hold the light and the framing.” | photo_angles |
| A launch ad for paid social | ”Using DesignerBox, make a product ad from this photo for paid social, portrait, with room for a headline.” | product_ad |
| The approved set for one product | ”Using DesignerBox, list my workflows, then run my product set workflow on this photo and show me each step.” | list_pipelines, then run_pipeline |
| A short clip for the landing page | ”Using DesignerBox, animate this product photo into an eight second clip, a slow push in, 16:9.” | generate_video |
Three jobs fit a coding task well.

Placeholders become real pictures. Codex built the page with gray boxes. Ask it to list the image slots, run the product set workflow for each product, and write the file names into the page. Each result lands in Assets. You download the files and add them to the repo.
One set for each product in a catalog file. Your repo holds a products file with a name and a photo for each item. Codex reads the file and runs the same workflow for each row, one row at a time. It reports the charge for each row as it goes.
Launch pieces for the thing you ship. The task that writes the release page can also make the ad picture and a short clip. The full workflow from the first product photo to the finished ad, in one subscription.
Product photos need to be in your DesignerBox Assets before a run. The upload tool is a file picker made for a chat window. From a terminal, add the photos in the web app first, then name them in the prompt. The tool reference lists every tool with its arguments, and the DesignerBox MCP launch post groups them by job.
Cost before the run
The DesignerBox MCP page lists what a connected client can spend (DesignerBox MCP page, October 2026):
- Reading is free. Reading your designs, brand profiles, models and plan charges no credits.
- The price comes first. Codex can read what each model costs and how many credits you have left before it starts a run.
- Every run reports its charge. The finished run states the credits it used, in the same answer as the result.
- One charge for a retry. A repeated call within five minutes returns the first result. It does not charge twice.
- Cancel and refund. Stop an avatar or a video job while it runs, and the credits are refunded.
- The template stays on the server. A template runs by name, and its prompt never reaches Codex.
An avatar run returns nine fixed poses for 25 credits. An 8-second clip costs 40 to 560 credits, depending on the model. With the writes mode set, every paid run waits for your approval.
Uploading your own photos and the commercial license start on the Pro plan. AI video, virtual try-on, upscaling, the image editor and the video editor start on the Premium plan. Team features, shared brand kits and white label are on the Ultra plan, and every plan below Ultra is one seat. Plans and credits are on the pricing page.
Limits of a Codex run
- Codex works one row at a time. For a whole sheet of products, batch runs one workflow over every row inside DesignerBox, up to 200 rows a sheet, and shows the results in one view.
- Video is asynchronous. A picture returns in the same call. For video, Codex sends the job, checks it, then returns the file. A video timeline takes one to five minutes.
- Results stay in your workspace. They land in Assets, and you download them from there. Nothing goes to a store or a channel on its own.
- DesignerBox does not have a public API. It has 74 tools over MCP, and OAuth is the sign-in for all of them.
- Connecting works on every plan. So does reading your workspace. Making pictures and video from Codex needs a paid plan.
The same server works in other clients. Cursor’s MCP setup uses a JSON file in place of the TOML table, and Claude connectors take the URL in a settings screen. For Gemini CLI and for a custom build, see how to make your AI agent creative.
There is a free plan, and it runs on sample products. Connect the server and read your workspace from Codex before you run anything. Get started free.
FAQ
How do I add an MCP server to Codex?
Run the add command in a terminal. A local server takes the command that starts it, and a remote server takes its address with the url flag. For an OAuth server, run the login command next. You can also add a table to config.toml, or use the MCP servers screen in the IDE extension and the ChatGPT desktop app.
Where is the Codex MCP config file?
It is config.toml in the .codex folder of your home directory. A project can have its own .codex/config.toml, and Codex reads it for trusted projects only. The Codex CLI, the IDE extension and the ChatGPT desktop app share the file.
Does Codex ask before an MCP tool runs?
That depends on the approval mode. OpenAI documents four values: auto, prompt, writes and approve. The writes mode asks before every tool that is not marked read-only. A tool with a destructive mark always needs approval, unless it also carries a read mark.
Can Codex generate images without an MCP server?
Yes. Codex has built-in image generation that uses gpt-image-2. OpenAI describes it for UI assets, banners, backgrounds, illustrations, sprite sheets and placeholders. Image runs spend your included limits 3 to 5 times faster on average than similar turns without an image.
How do I connect DesignerBox to Codex?
Add the server with the URL https://mcp.designerbox.ai/api, then run the login command and approve the DesignerBox sign-in. Codex holds a scoped token for 30 days. Then you ask for a job in plain words.
Does a DesignerBox run from Codex cost credits?
Reading your workspace charges no credits. A run charges credits, the cost is shown before the run, and the finished run reports what it charged. A repeated call within five minutes returns the first result and does not charge twice.
Sources
- Codex MCP support, the shared config.toml, the add, login and list commands, the STDIO and Streamable HTTP keys, timeouts, tool lists, approval modes and OAuth client registration: learn.chatgpt.com, read October 2026
- The full list of server keys, with no transport key: learn.chatgpt.com, read October 2026
- Prompt injection, destructive tool approvals, the network proxy scope and the automatic approval reviewer: learn.chatgpt.com, read October 2026
- Codex built-in image generation, gpt-image-2, the $imagegen keyword and the usage rate: learn.chatgpt.com, read October 2026
- The definition of MCP: modelcontextprotocol.io, read October 2026
- The stdio and Streamable HTTP transports: modelcontextprotocol.io, read October 2026
- The DesignerBox server URL, OAuth sign-in, the 30-day token, tools, cost rules and timing: DesignerBox MCP page (designerbox.ai/mcp) and DesignerBox for Codex page (designerbox.ai/mcp/codex), read October 2026
Every fact in this guide was read on 7 October 2026. OpenAI changes the Codex menus, keys and commands often, so check its documentation before you roll a server out to a team.