

Magento product images are files you attach to a product and assign to four roles: Base, Small, Thumbnail and Swatch. Adobe’s documentation gives example sizes of 1100 by 1100 pixels for a Base image with zoom, 470 by 470 for a Small image, and 50 by 50 for a Thumbnail or a Swatch. By default the first image you upload takes every role.
Those sizes are only half of the picture. Magento, sold today as Adobe Commerce and Magento Open Source, resizes your photo twice. The first resize happens in the browser at upload, against a default limit of 1920 pixels wide and 1200 pixels high. The second happens on the storefront, where the theme makes one copy for each slot it shows.
This guide follows one photo through both resizes. It covers the roles, the upload limit, what the theme does to a photo with the wrong shape, how to import images for a whole catalog, and what to shoot so product 300 looks like product 1.
Key Takeaways
-
Four roles, one gallery. Base is the main image on the product page, Small fills category and search listings, Thumbnail fills the gallery strip and the cart, and Swatch shows a color or pattern.
-
The first upload takes every role. Adobe states that all roles go to the first image by default. Reassign them when a different shot suits the category grid.
-
The default upload limit is 1920 by 1200 pixels. A 2000 pixel square photo is stored at 1200 by 1200 unless you change the setting.
-
Zoom needs two to three times the container. Adobe says the Base image should be two or three times the size of its container, so measure your theme before you choose a size.
-
The theme does not crop by default. The documented defaults keep proportions and add a background, so a mixed-shape catalog produces a ragged grid.
-
A CSV import does not resize anything. Adobe notes that importing product images does not start an image resize.
-
Shoot one shape for the whole catalog. Square is the safe choice, because every example size Adobe gives is square.
What are the four Magento image roles?
The four Magento image roles are Base, Small, Thumbnail and Swatch. A role tells the storefront which image to show in which place. One image can hold several roles, and Adobe’s guide says that by default all roles are assigned to the first image uploaded to the product (experienceleague.adobe.com, accessed October 2026).
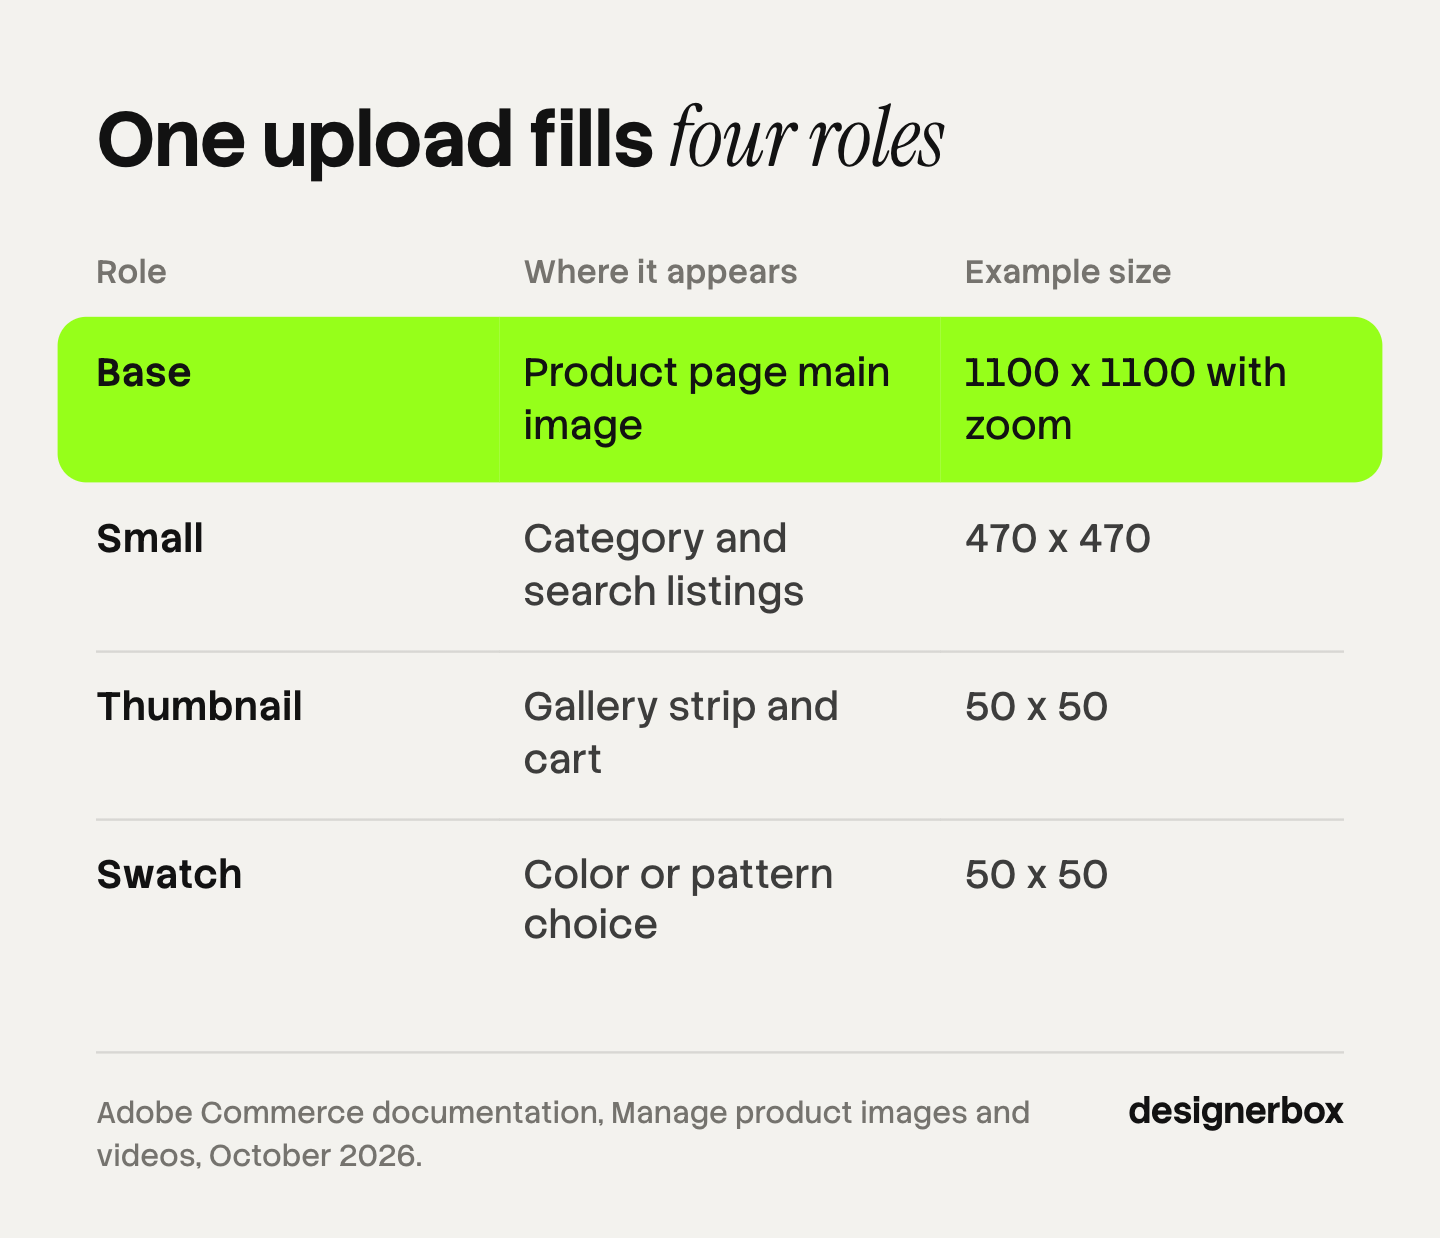
| Role | Where it appears | Adobe’s example size |
|---|---|---|
| Base | The main image on the product detail page | 470 by 470 without zoom, 1100 by 1100 with zoom |
| Small | Category and search listings, up-sells, cross-sells, the new products list | 470 by 470 |
| Thumbnail | The thumbnail gallery, the shopping cart, blocks such as related items | 50 by 50 |
| Swatch | A color, pattern or texture choice | 50 by 50 |
Adobe labels these as example sizes. The real sizes on your store come from your theme, which the next sections cover.
Two details in the same guide matter before any upload. Adobe recommends the sRGB color profile, because every other profile is converted to sRGB at upload and that can change the color. And the file name, extension included, cannot be longer than 90 characters.
There is a third detail for stores with several store views. New product images are always visible in all store views. To hide one in a single view, you switch to that view and select the hide checkbox for that image.
What size should Magento product images be?
A Magento product image should be square, sized to two or three times the product page container, and no larger than your upload limit. For many themes that is a square between 1200 and 2000 pixels per side. The exact number depends on two settings that most size guides skip.
The zoom rule. Adobe states that image zoom starts when the uploaded image is larger than the image container, and that the Base image should be two or three times the size of the container. A 700 pixel container therefore needs a Base image of 1400 to 2100 pixels.
The upload limit. Adobe Commerce can resize large images in the browser as you upload them. The setting is on by default, with a maximum width of 1920 pixels, a maximum height of 1200 pixels and a JPG quality of 80 (experienceleague.adobe.com, accessed October 2026). The resize keeps the proportions and stays inside both limits.
Put those two facts together. A square photo cannot be taller than 1200 pixels under the defaults, so a 2000 pixel square is stored as 1200 by 1200. That is our arithmetic from Adobe’s stated defaults, not a figure Adobe prints. It still clears the 1100 pixel zoom example. It does not clear a 700 pixel container at three times zoom.
So decide in this order:
- Measure the product image container in your theme.
- Multiply it by two or three for the zoom level you want.
- Set the maximum width and height to that number, under Stores, Settings, Configuration, Advanced, System, Images Upload Configuration.
- Shoot and export every master at that size.
Adobe recommends a quality setting between 80 and 90 percent for a smaller file that still looks sharp. If your source photos are already smaller than the target, no setting adds the detail back. Low resolution product images explains what upscaling can and cannot do.
How does the theme resize images on the storefront?
The theme resizes images from a file named view.xml, which holds a width and a height for every image slot. Adobe’s frontend guide lists the settings for each slot and their defaults (developer.adobe.com, accessed October 2026).

Three defaults explain most Magento image complaints:
- Proportions are kept. The aspect ratio setting is true by default, so the image is never stretched.
- Nothing is cropped. The frame setting is true by default, which means images are not cropped.
- Small images stay small. The constrain setting is true by default, so an image smaller than the slot is not enlarged.
A portrait photo in a square slot therefore keeps its shape and sits on a background that fills the rest of the slot. The same guide documents a background color setting for exactly that area. One portrait photo in a grid of squares looks narrower than its neighbors, and that is where an uneven category page comes from.
The fix is in the photos. Pick one shape and shoot every product to it. A developer can change the theme sizes, and Adobe’s guide then points to one command, catalog:images:resize, which remakes the stored copies to match.
That command matters at launch too. Adobe’s implementation guide says resized copies are stored in a cache folder under pub/media/catalog/product, and that skipping the resize before launch pushes the work to page load, which slows the site (experienceleague.adobe.com, accessed October 2026). An asynchronous mode has been available since Adobe Commerce 2.4. Ask your developer which one your store uses.
How do you import product images in bulk?
You import Magento product images with a CSV file that lists each file name beside its SKU. Adobe documents three methods: files on the Commerce server, files on an external server, and files in remote storage (experienceleague.adobe.com, accessed October 2026).
The CSV uses four image columns, and it must contain only the SKU column and the image columns:
| Column | What goes in it |
|---|---|
| base_image | The file for the Base role |
| small_image | The file for the Small role |
| thumbnail_image | The file for the Thumbnail role |
| additional_images | Every other gallery image, separated by commas |
For the local method, the default folder is var/import/images on the server, and files in that folder need no path before the file name. For the external method, each cell holds the full URL of the image.
Three notes from Adobe’s page save a failed import:
- Edit the CSV in a program that supports UTF-8. Adobe warns that Microsoft Excel inserts extra characters into the column header, which can stop the import.
- Test with a few products first. Adobe says to run the process with a few products before importing many images.
- Import does not resize. Adobe notes that importing product images does not start an image resize. The storefront makes the resized copies afterwards.
That last note has a second effect. The upload limit described above applies to the browser upload in the Admin, so an imported file keeps the size you exported it at. Export every master at your target size before the import, and check a few product pages after it.
How do placeholders and watermarks work?
A Magento placeholder image is the picture a store shows when a product has no image yet. Adobe’s guide says a different placeholder can be uploaded for each role, and that the first placeholder is a sample logo you can replace. The setting is under Stores, Settings, Configuration, Catalog, Catalog, Product Image Placeholders.

Replace the sample logo before launch. A neutral tile in your own grid shape reads as a planned gap. A default logo beside real products reads as a broken page. A catalog with many placeholders also has a photography gap, which the next section addresses.
Watermarks sit in a different place, under Content, Design, Configuration, in the Product Image Watermarks section of a store view. Adobe accepts a JPG, GIF or PNG file as the watermark, and you set an opacity, a size and a position for each role. Refresh the cache after you save, as the guide instructs.
Think before you turn a watermark on for the Base image. Many advertising and marketplace channels restrict overlays on product images, so check the rules of every channel that takes its images from your store. AI product photos and marketplace rules lists the main ones.
What should a Magento product gallery show?
A Magento gallery for a physical product needs five kinds of image, all in one shape:
- A clean packshot on a plain background, centered, with space around the product. Give it the Base, Small and Thumbnail roles.
- Two or three alternate angles that show what a buyer would turn over in their hands.
- A detail shot of the texture, finish, stitching or closure.
- A scale reference, so nobody has to picture the dimensions from a table.
- A context shot, where the setting is part of the decision.
The space around the product in the first shot matters more on Magento than on most platforms. The same file fills a 50 pixel cart thumbnail and a zoomed product page, and a product shot tight to the edge looks cramped at the small end.
Use the Swatch role for configurable products. A 50 pixel square of the real fabric or finish tells a buyer more than a flat color chip. Product photography angles covers which angles earn a slot for each product type.
A full image set for every SKU
Magento stores are often large catalogs with a small team behind them. Five images for each of 300 products is 1,500 files, and few teams can shoot that. The practical route is one real photograph for each product, with the other images made from it.
Anyone can make an AI picture. Making hundreds that still look like your brand is the hard part. In DesignerBox you build that job once as a workflow, with your brand rules, your background and your framing. Then you run it on the next product, and the workflow reads the same rules on every run. Batch runs one workflow over a sheet of up to 200 rows, and you keep, discard or re-run each row. You see the cost before each run. The page for ecommerce brands shows the same job for a store catalog. The full workflow from the first product photo to the finished ad, in one subscription.
Three limits apply:
- Delivery is a download. DesignerBox does not publish images into a Magento store. You download the results, or send them with a webhook or an S3 step, and then run the CSV import above.
- Plans. Uploading your own photos and the commercial license start on the Pro plan. AI video, virtual try-on, upscaling, the image editor and the video editor start on the Premium plan. There is a free plan, and it runs on sample products. Every plan below Ultra is one seat. Plans and credits are on the pricing page.
- Accuracy. Color, finish, material and size must come from a real photograph of the real product. Check every result against the product before you import it.
If you sell in the EU, a realistic AI image of a person can count as a deep fake. Article 50(4) of the EU AI Act requires whoever publishes a deep fake to disclose it, and Article 50 has applied since 2 August 2026 (European Commission FAQ, accessed September 2026). This is general information, not legal advice. Labeling AI-generated fashion images covers the details.
The image handling differs on every store platform, and the sizes do not transfer. Shopify product images, WooCommerce product photography and PrestaShop product images cover the other three.
Start from a template, add your brand and your products, and run it. See the templates.
FAQ
What size should Magento 2 product images be?
Adobe’s example sizes are 1100 by 1100 pixels for a Base image with zoom, 470 by 470 for a Small image and 50 by 50 for a Thumbnail. Your theme sets the real sizes. A safe master is a square two or three times the size of your product image container, and no larger than the upload limit in your configuration.
Why are my Magento images smaller than the files I uploaded?
The upload resize is on by default. Adobe Commerce resizes large images in the browser to fit a maximum width of 1920 pixels and a maximum height of 1200 pixels, and it keeps the proportions. A 2000 pixel square is therefore stored at 1200 by 1200. You change both limits under Images Upload Configuration.
How do I change the Magento placeholder image?
Go to Stores, Settings, Configuration, then Catalog, Catalog, and open Product Image Placeholders. Choose a file for each image role and save. Adobe says you can use the same image for every role or a different one for each.
Where are Magento product images stored?
Product images sit under pub/media/catalog/product on the server, and the resized copies sit in a cache folder inside it. Magento creates its own folder structure, organized alphabetically, so you do not set a path when you import new images.
Why do my Magento category images have bars beside them?
The photo and the slot have different shapes. The theme defaults keep the proportions and do not crop, so the remaining area is filled with a background. Shoot every product in one shape, usually square, and the bars disappear.
Does importing images resize them in Magento?
No. Adobe states that importing product images does not start an image resize, and that the storefront resizes them afterwards. On a large catalog, a developer runs the catalog:images:resize command before launch so the first visitors do not wait for it.
Can I use AI-generated product images on a Magento store?
We found no Adobe Commerce rule about AI images in the pages cited here, as of October 2026. The limits come from consumer law in your market and from the channels you advertise on. The image must not misrepresent what the buyer receives. In DesignerBox, the cost of each run is shown before you start it.
Sources
- Adobe Commerce, Manage product images and videos: https://experienceleague.adobe.com/en/docs/commerce-admin/catalog/products/digital-assets/product-image
- Adobe Commerce, Product image configuration: https://experienceleague.adobe.com/en/docs/commerce-admin/catalog/products/digital-assets/product-image-config
- Adobe Commerce, Product image import: https://experienceleague.adobe.com/en/docs/commerce-admin/systems/data-transfer/import/data-import-product-images
- Adobe Commerce frontend guide, Configure theme properties: https://developer.adobe.com/commerce/frontend-core/guide/themes/configure
- Adobe Commerce, Catalog image resizing best practices: https://experienceleague.adobe.com/en/docs/commerce-operations/implementation-playbook/best-practices/development/catalog-image-resizing
- European Commission, Transparency obligations under Article 50 of the AI Act (FAQ): https://digital-strategy.ec.europa.eu/en/faqs/transparency-obligations-under-article-50-ai-act
Magento image roles, example sizes, upload limits, placeholders, watermarks, import columns and theme defaults verified from Adobe’s own documentation as of October 2026. The 1200 by 1200 result for a square upload is arithmetic from Adobe’s stated defaults. Theme sizes differ by store, so confirm them against your own installation. DesignerBox plans and credits are on the DesignerBox pricing page (designerbox.ai/pricing), October 2026.