
To bulk upload images to Shopify, pick one of four routes by image count. Drag files into one product’s Media section. Upload a set to the Files page, 20 files at a time. Import a product CSV with one image URL per row, up to 15 MB. Or use an app or the Admin API, which match files to products for you.
Your first 20 products do not need a system. You open each product, drag in five photos and save. Then a drop of 150 products arrives with six images each. That is 900 files, and each one has to land on the right product, in the right order, with alt text.
This guide is for a brand or a one-person shop with 20 to 500 products on Shopify. It covers the four routes, the limit on each one, the CSV columns that carry images, and the six errors that lose images during an import. Every limit was read on Shopify’s own help pages on October 2, 2026.
Key Takeaways
- Four routes, one question. Count the images first. One product takes the product page. A few dozen files take the Files page. Hundreds of products take a CSV. Thousands take an app or the Admin API.
- 250 is the cap per product. A product holds a maximum of 250 images, 3D models or videos. Each variant takes one media item from that list.
- A CSV carries text only. Every image needs a public https URL. Shopify downloads the file during the import and stores its own copy.
- One row per image. Repeat the product handle on each new row and put one URL in the product image URL column.
- Name the files first. Shopify’s CSV page says the image file name is final after the upload. Name the files before you start.
- A sorted spreadsheet loses images. Shopify warns that a CSV sorted in Excel or Numbers can separate products from their image links.
How do you bulk upload images to Shopify?
A bulk upload of images to Shopify goes through one of four routes. Each one has a different limit and a different way of matching a file to a product.
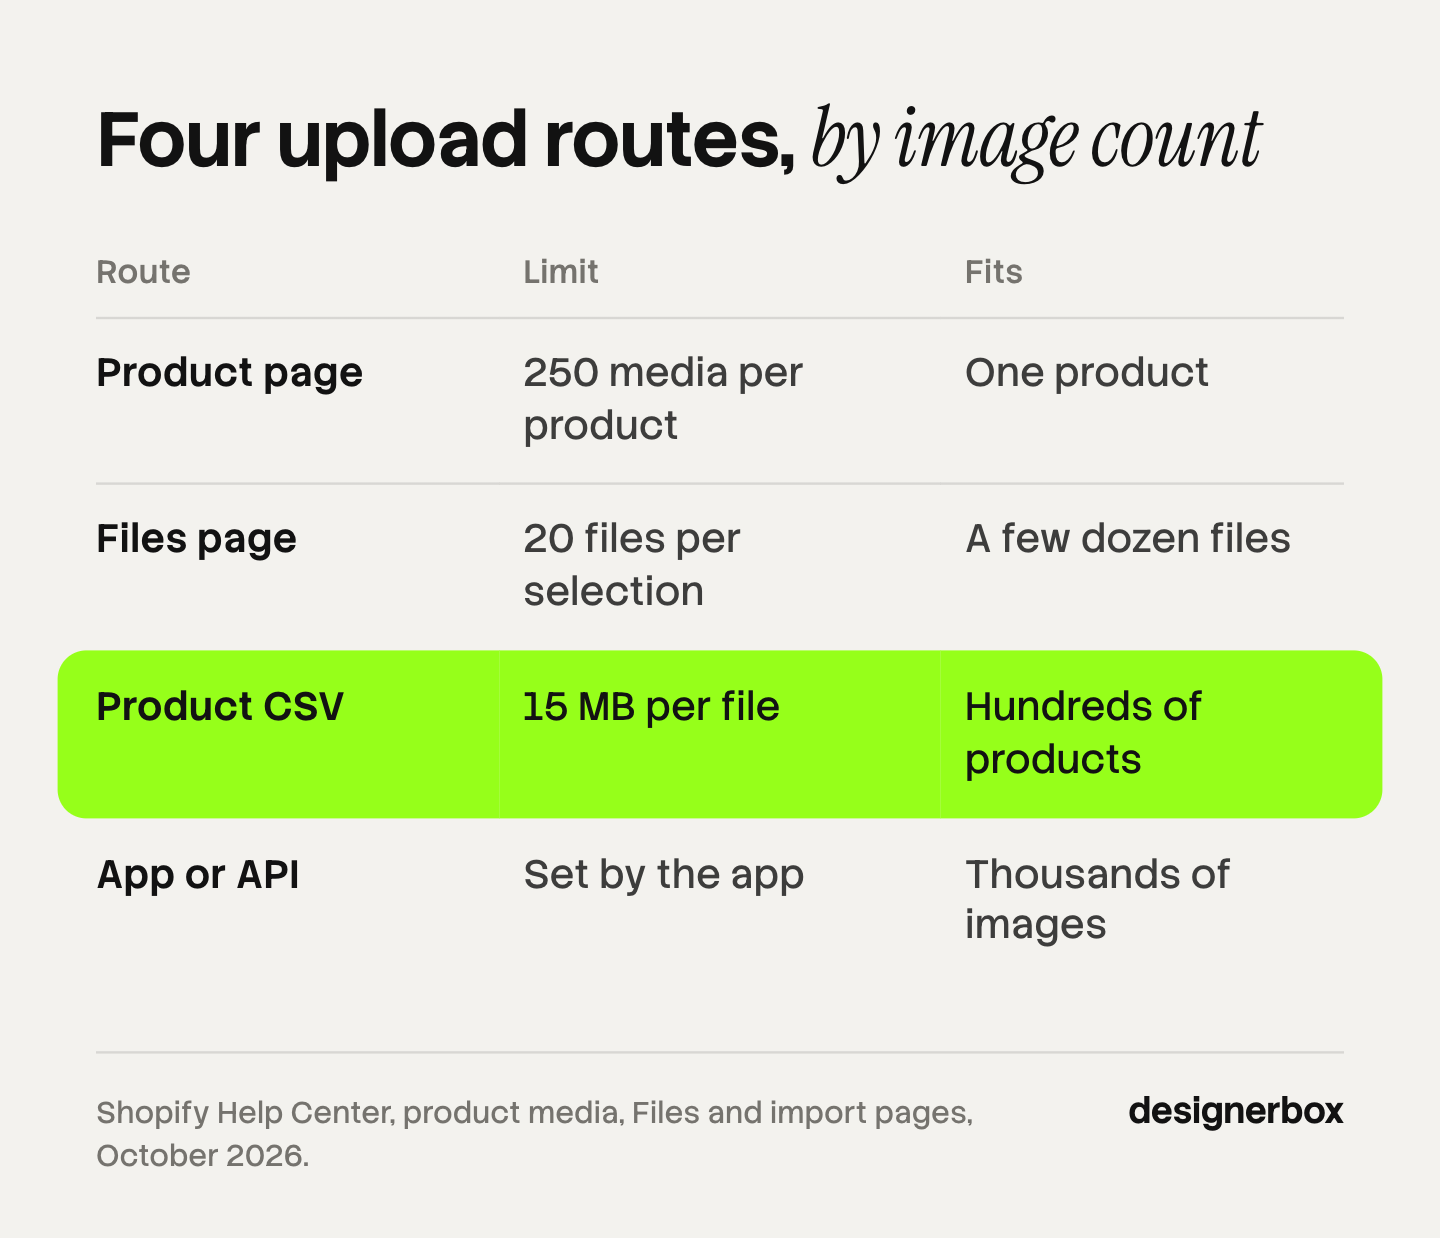
| Route | Where in the admin | Limit Shopify states | Matches file to product by |
|---|---|---|---|
| Product page | Products, then the Media section | 250 media items per product | You, one product at a time |
| Files page | Content, then Files | Up to 20 files per selection | You, with Select existing on each product |
| Product CSV | Products, then Import | 15 MB per CSV, one row per image | The handle column |
| App or Admin API | An installed app, or your own code | Set by the app or the API | SKU, barcode or product ID |
Sources: Shopify Help Center pages on adding product media, the Files page and importing products, read October 2026.
The first two routes need no preparation. They also need a person to place every image. The last two take preparation once, and after that the product count does not change the work.
Route 1: the product page
Open a product and go to the Media section. You can drag files in, click Upload new, or click Select existing and then Add from URL. This is the right route for one product, or for a fix on a live listing.
Two rules apply here and on every other route:
- A product holds a maximum of 250 images, 3D models or videos.
- The first media item is the main one. Shopify shows it on collection pages, the cart page, the checkout page and your home page.
To change the main image, drag another image to the first place. Our guide to Shopify product images covers what each of those surfaces does to image one.
Route 2: the Files page
The Files page, under Content, holds every file in your store. Upload a set of images there, then open each product, click Select existing and pick the images for it.

Shopify’s Files page instructions say to select up to 20 files to upload. Its CSV help page says that after you click Upload files, you can select up to a couple hundred images. Shopify states both numbers, so plan for 20 and treat a larger selection as a bonus.
Each image has to meet the file rules:
| Rule | What Shopify states |
|---|---|
| File size | Maximum of 20 MB |
| Resolution | Maximum of 25 megapixels |
| Aspect ratio | Between 100:1 and 1:100 |
| Formats | JPEG, PNG, WEBP, HEIC and GIF |
| File name | Must not begin with a period |
The Files page also gives each image a URL. Click the Copy link icon next to a file to copy it. That URL is what the CSV route needs. For the pixel size to export at, see our guide to Shopify product image size.
Route 3: the product CSV
A CSV is the route for hundreds of products. It is also the route with the most rules, because a CSV contains only text. Shopify says all product images must be on an existing website first. During the import, Shopify downloads each image and uploads it to your store again.
Four columns carry the images:
| Column | What goes in it | Rule |
|---|---|---|
| Product image URL | The URL of one image | https, public, no password |
| Image position | The order on the product page | Starts at 1, ascending |
| Image alt text | A description of the image | 512 characters maximum, 125 or fewer is optimal |
| Variant image URL | The image for that variant row | Must be a working image URL |
Older templates use other column names. Many guides still call the first column Image Src. Shopify says it keeps backward compatibility with older names and recommends the current format (Shopify Help Center, October 2026).
How do you add several images to one product in a CSV?
Use one row per image. Shopify’s steps are:
- Upload the images to the Files page and copy each URL.
- In the spreadsheet, insert one new row under the product for each extra image.
- Paste the product handle into the first column of each new row.
- Paste one image URL into the product image URL column of each row.
- Enter the image position and the alt text.
- Save the file as a CSV in UTF-8 and import it under Products.
For a product with variants, put the product details and the first image URL in the first row. Each following row carries the handle, the variant details and its image URL.
Shopify recommends Google Sheets for editing the file. A CSV supports images only. Videos and 3D models go through the Files page.
Route 4: an app or the Admin API
At thousands of images, pasting URLs into a spreadsheet becomes the slow step. Two routes remove it.
An app. The Shopify App Store lists bulk image upload apps. One listing describes matching images to products by SKU, barcode, product title or metafield, from a Google Drive or Dropbox folder (apps.shopify.com, October 2026). You name each file after the SKU, and the app places it.
The Admin API. A developer uploads each file once with the fileCreate or stagedUploadsCreate mutation and gets a file ID. Then productSet, productCreate or productUpdate attaches that ID to a product through the media field. The app needs the read_products, write_products and write_files access scopes (shopify.dev, October 2026).
Some image tools also connect to the store directly. Photoroom, for example, describes an integration that imports your Shopify products, lets you edit the images and publishes the approved changes back to Shopify (photoroom.com/blog, October 2026). That removes the download and upload steps for edits made in that tool.
Which six errors lose images in a bulk upload?
Each of these is in Shopify’s own help pages. Each one is easy to miss on a first import.
- You sorted the spreadsheet. Shopify warns that a CSV sorted in Excel or Numbers can remove products from their image links, and the images are lost. Never sort the file after you add image rows.
- You left a column blank with overwrite on. When you select Overwrite products with matching handles, a blank non-required column overwrites the stored value as blank. A blank variant image URL column clears the variant images. Delete a column you do not want to change.
- The URL is private. A link from a shared drive that needs a sign in fails. The URL has to open in a browser where you are signed out.
- The file name has a reserved ending. Shopify says the image file name must not include the suffixes _thumb, _small or _medium. On the Files page, names also can’t end with words such as pico, icon, thumb, testing, small or compact.
- You deleted images after the export. If you export products, remove images from the store and then import the old file, the import fails. The old URLs no longer exist.
- You expected to cancel. A CSV import can’t be canceled once it begins, and Shopify keeps no history of past imports. Export a backup first, and check the activity log after.
One more behavior looks like an error and is not. When the CSV links to an image on your own Files page, Shopify downloads it and stores a second copy. Shopify calls this expected. To avoid the duplicate, host the images elsewhere, or add them to products directly after the import.

What should you prepare before a bulk upload?
Three things decide whether the import works the first time.
Name the files first. Shopify’s CSV page says the file name is final once the image is in your store. The Files page lets you edit a file’s URL handle later, but the old URL then stops working. Use the product handle or the SKU, then the position: linen-shirt-white-01.jpg, linen-shirt-white-02.jpg. Our guide to an image file naming convention gives the four parts and the characters to avoid.
Write the alt text in the sheet. Shopify’s limit is 512 characters, and it says 125 or fewer is optimal. Describe what the image shows and name the product. Do not repeat one keyword across six images.
Count your variants. A product can have up to 2,048 variants and 250 media items, and each variant takes one media item from the product’s list. Color variants need their own image. Size variants usually share one. Our guide to AI product images for Shopify works through that math.
Then test. Import five products, open each one on the storefront and check the order, the main image and the variant images. Run the full file only after the five pass.
How do you replace or organize images later?
A catalog changes after the first upload. Three tools on the Files page help.
- Search and filter. You can filter files by size, by type, by file reference and by alt text, and save a filter as a view. A filter on alt text finds every image that still has none.
- Replace. The Replace icon swaps one file for another of the same format, such as a JPG for a JPG. Shopify notes that the file name stays the same and the file’s link changes. You can’t replace files as a bulk action.
- Storage. Shopify lists a storage limit per plan, from 100 GB on Basic to 10 TB on Enterprise. A catalog of product stills is unlikely to reach it. Video reaches it sooner.
To replace images across many products, use the CSV route again with the overwrite option, and include only the columns you want to change. On a WooCommerce store the routes differ: see WooCommerce import product images.
Where the images come from
The upload is the last step. The slower step is making 900 images that all look like one brand.
Anyone can make an AI picture. Making hundreds that still look like your brand is the hard part.
In DesignerBox you build the image set once as a workflow: the white-background hero, the angles, the detail shot, the lifestyle scene. A batch then runs that workflow over a sheet with one product per row, up to 200 rows in one sheet. Every row reads the same brand rules, so row one and row two hundred have the same light and framing (DesignerBox batch page, October 2026).
You review in the sheet. You keep or discard each result and re-run one row without touching the rest. The cost of the whole sheet is shown before the run.
Then you download the results, name them by handle and position, and use one of the four routes above. The page for Shopify stores shows the image set per product.
The full workflow from the first product photo to the finished ad, in one subscription.
Batch, templates, apps and brand rules are on every plan. There is a free plan, and it runs on sample products. Uploading your own photos and the commercial license start on the Pro plan. Plans and credits are on the pricing page.
When another tool fits better
- You want images written to Shopify automatically. DesignerBox does not publish to a store. You download the results, or send them with a webhook or an S3 step. A tool with a Shopify integration, such as the one Photoroom describes, fits that need.
- You only need to move files. If the photos already exist and are final, a CSV or an upload app does the whole job. No image tool is needed.
- Your team needs several seats. Every DesignerBox plan below Ultra is one seat.
A free plan for your first run
Start from a template and run it on a sample product. Look at the set it returns before you plan a whole sheet.
FAQ
How do I bulk upload images to Shopify?
Use one of four routes. Drag files into one product’s Media section. Upload up to 20 files at a time on the Files page. Import a product CSV with one image URL per row. Or install an upload app that matches files to products by SKU.
How many images can a Shopify product have?
A product holds a maximum of 250 images, 3D models or videos. Each variant can have one media item, and it must come from the product’s media list. Shopify states both rules in its help center, read in October 2026.
How do I add multiple images to one product in a Shopify CSV?
Add one row per image. Paste the product handle into the first column of each new row. Put one URL in the product image URL column of each row, then set the image position and the alt text.
Why did my Shopify CSV import lose its images?
The three common causes are a sorted spreadsheet, a private image URL and a blank column with the overwrite option on. Shopify also fails an import when the file links to images you deleted from the store after the export.
Can I upload images to Shopify from my computer with a CSV?
Not directly. A CSV contains only text, so each image needs a public URL. Upload the files to the Files page first and copy each link, or host them on another service. Shopify then downloads each image during the import.
What is the size limit for a Shopify product CSV?
A product CSV can’t exceed 15 MB. If the upload times out or returns an error, Shopify says to split the file into several smaller files and import each one.
Can I rename a Shopify image after I upload it?
Not without a cost. Shopify’s CSV page says the image file name is final after the upload. On the Files page you can edit a file’s URL handle, but the previous URL then stops working. Name each file before the upload.
Can DesignerBox upload images to my Shopify store?
No. DesignerBox does not publish to a store. You download the results, or send them with a webhook or an S3 step, and then use one of the four routes. In DesignerBox you see the cost before each run.
Sources
- Shopify Help Center, adding product media: 250 media items per product, the main media item and where it displays, Select existing, Add from URL, storage limits by plan (help.shopify.com, read October 2, 2026)
- Shopify Help Center, the Files page: up to 20 files per selection, 20 MB, 25 megapixels, aspect ratio, formats, file name rules, filters and saved views, replacing a file (help.shopify.com, read October 2, 2026)
- Shopify Help Center, using CSV files: the four image columns, one row per image, public https URLs, the final file name, reserved suffixes, alt text lengths, images only, the duplicate copy, older column names (help.shopify.com, read October 2, 2026)
- Shopify Help Center, importing products: the 15 MB limit, sorted spreadsheets, overwrite behavior, no cancel and no import history (help.shopify.com, read October 2, 2026)
- Shopify Help Center, adding variants: 2,048 variants per product, one media item per variant (help.shopify.com, read October 2, 2026)
- Shopify developer documentation, manage media for products and collections: fileCreate, stagedUploadsCreate, the media field and access scopes (shopify.dev, read October 2, 2026)
- Shopify App Store, a bulk image upload app listing: matching by SKU, barcode, product title or metafield (apps.shopify.com, read October 2, 2026)
- Photoroom blog, managing product images for a growing Shopify store: the Shopify integration and publishing changes back to the store (photoroom.com/blog, read October 2, 2026)
- DesignerBox batch: one product per row, up to 200 rows, review per row, cost of the sheet, plan coverage: DesignerBox batch page (designerbox.ai/product/batch), October 2026
Shopify limits verified on Shopify’s own help and developer pages on October 2, 2026. The 150-product, 900-file figure is example arithmetic, not a measurement. Shopify changes its admin often, so check each page before a large import. Individual results vary.