
Tech product photography shows an electronic product exactly as a buyer will receive it. That means glossy plastic without glare from the room, a screen that shows the real interface, ports and buttons a buyer can count, and a finish in its true color. A full listing kit for one device has about ten frames, from the white packshot to the contents of the box.
Much of an electronic product behaves like a mirror. A black speaker reflects the softbox, the ceiling and the person holding the camera. A phone screen reflects the room when it is off, and it glows too bright when it is on. The details a buyer checks before paying are the smallest things in the frame: the port type, the button layout and the cable.
This guide is for consumer electronics and accessory brands with 20 to 500 products, who need the same listing kit for every device. If you want the finished set rather than the method, electronics product photography on DesignerBox starts from one photo of your device. The guide covers each problem in turn, the Amazon and Google image rules, a ten-frame shot list, and where AI editing helps.
Key Takeaways
-
Glossy plastic shows the light, so shape the light. Use large, soft sources and move them until each reflection is one clean band that follows the shape of the device.
-
Show the real interface on the screen. A black screen can look like a dead device. A screen showing an interface the device does not run is a claim about the product.
-
Make every port easy to count. Shoot each edge straight on with a light that skims across it, so each opening reads as a hole with depth.
-
Keep the finish color true. Set white balance from a gray card, keep the light fixed across the range, and compare the edit with the real device.
-
Amazon’s main image rules are strict. A pure white background, the product at 85% of the image, and only the accessories that come in the box.
-
AI edits the scene, and you check the device. Backgrounds, stray reflections, screen content and settings are safe to edit. Text, logos, ports and buttons must match the real product.
What is tech product photography?
Tech product photography is product photography for electronics: phones, headphones, speakers, chargers, cameras, smart home devices and their accessories. Three things make it different. The surfaces reflect, so every light shows as a shape on the product. The screen is a second picture inside the picture. And buyers read the photos like a spec sheet, checking the ports, the buttons and what comes in the box.
Some teams call it electronics product photography or gadget photography. Each problem below has its own fix.
| Problem | What the buyer checks | The fix |
|---|---|---|
| Glossy surfaces | Is it scratched or cheap-looking? | Large soft light, black and white cards |
| The screen | Does it work, and what does it run? | A real screenshot, matched to the angle |
| Ports and buttons | Will it connect to what I own? | Raking light, one frame per edge |
| Finish color | Is it the colorway I picked? | Gray card, fixed light, side-by-side check |
| Size | Will it fit my desk, bag or hand? | A hand or a known object in frame |
How do you photograph glossy plastic and reflections?
A glossy surface acts like a mirror. It shows the lights, the walls and the camera around it. So on glossy electronics you shape the reflection first. Use large, soft light sources, place them where the surface reflects them as clean bands, and block everything else with black or white card.
Start with the size of the light. A small bare light makes a hard, bright spot. A softbox or a sheet of diffusion fabric makes a soft band. On a curved device, such as an earbud case, a tall strip light gives one long highlight that shows the curve.
Then use cards to control the edges. A black card close to a silver or white device puts a dark line along its edge, which separates it from a white background. A white card lifts the shadow side of a black device. Check each change on a large screen, never on the camera’s small display.
Keep the camera out of the reflection. A longer lens lets you stand further from the device, and a black card with a hole for the lens hides the camera body. A polarizing filter cuts reflections from glass and glossy plastic: turn it slowly until the stray reflection fades.
Clean the device in the minute before the shot. Glossy black plastic shows every speck of dust and every fingerprint, so wear cotton gloves and plan a short retouch pass. A watch crystal has the same problem under glass, and the watch photography guide covers dials. If the light was wrong on a finished shoot, fixing product photo lighting without a reshoot sorts the problems by how much you can save.
What should the screen show?
Show the screen on, with the real interface of the device. A black screen can look like a device that is broken or turned off. A lit screen shot in camera is often too bright, or it shows lines. A common method is to shoot the screen dark and clean, then place a real screenshot of the interface on it in editing, matched to the angle and the brightness of the scene.
| Screen state | When it fits | What to watch |
|---|---|---|
| Off, black | The packshot of a device with a glass front | Reflections of the room on the glass |
| On, shot in camera | A lifestyle frame where the light is low | Moiré, dark bands, a glow that looks fake |
| Screenshot placed in editing | The main set, where the interface sells the device | The angle, the brightness, and a real interface |
The interface must be real. A mock interface, one the device does not run, is a claim about what the product does. Amazon asks that every image accurately represents the product you sell (sellercentral.amazon.com, September 2026). Google Merchant Center asks you to match the image to the product you are selling (support.google.com, September 2026). Take the screenshot from the device itself, at the resolution it produces. Remove personal data, notifications and anything that dates the image.

If you shoot a lit screen in camera, watch for two faults. Moiré is a pattern of wavy lines that appears when the camera sensor’s grid meets the screen’s pixel grid. A small change in distance or angle usually removes it. Dark bands can appear at fast shutter speeds, so use a slower one on a tripod. Many screens give off polarized light, so a polarizing filter can turn the screen dark at some angles.
How do you photograph ports, buttons and cables?
Buyers check the ports before they buy. They look for the connector type, the number of ports and where each one sits. Shoot each edge that has a port or a button straight on, with a light that skims across the surface. The raking light gives each opening a small shadow, so a port reads as a hole with depth and a button reads as raised.
Give each busy edge its own frame, and use a small aperture so the whole edge stays sharp. Read every printed label at full size. The words on a button or a port label are what a buyer enlarges to check.
Cables make a clean frame look untidy. Coil each cable into the same loose loop every time, hide the twist tie, and show both connector ends in one close-up. If the cable length is a selling point, state it in the listing text.
How do you keep the finish color accurate?
Shoot a gray card or a color chart in the first frame, under the same light as the product. Set the white balance from it, and keep the same light and camera settings for every product in the range. Then compare the edited photo with the real device, side by side, on a calibrated screen. Colorways such as graphite, charcoal and midnight blue differ by small amounts, so a warm or cool cast can show the wrong one.
Metal finishes need extra care. Brushed aluminum and anodized color can shift with the angle of the light, so shoot every colorway from the same angle with the same light. Matching photos across the range also make the store look like one brand, as the ecommerce branding guide explains.
Export in RGB. Amazon asks for RGB files and says not to rely on ICC color profiles for accurate color on its site (sellercentral.amazon.com, September 2026). Google asks that each color variant gets its own image, showing the correct color, pattern and material (support.google.com, September 2026).
What do Amazon and Google require from electronics images?
Amazon’s main image rules apply to electronics as to other products. The background is pure white, RGB 255, 255, 255. The product fills 85% of the image, appears once, and shows only the accessories included with it. Google Merchant Center asks for at least 500 x 500 pixels from 31 January 2027, and recommends about 1,500 x 1,500.
Amazon, from its product image guide (sellercentral.amazon.com, September 2026):
- Size. Images need at least 500 pixels on the longest side and at most 10,000. Amazon recommends 1,000 pixels or more, because that enables the zoom function.
- Accessories. No accessories or props that are not included and could confuse the customer.
- Packaging. Do not include packaging in the main image, unless it is an important product feature, such as a carrying case.
- Badges. No Amazon logos or badges, and that includes “Works with Amazon Alexa”. If your packaging carries that badge, check the packaging frame too.
- AI-generated people. If a photorealistic person in the image was made entirely by AI, tag the file with the keyword contains-synthetic-performer in its XMP metadata.
Google Merchant Center, from its image link rules (support.google.com, September 2026):
- No overlays. No promotional text, watermarks or borders on the main image.
- Real products only. No placeholder, and no generic image in place of the product.
- Packaging. If the image shows the original packaging, show it in three dimensions, and not only its front.
- AI metadata. Images made with generative AI must keep the metadata that says so, such as the IPTC DigitalSourceType tag TrainedAlgorithmicMedia.
- Advice. Google also advises against scaling up a small image, and against showing products that are not sold with the main product.
These are platform rules, and they change. Amazon’s page notes that some jurisdictions may require a disclosure when a product image contains AI-generated people. This is general information, not legal advice. For each Amazon image slot, see AI product photography tools for Amazon. For older files under the 500 pixel floor, see low resolution product images.
The tech product photography shot list
One device needs about ten frames. Amazon recommends at least six additional images and one video beyond the main image (sellercentral.amazon.com, September 2026). The ten frames below cover that set, plus what a store page needs. The first is a packshot: the product alone on plain white.
| # | Frame | What it answers | How to shoot it |
|---|---|---|---|
| 1 | Main packshot | What is it? | Front three-quarter, white RGB 255, product at 85% |
| 2 | Front, screen on | What does it run? | A real screenshot placed on the screen |
| 3 | Back | What is on the back? | Labels, vents and mounting points in focus |
| 4 | Port edge | Will it connect to my things? | Straight on, raking light, one frame per edge |
| 5 | Button side | What can I control? | Every printed label readable at full size |
| 6 | Finish close-up | What is it made of? | Macro on the texture, the same light as frame 1 |
| 7 | Scale | How big is it? | In a hand, or next to a known object |
| 8 | In use | Where does it fit in my day? | A real room, a real task, the screen on |
| 9 | In the box | What do I get? | Every item laid flat, cables coiled the same way |
| 10 | Packaging | What arrives at my door? | The box in three dimensions, front and side |
The scale frame is easy to forget, and buyers look for it. Baymard Institute found that 42% of users try to judge the size of a product from its images, and that 28% of the sites it reviewed had no in-scale image (baymard.com, first published 2017, read September 2026). A hand around a power bank answers that question without a ruler.

The in-use frame shows where the device fits in a buyer’s day: reading on a tablet, or taking a call on earbuds. Keep the device at its true size next to the person. The in-the-box frame must match the real box contents exactly. For the angle frames, see the seven product photography angles.
Where does AI editing help with electronics photos?
AI editing is useful on the parts of an electronics photo that belong to the scene: the background, stray reflections, the content on the screen and the setting around the device. It is risky on the parts that belong to the product: printed text, logos, port shapes, the button layout and the number of vents or speakers. Those must match the real device, frame by frame.
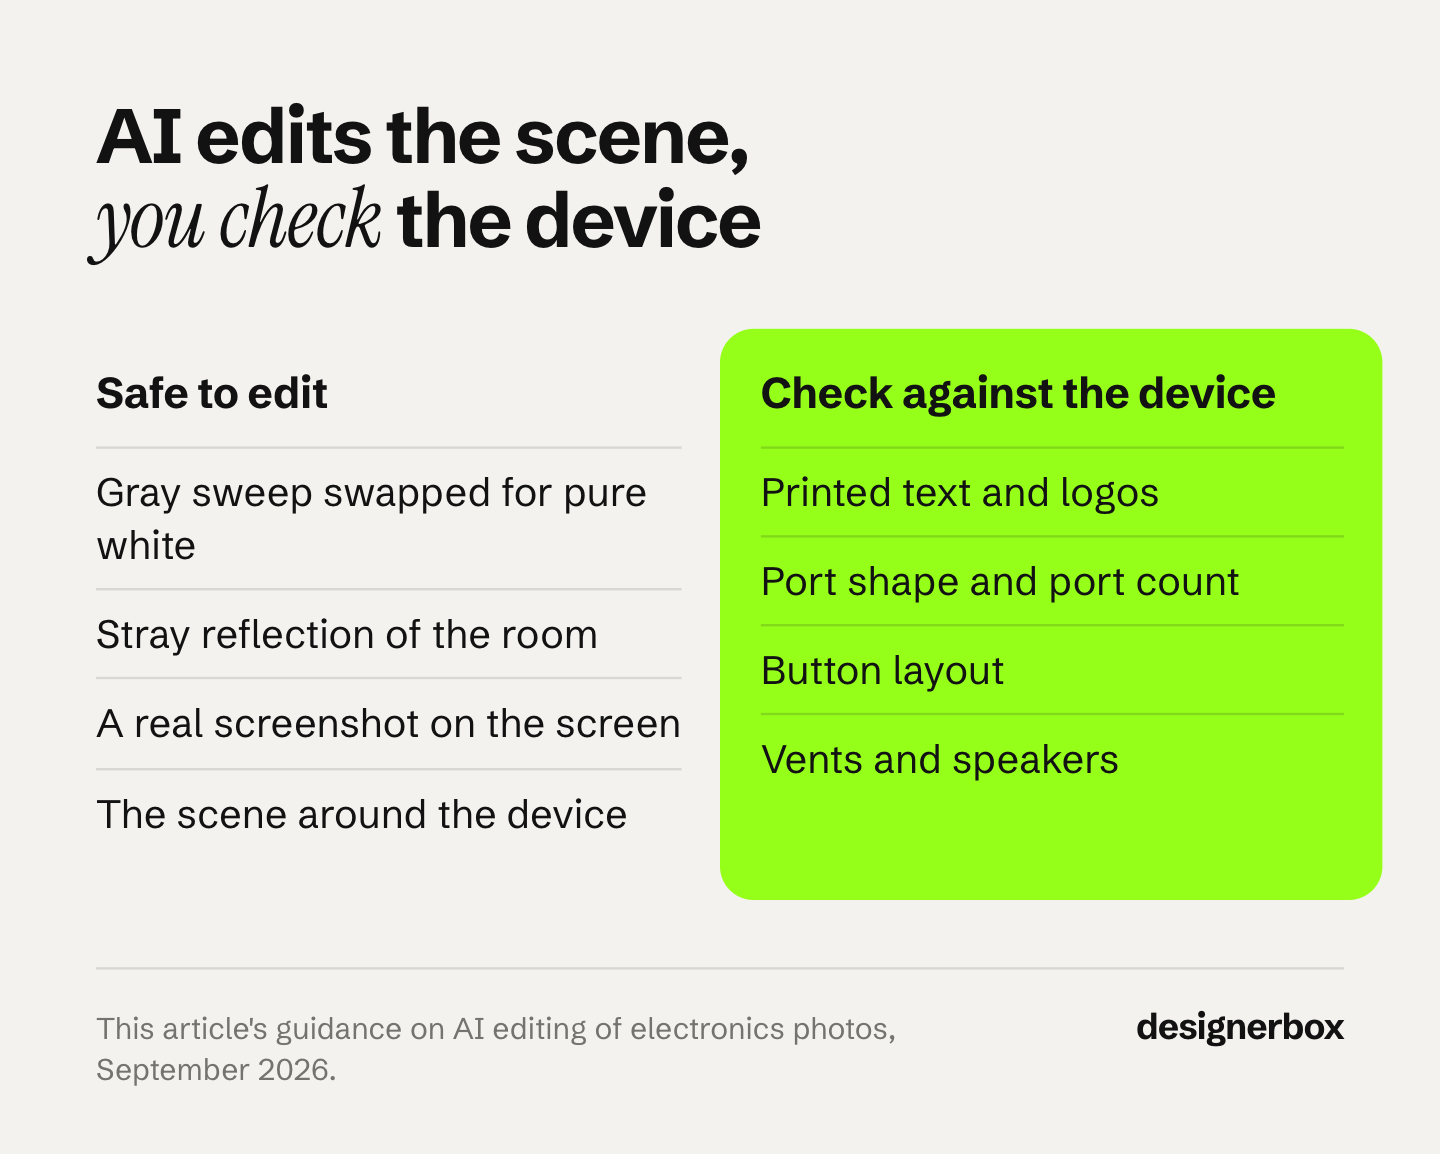
Four edits usually help:
- Background. Swap a gray sweep for pure white, and check that the white measures 255 on all three channels.
- Reflections. Remove a stray reflection of the room or the camera. Keep the highlight that shows the shape of the device, or the product looks flat.
- Screen content. Place a real screenshot on the screen at the right angle and brightness. The interface itself comes from the device, never from the model.
- Scenes. Build the lifestyle frame around a clean packshot, and check the shadows and the size of the device.
The honest limit is small detail. Image models can redraw it. A logo can lose a letter. A USB-C port can become a rounded shape of the wrong size. A remote with four buttons can gain a fifth. A new angle made from one photo is a guess about the sides the camera never saw. Before any AI frame ships, count the ports, read every printed word and compare the buttons with the real device. Five accuracy checks for AI product photos sets out how to test your hardest product before you run the whole catalog.
Electronics listing kits as a workflow
Anyone can make an AI picture. Making hundreds that still look like your brand is the hard part. A brand with 200 devices needs the same ten frames for each one, in the same light.
DesignerBox is AI creative production for brands and agencies. You build the listing kit once as a workflow: the packshot on white, the angles, the detail frames and the in-use scene. You set your brand rules once, and the workflow reads them on every run. Background removal and replacement, relighting, multi-angle from one photo, product placement and upscaling are all steps you can add. The image editor makes one edit after another, and the picture keeps its detail and resolution. So you can change the background, then fix a reflection, then add the screen.
Batch runs one workflow over a whole sheet of products, and you review the results in one pass. You keep or discard per row, and re-run one row on its own. Three critic steps score the results, and best-of-N keeps the best one. No critic step knows your port layout, so you still compare every frame with the real device. The full workflow from the first product photo to the finished ad, in one subscription. The electronics page shows what a run on one device returns.
Here are the limits. DesignerBox does not publish into your store. You download the results, or send them with a webhook or an S3 step. Uploading your own photos and the commercial license start on the Pro plan. Relighting and upscaling start on the Premium plan. Team features, shared brand kits and white label are on the Ultra plan, and every plan below Ultra is one seat.
A free plan for your first run
Start from a template, add your brand and your products, and see the cost before you run it. Get started free.
FAQ
How do you stop reflections on glossy electronics?
Use large, soft light sources and place them where the surface reflects them as clean bands. Block the rest of the room with black or white card, and hide the camera behind a black card with a hole for the lens. A polarizing filter also cuts reflections from glossy plastic.
Should the screen be on or off in a product photo?
For most listing frames, show the screen on with the device’s real interface, often placed in editing. An off screen fits a packshot of a device with a glass front. The interface must be one the device really runs.
How do you avoid moiré when you photograph a screen?
Moiré appears when the camera sensor’s grid meets the screen’s pixel grid. Change the camera distance or angle slightly until the wavy lines disappear. Placing a screenshot in editing avoids the problem.
What background should electronics product photos use?
Amazon requires a pure white background for the main image, RGB 255, 255, 255, with the product at 85% of the image. Additional images can use scenes, such as a desk, for the scale and in-use frames.
How many photos does an electronics listing need?
Amazon recommends at least six additional images and one video beyond the main image. A full kit for one device has about ten frames, from the packshot to the box contents.
Can AI edit electronics product photos?
Yes, for the scene: the background, stray reflections, the screen content and the setting. Image models can change printed text, logos, port shapes and button layouts, so check those against the real device. Google Merchant Center also requires AI-generated images to keep their AI metadata.
Sources
- Amazon Seller Central, Product image guide (main image rules, image sizes, accessories, packaging, badges, image variants, AI-generated people): sellercentral.amazon.com/help/hub/reference/external/G1881, accessed September 2026
- Amazon Seller Central, Technical image file requirements (RGB color mode, ICC color profiles): sellercentral.amazon.com/help/hub/reference/external/G9FUUH87RBNXGKB7, accessed September 2026
- Google Merchant Center Help, Image link (size, overlays, placeholders, variants, packaging, AI-generated image metadata): support.google.com/merchants/answer/6324350, accessed September 2026
- Baymard Institute, “Product Page UX: Provide at Least One ‘In Scale’ Image”: baymard.com/blog/in-scale-product-images, first published May 2017, accessed September 2026
- DesignerBox pricing page (designerbox.ai/pricing), September 2026: feature gates
Marketplace image rules verified from Amazon Seller Central and Google Merchant Center Help as of September 2026. Individual results vary.