
The DesignerBox Figma AI plugin puts image and video generation, background removal, and product photography on the Figma canvas. Sign in with your DesignerBox account, run a tool from the Apps tab, and the result lands as an editable Figma frame. No export, no round trip to another app. Six tools cover generation, cutouts, outpainting, product ads, and new camera angles.
You have a layout open, eight placements to fill, and a folder of gray boxes where the imagery goes. The usual fix is a second tab, a third login, a download, a drag back into Figma, and a filename you will never find again.
Every one of those steps happens because the picture gets made somewhere the layout is not.
This covers the six tools in the plugin, the job each one is good at, what they cost in credits, where Figma’s own AI already does the work, and what happens when the same shot has to exist for two hundred products instead of one.
Anyone can make an AI picture. Making hundreds that still look like your brand is the hard part. At that scale, you move the job from the plugin to a saved workflow.
The full workflow from the first product photo to the finished ad, in one subscription. That subscription covers the plugin, the image editor, the video editor, the brand rules and the Assets library.
Key Takeaways
- Six tools ship in the Apps tab: generate image, generate video, remove background, expand, product ad, and photo angles.
- Output is a Figma layer, not a file. Results land on the canvas as frames you can move, mask, and restyle, so there is nothing to re-import.
- The model you pick for a step sets what an image costs, and the plugin shows the cost before the run.
- Video is priced per second of output. An 8-second clip costs 40 to 560 credits, depending on the model.
- Figma already removes backgrounds natively. Remove background, Boost resolution, Expand images, Isolate and erase objects, and Make and edit images all run on canvas, on a paid plan with a Full seat (help.figma.com, October 2026). Use those first for an image you already have.
- The plugin is where you decide what the shot should be. A saved DesignerBox workflow is where that same shot runs again for the next forty products.
- One account carries across surfaces. The same login and credit balance work in the plugin, the browser extension, on mobile, and through the DesignerBox MCP server.
What the Figma AI plugin does
Add DesignerBox from the Figma Community, open it from the Plugins menu, and sign in with your DesignerBox account. The plugin page carries the current tool list.
Figma’s help center says you can run a plugin from the Community, from the file browser, or from inside a file. In a design file, it points to the Tools tab in the left navigation bar, filtered to plugins. Plugins work in Figma Design, Dev Mode, FigJam, Figma Slides and Figma Buzz (help.figma.com, October 2026).
Installing is free. Generation spends DesignerBox credits against your plan, managed in your account rather than through Figma.
The six tools in the Apps tab
The DesignerBox Figma plugin has six tools in its Apps tab: generate image, generate video, remove background, expand, product ad and photo angles.
| Tool | What you give it | What comes back |
|---|---|---|
| Generate image | A prompt, a model, an aspect ratio | A text-to-image result placed on canvas |
| Generate video | A prompt, or a selected layer as the first frame | A poster on canvas, the MP4 in a tab |
| Remove background | A selected layer | A clean cutout, ready to composite |
| Expand | A frame and a wider or taller ratio | An outpainted scene that continues past the original edge |
| Product ad | A product photo | Campaign-ready shots built from your real product |
| Photo angles | A product photo | The same product from a different viewpoint |
Generate image and generate video are the open-ended pair. The other four are narrow on purpose: each one does a single job that used to cost a tab switch.
Generate image
Describe the shot, pick the model, pick the aspect ratio, and the result places itself on the canvas. Model choice matters more than prompt length, and it is also what you pay, because the model on the step sets the rate. Nano Banana Pro holds editing fidelity. Seedream 5 renders text natively. The model list shows what each one is for.
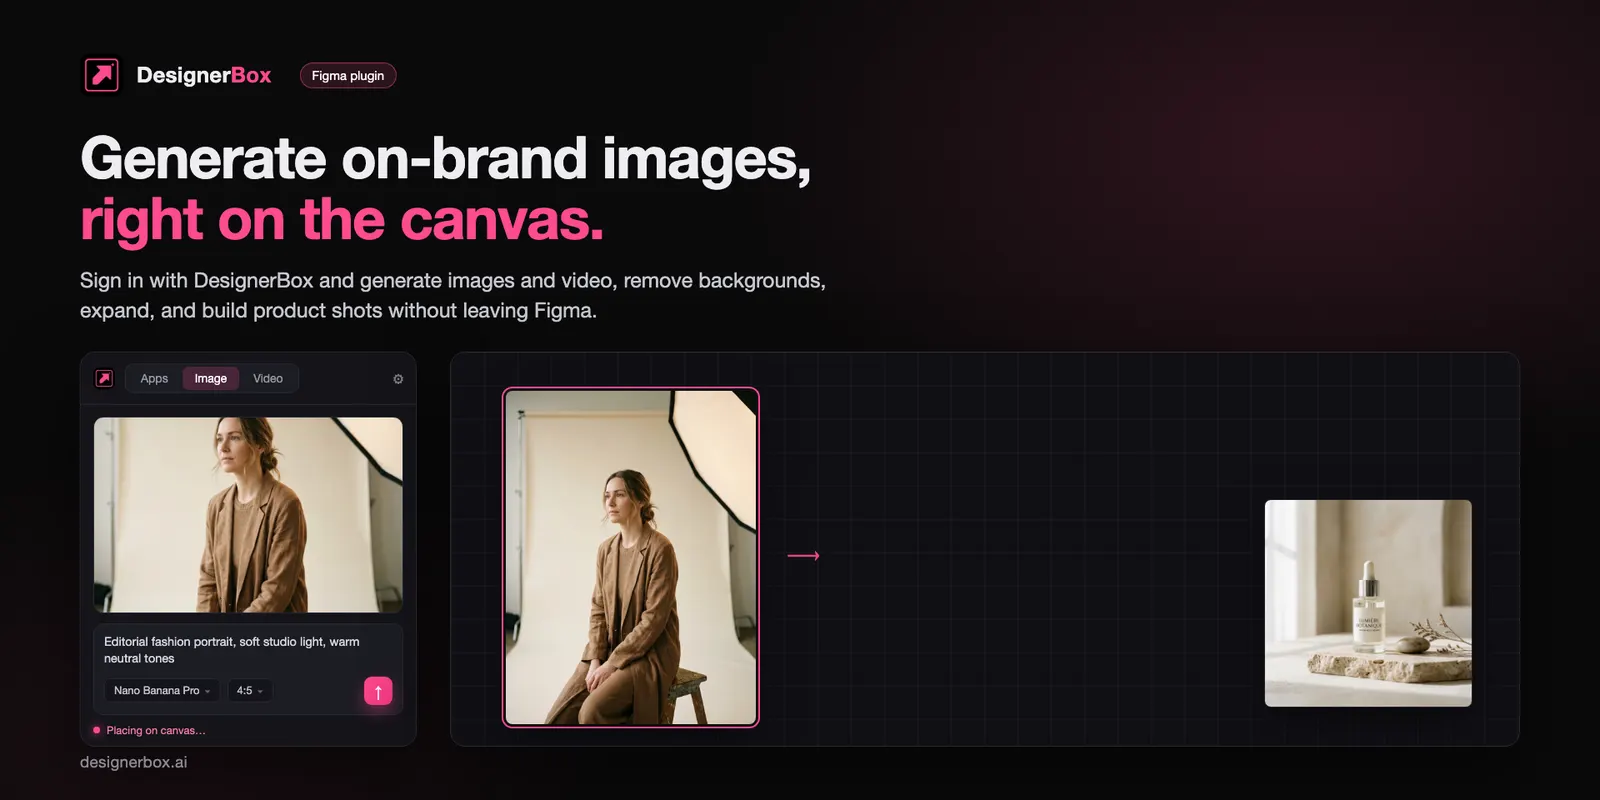
A layout usually needs three or four passes before an image is right. The DesignerBox image editor makes one edit after another, and the picture keeps its detail and resolution.
Generate video
Two routes. Text-to-video from a prompt, or image-to-video using a selected layer as the opening frame, which is the one that matters when the video has to start from a product you already have.
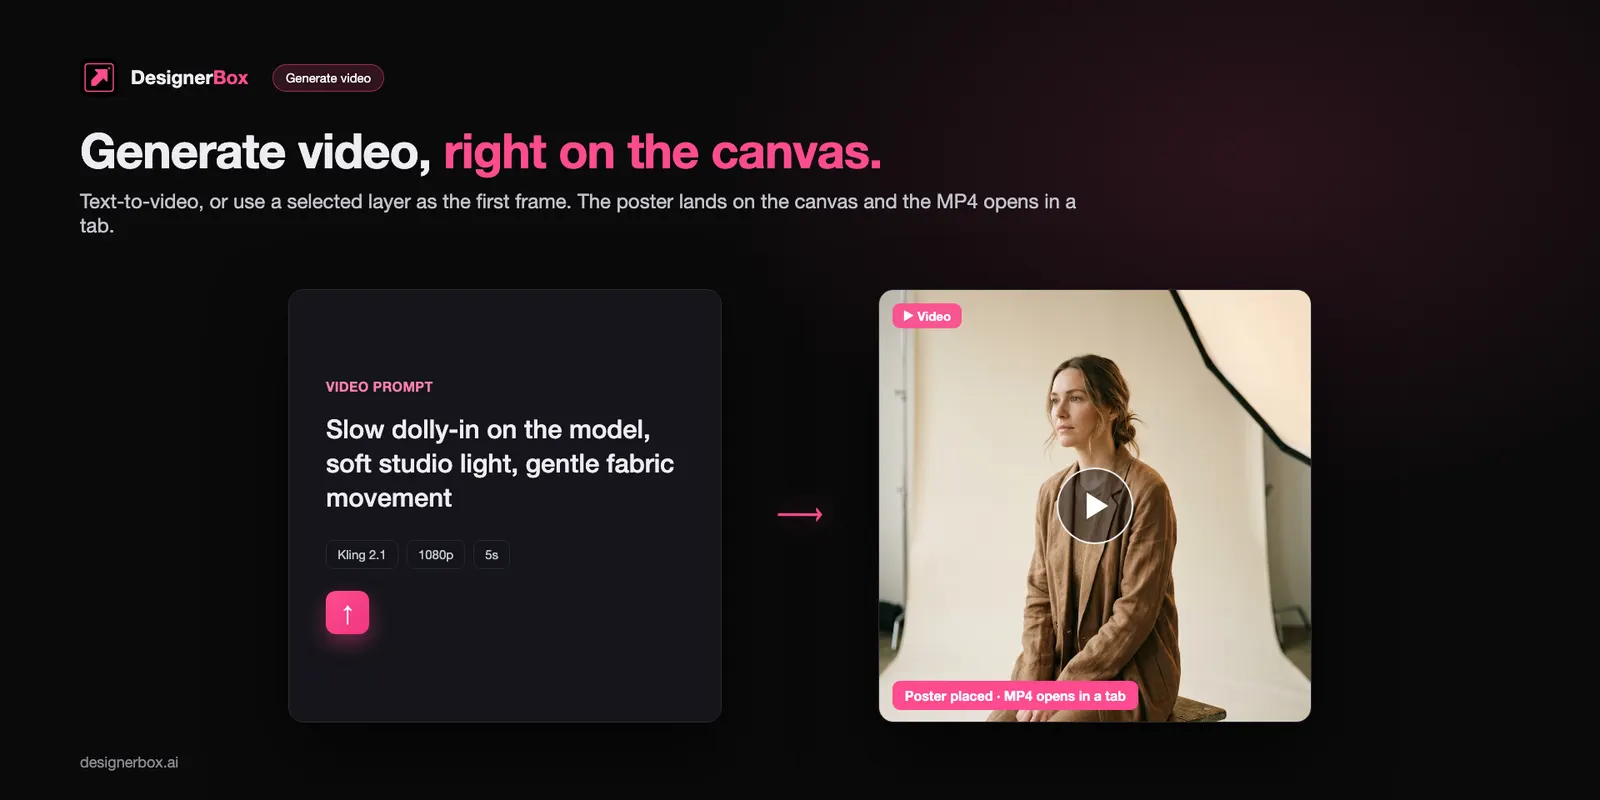
The poster frame lands on the canvas so the layout stays readable. The MP4 opens in a tab. Cutting, captioning and color happen in the video editor, which is multi-track rather than a single generated clip.
Remove background
Select a layer, and you get a cutout back. You will likely use this tool more than any other in the set.
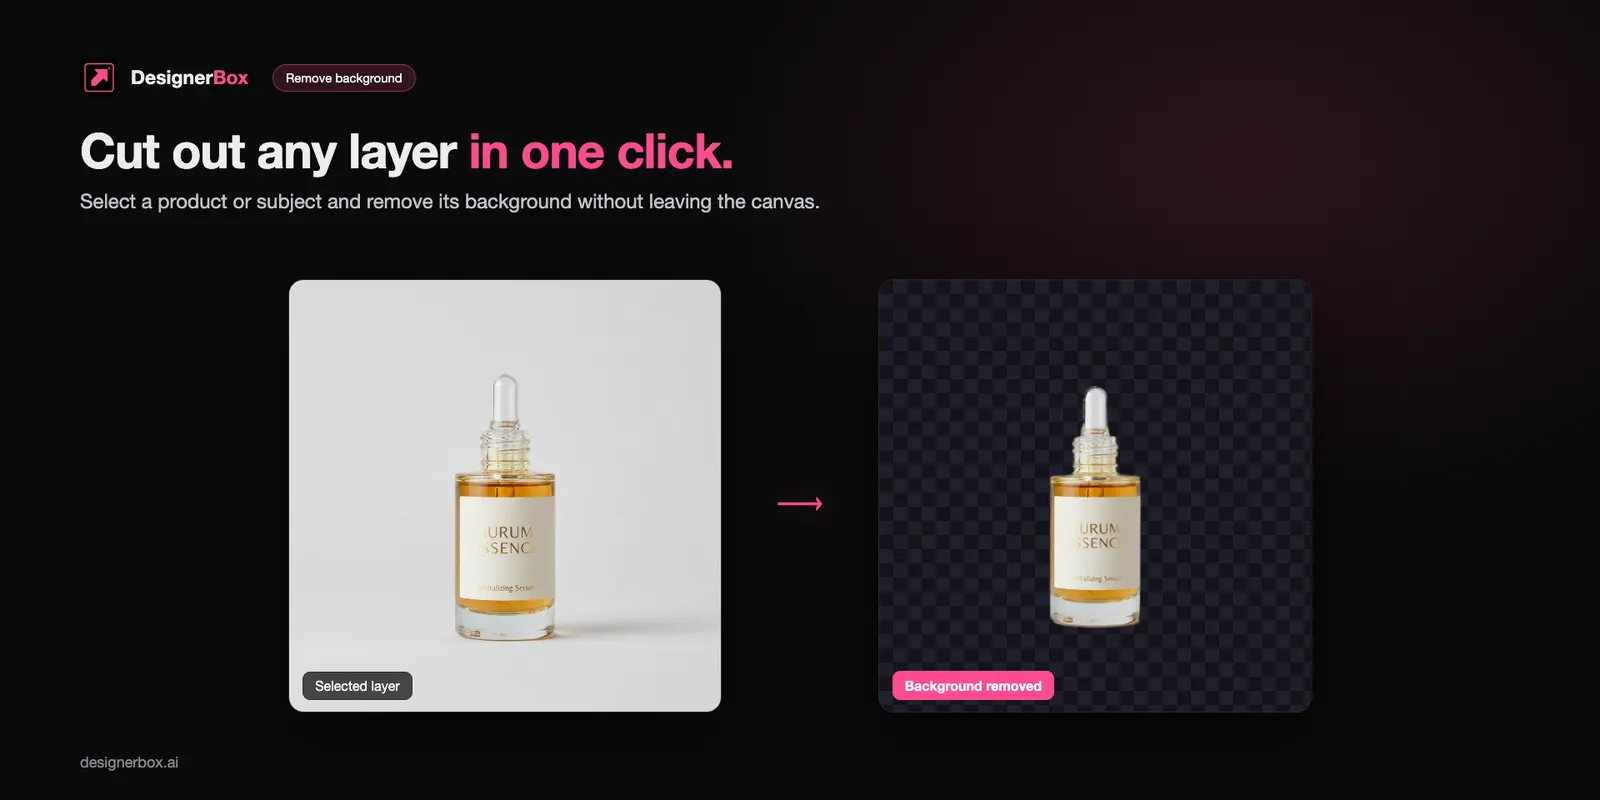
Read the Figma section below before you build a habit around it. Figma removes backgrounds natively now, and the native tool runs on the Figma AI credits your seat includes.
Expand
Outpaint a frame wider or taller and the scene continues rather than stretching. A square packshot becomes a 16:9 banner. A portrait crop becomes a full-bleed background.
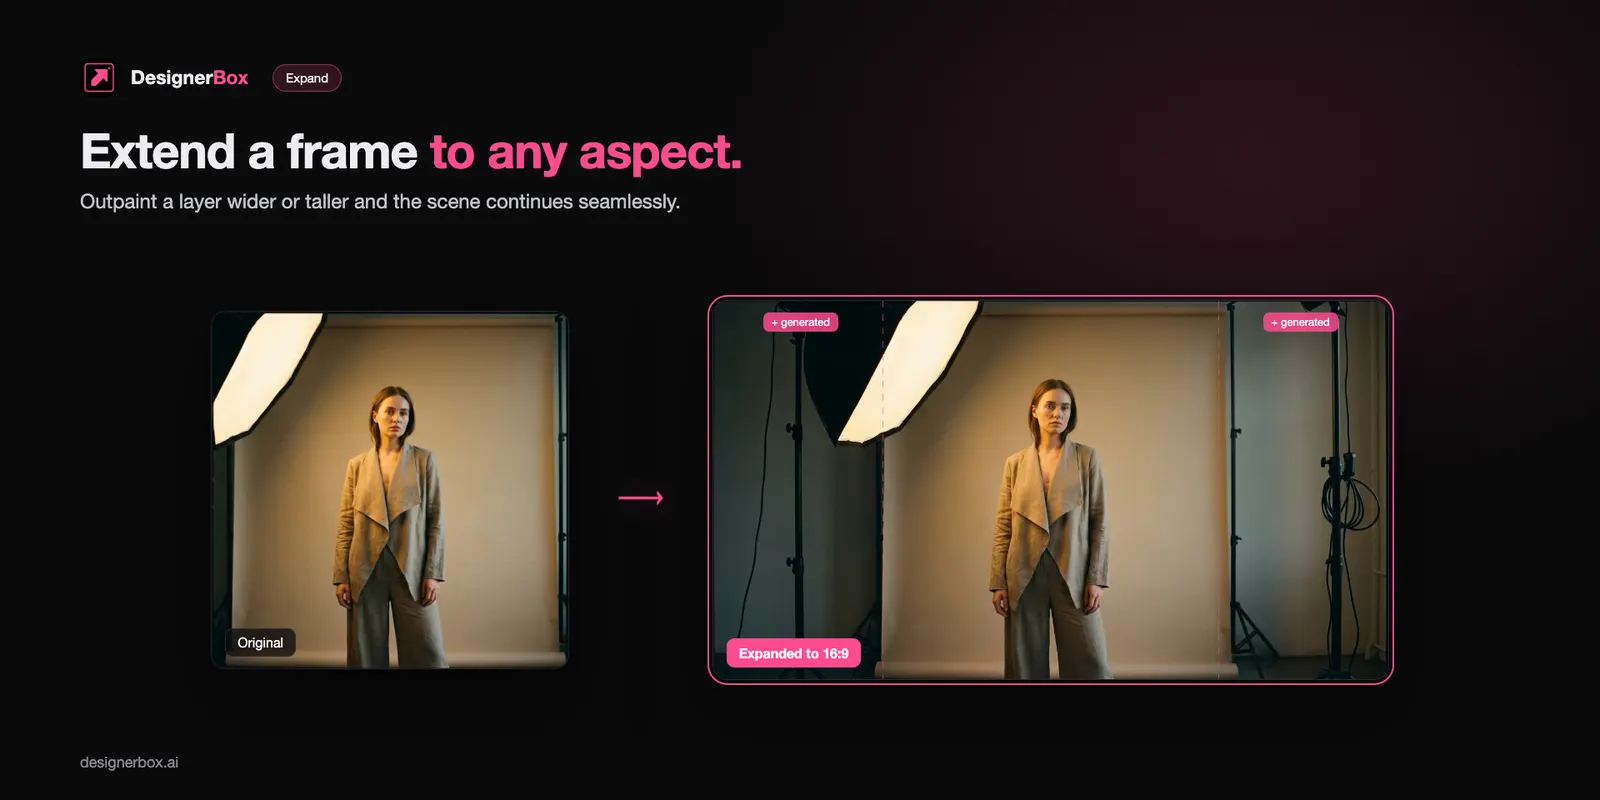
This is the tool that solves the recurring format problem: one shot, six placements, six aspect ratios, and a photographer who framed for none of them.
Product ad and photo angles
Both start from a product photo instead of a prompt, which is the difference that matters. Product ad returns campaign-ready shots. Photo angles re-shoots the same object from a viewpoint that was never captured.
Photo angles deserves a closer look. Cropping cannot give you a top-down view when your only file is a three-quarter front view. We covered the mechanics separately in turning one product photo into every angle.
Four jobs it handles well
Hero and landing-page imagery. Generate directly into the frame that needs filling, at the ratio the frame already is, then expand it when the breakpoint changes.
Ecommerce product and catalog photos. One accurate product photo goes in. Angles, backgrounds and lifestyle scenes come out, without booking a studio day per drop. Catalog work is where the credit math gets interesting, and where what a product photoshoot costs sets the real comparison.
Ad and social creative in multiple sizes. Build the 1:1, expand to 16:9 and 9:16, keep all three in the same file with the same source. Brand drift usually enters when assets get rebuilt in different tools, which is the problem keeping AI output on brand covers.
Quick cutouts for mockups and decks. Select a layer, remove the background and place the cutout.
The plugin is best at one job: filling a layout with real-looking content instead of gray boxes.
The job you build once
A layout shows you what a shot has to be. The crop, the background, the light, how much headroom the copy needs. Working that out in front of the real frame is fast, and the plugin exists so you can do it without leaving the file.
Doing it a second time by hand is the waste. Forty products, four placements each, and the same decisions get made again.
That is the split worth drawing. Figma is where you define the job on one product. DesignerBox is where the same job runs again on the next product and the one after that, with the same brand rules read from a record instead of remembered by a person. A saved workflow runs again without a rebuild. A colleague can run it as a DesignerBox app, which is a workflow with a form. Row one and row two hundred meet the same standard.
Build the shot in Figma while the layout tells you what it needs. Move the work into DesignerBox as soon as the answer has to hold for a whole catalog, whether that is product photography, ad creative or video ads.
What it costs
There is no flat per-image price. Every model has its own rate, and the cost of the run appears before you press Run.
| Operation | What it costs |
|---|---|
| Generate or edit an image | Set by the image model in the step |
| Create avatar | Nine fixed poses for 25 credits |
| Video | Priced per second of output, 40 to 560 credits for an 8-second clip |
On images, model costs differ a lot, even though every model puts a finished image on the canvas. Run background plates on a cheap model and save the default model for the shots a customer zooms into.
On video: the model you pick sets the price of each clip. Storyboard on a cheap model, then re-run the shot that works on an expensive one. The full breakdown of what a clip costs works through it model by model.
Uploading your own photos and the commercial license start on the Pro plan. AI video, virtual try-on, upscaling, the image editor and the video editor start on the Premium plan. Team features, shared brand kits and white label are on the Ultra plan, and every plan below Ultra is one seat. The free plan cannot make video. Plans and credits are on the pricing page, along with what each plan buys.
When you do not need a plugin at all
Figma now edits images on canvas, so some of this work no longer needs an external tool.
Figma’s help center lists the image tools in Figma Design: Make and edit images, Remove background, Boost resolution, Expand images, Isolate and erase objects, and Vectorize images. They need a paid plan and a Full seat, and they use Figma AI credits (help.figma.com, October 2026). Weave tools add Replace background and Change lighting. They have been in Figma Design since 24 June 2026, on Professional plans and above with Full seats. They are in open beta and use no AI credits until 6 October 2026. From that date they are generally available, and each run uses Figma AI credits (help.figma.com, October 2026).
So: if the job is removing a background, erasing an object, or boosting resolution on an image you already have, use Figma. It is on canvas, and it runs on the Figma AI credits your seat already includes.
What those two lists do not name is three jobs that start from your physical product. A new camera angle of the same object. A garment on a model. Product video. Those need a model that starts from your actual product photo, which is the line the plugin sits on.
Most tools on those lists edit an image you already have. The plugin adds shots of your product that do not exist yet. The longer version of that argument is in AI product photography in Figma. The rest of Figma’s own AI, from the agent to the text and layer tools, is mapped in Figma AI tools, sorted by job. Figma Weave, the standalone node canvas that used to be Weavy, is compared with four other canvas tools in Flora AI and its alternatives.
One account across four surfaces
The plugin is one door into the same account. The DesignerBox login and credit balance work identically in the browser extension, on mobile, and through the MCP server, which exposes 68 tools to Claude, Cursor, ChatGPT and any other MCP client. History and plan follow you across all of them.
That matters for a specific failure mode. A designer generates in Figma, a marketer generates in the browser, and neither can find what the other made. Same account, same library, one search.
Briefing an AI chat is a different skill from working on a canvas. Agentic AI for content creation covers it.
On network access, the plugin talks only to DesignerBox for sign-in, generation, and the CDN that serves your results. No third-party analytics, no trackers.
Your first run in the plugin
- Install. Add the plugin from the Figma Community listing.
- Open it. Plugins menu, then DesignerBox. Sign in with your DesignerBox account.
- Pick a tool from the Apps grid. Generate image is the fastest way to see whether the result fits your brand.
- Add a prompt or select a layer. Prompt-led tools take text. Product ad, photo angles, remove background and expand take a selected layer.
- Place the result. It arrives as an editable frame. Move it, mask it, restyle it like any other layer.
- Finish on canvas. Expand to each placement’s ratio, boost resolution, erase what the layout does not need.
- Save the settings that worked. Model, prompt and framing become the job you run again for the next product.
Steps 6 and 7 are the point. The plugin feeds Figma’s own image tools rather than standing in for them, and the setup you land on in one file is the thing that scales.
Once the plugin is open, the template directory shows the product-photography jobs worth starting from.
FAQ
Is the DesignerBox Figma plugin free?
Installing is free from the Figma Community. Generation spends DesignerBox credits against your plan, and there is a free plan.
Can I generate video inside Figma?
Yes. The plugin runs text-to-video from a prompt, or image-to-video using a selected layer as the opening frame. The poster lands on the canvas and the MP4 opens in a tab. AI video requires the Premium plan or higher.
Does the plugin work on the free Figma plan?
Yes. Figma’s help center says any user on a Starter plan can run plugins in Figma Design, FigJam, Figma Slides and Figma Buzz. Dev Mode needs a Full or Dev seat (help.figma.com, October 2026). Figma’s own Weave tools are the feature restricted to Professional plans and above with Full seats.
How is this different from Figma’s built-in AI image tools?
Figma’s built-in image tools remove backgrounds, boost resolution, expand images, isolate and erase objects, and make or edit an image from a prompt (help.figma.com, October 2026). The plugin adds video, new camera angles of your real product and shots built from a product photo, on your DesignerBox account.
Which models can I pick from?
The catalog carries image and video models from Google, OpenAI, ByteDance, Black Forest Labs, Kuaishou and Runway, including Nano Banana Pro, Seedream 5, FLUX 2 Flex, Veo 3.1 and Kling 2.6 Pro. You choose the model per generation rather than being handed one house style.
What does an image cost in the plugin?
It depends on the model you pick. The model on the step sets the rate, and the plugin shows the cost before the run.
Can I use the results in paid ads?
Yes, from the Pro plan up. That is where the commercial license starts. Check your plan before you deliver client work.
Sources
- Figma Learn, Use AI tools in Figma Design: the image tools, and the plan and seat they need (help.figma.com/hc/en-us/articles/23870272542231, read 2 October 2026)
- Figma Learn, How Figma AI credits work: seats include AI credits, and the image tools use them (help.figma.com/hc/en-us/articles/33459875669015, read 2 October 2026)
- Figma Learn, Use plugins in files: where plugins run, by plan and seat (help.figma.com/hc/en-us/articles/360042532714, read 2 October 2026)
- Figma Learn, Use Weave tools in Figma and What’s new from Config 2026: the Weave tool examples, the 24 June 2026 rollout, plan requirements and beta credit treatment (help.figma.com/hc/en-us/articles/40779260614935 and help.figma.com/hc/en-us/articles/39582753756695, read 2 October 2026)
- Figma Learn, AI credit updates FAQ: Weave tools become generally available on 6 October 2026 and use AI credits from that date (help.figma.com/hc/en-us/articles/42614902212887, read 2 October 2026)
- The plugin listing itself: DesignerBox on the Figma Community
- DesignerBox plans, credits, the model catalog, the MCP tool count and the plan gates: (designerbox.ai/pricing and designerbox.ai/mcp, September 2026)
Figma plugin behavior, AI tool lists, AI credits and Weave availability re-checked on Figma’s Help Center on 2 October 2026. DesignerBox plans and credits are current as of September 2026 on designerbox.ai/pricing, and the model list was re-checked on designerbox.ai/models on 2 October 2026. Model specifications in this category change monthly. Individual results vary.