To create product images with AI, start from a real photo of the product, choose a method that keeps the product’s own pixels or shape, and write a brief of six lines: use, product, scene, light, camera and keep. Google, OpenAI and Black Forest Labs each publish a prompting guide. They agree on four rules, and one brief can follow all four.
Most guides to this topic list the same steps: take a good photo, pick a style, make variations, test. None of that tells you what to type. The words you give the model decide whether the label stays readable and the color stays true.
This guide reads the three model makers’ own documentation, as of October 2026. It shows where the guides agree, where they split, and a brief that works on all three. It is written for a brand or a small team with 20 to 500 products to shoot.
Key Takeaways
The product goes in as a photo. A text description gives the model a product to invent. A source photo gives it your product to keep.
Three guides share four rules. Be specific, name the one thing that changes, say what each input image is for, and change one thing at a time.
The guides split on three points. They differ on line order, on “no” statements and on camera specs. A brief written in positive words with plain shot terms follows all three.
Six lines cover a product image. Use, product, scene, light, camera and keep. The keep line is the one most prompts leave out.
No vendor promises an exact copy. Google says its model “can still struggle with small faces, accurate spelling, and fine details in images” (deepmind.google, October 2026). Every result needs a check against the source photo.
A saved brief is worth more than a good one. The brief matters most on product forty, when the same six lines still produce the same shot.
How do you create product images with AI?
You create product images with AI in three moves. First you pick the method, which decides how much of the real product survives. Then you write the brief, which tells the model what to draw around it. Then you check each result against the source photo before it reaches a listing or an ad.
The order matters. A careful prompt cannot rescue the wrong method. If you ask a model to draw your bottle from a text description, it draws a bottle. It has never seen yours.
The input is the first decision, and it comes before any of this. One clean, sharp, evenly lit frame of the product is the base for every image that follows. The guide to the source product photo covers what that frame has to get right.
Which method keeps the product accurate?
There are four ways to get a product image from a model. They differ in one thing: who draws the product.
| Method | What you give the model | Who draws the product | Use it for |
|---|---|---|---|
| Text only | A written description | The model, from nothing | Concepts and mood boards, never a listing |
| Reference image | Your photo plus a scene description | The model, guided by your photo | Lifestyle scenes, new angles, ads |
| Targeted edit | Your photo plus one change | You. The model changes one element | Background, surface or light changes |
| Cutout and scene | Your photo, isolated, then placed | You. The model draws the scene only | Main images, anything a label must survive |
The lower rows keep more of the real product. The upper rows give the model more freedom. Pick the lowest row that still produces the shot you need.
Reference images have limits, and the limits differ by model. Google’s image guide lists up to 6 high-fidelity object images for Nano Banana Pro, up to 10 for Nano Banana 2 and up to 14 for Nano Banana 2 Lite (ai.google.dev, October 2026). A product photographed from three sides is three object images. Our comparison of Nano Banana 2 and Nano Banana Pro sets Google’s two models side by side.
For the cutout method, OpenAI names the two things that decide the result: “edge quality (clean silhouette, no fringing/halos) and label integrity (text stays sharp and unchanged)” (developers.openai.com, October 2026). Those are also the two things to inspect first. Our guide to the GPT Image 2 API covers what each image costs.
For worked examples of each method, graded by what the model drew, see AI product photography examples.
What the model makers agree on
Google, OpenAI and Black Forest Labs wrote their guides separately, for different models. Four rules appear in all three.
| Rule | OpenAI | Black Forest Labs | |
|---|---|---|---|
| Be specific | ”Be hyper-specific: The more detail you provide, the more control you have." | "Be concrete about materials, shapes, textures, and the visual medium" | "Be specific about what changes” |
| Name the one change, state what stays | ”change only the [specific element]” and “Keep everything else in the image exactly the same" | "change only X” plus “keep everything else the same” | Be “explicit about what should stay the same” |
| Say what each input image is for | ”place [element from image 2] onto [element from image 1]" | "Reference each input by index and description" | "clearly describe the role of each” |
| Change one thing at a time | ”Iterate and refine: Don’t expect a perfect image on the first try." | "refine with small, single-change follow-ups” | Its good examples are single changes: “Change the shirt color to red” |
Sources, all read in October 2026: Google’s image generation guide, OpenAI’s image prompting guide, and Black Forest Labs’ FLUX.2 prompting guide and single-reference editing guide.
Black Forest Labs also lists the prompts to avoid: “Make it better”, “Improve the lighting”, “Make it more professional” and “Fix the image”. Each one asks for a judgment and names no change.
Two of the three add a fifth rule. Google says to “Provide context and intent” and explain the purpose of the image. OpenAI says to “include the intended use (ad, UI mock, infographic)”. Telling the model that the image is a marketplace main image changes how polished the result is.
OpenAI adds one warning that applies to any series of edits. Its guide says to “repeat the preserve list on each iteration to reduce drift”. A relight after a background change needs the full keep line again.
Where the guides disagree
The three guides split on three points. A brief copied from one model’s guide can work against another model.
| Point | OpenAI | Black Forest Labs | |
|---|---|---|---|
| Line order | No fixed order. Its product template starts with the product | ”background/scene → subject → key details → constraints" | "Main subject → Key action → Critical style → Essential context → Secondary details" |
| "No” statements | Describe the scene in positive words. It calls this a semantic negative prompt | Lists them as constraints: “no watermark”, “no extra text" | "FLUX.2 does not support negative prompts.” |
| Camera specs | Shot terms such as “wide-angle shot” and “macro shot" | "detailed camera specs may be interpreted loosely” | Name a camera and lens: “Shot on Fujifilm X-T5, 35mm f/1.4” |
Each split has a safe reading.
Order. Black Forest Labs says “Word order matters” and that FLUX.2 “pays more attention to what comes first”. OpenAI puts the scene first. Write the brief as labeled lines, which OpenAI’s guide recommends for complex requests. Then you can move the product line to the top for FLUX and the scene line to the top for GPT Image, with no rewrite.
Negatives. Positive wording works on all three. Black Forest Labs gives the pattern: instead of “no blur”, say “sharp focus throughout”. “A plain white surface with nothing else on it” tells every model what to draw.
Camera. Plain shot terms work on all three: the angle, the framing and the kind of lens. A camera model name is a FLUX habit. On a GPT Image model, treat it as a hint about the look and never as a setting.
The six-line brief
One brief of six labeled lines follows the four shared rules and avoids the three splits. Each line holds one decision.
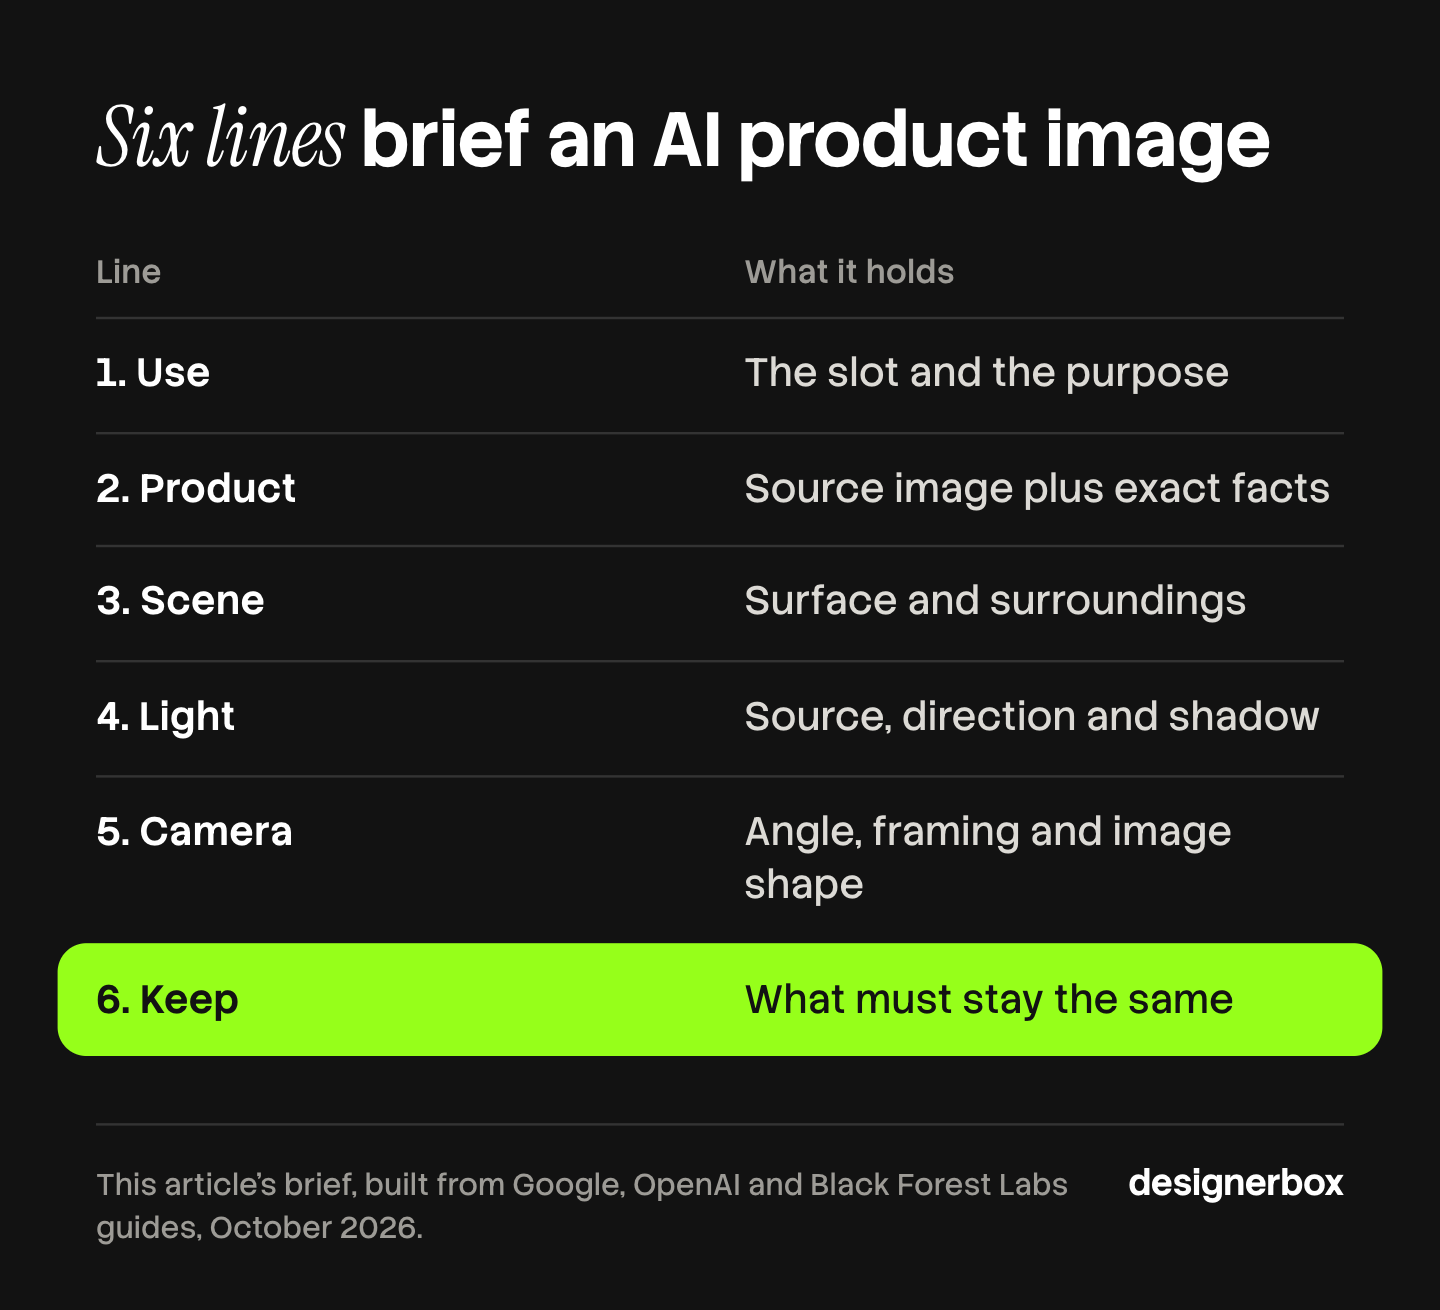
| Line | What it holds | Example |
|---|---|---|
| 1. Use | The slot and the purpose | ”A marketplace gallery image for a skincare brand.” |
| 2. Product | The image it comes from, plus the facts that must be right | ”Image 1 is the product: a 30 ml amber glass dropper bottle with a white label that reads ‘NIGHT OIL’.“ |
| 3. Scene | The surface and what is around the product | ”The bottle stands on a pale travertine slab. A folded linen cloth sits behind it, out of focus.” |
| 4. Light | The source, the direction and the shadow | ”Soft daylight from the left. One soft shadow falls to the right.” |
| 5. Camera | The angle, the framing and the shape of the image | ”Eye-level shot, the bottle fills two thirds of the frame. Square image.” |
| 6. Keep | What must stay exactly as it is in Image 1 | ”Keep the bottle’s shape, glass color, dropper and label text exactly as in Image 1.” |
Three details make the lines work.
Put label text in quotes. OpenAI’s guide says to “Put literal text in quotes or ALL CAPS”. For a brand name with an unusual spelling, it says to spell the word out letter by letter.
Give colors as codes where the model reads them. Black Forest Labs says FLUX.2 “supports precise color matching using hex codes”, and that the code must belong to an object: “The car is #FF0000” works better than “use red #FF0000 in the image”. This is FLUX.2 guidance. The other two guides do not make the same claim.
Write the keep line as a list. “Keep the product the same” names nothing. Shape, color, closure, label text and logo position are five things a person can check.
Line 2 and line 6 are the ones a general prompt skips. They are also the two that separate your product from a product that looks similar.
Prompt for product photography: three briefs to copy
These three briefs follow the six lines. Change the product facts and keep the structure.
A white-background packshot, as a cutout. Use this when the product’s pixels must survive.
Use: a marketplace main image. Product: Image 1 is the product, a matte black ceramic mug with a cork base. Scene: a pure white background with nothing else in the frame. Light: even, soft studio light with one faint contact shadow under the mug. Camera: straight-on shot, the mug centered and filling most of the frame, square image. Keep: the mug’s shape, the matte finish, the cork base and its proportions exactly as in Image 1.
A lifestyle scene from a reference image. Use this for gallery slots and ads.
Use: a lifestyle image for a product page. Product: Image 1 is the product, a tan leather card holder with one line of stitching along each edge. Scene: the card holder lies on a dark oak desk beside a closed notebook. Light: warm window light from the right, late afternoon. Camera: 45-degree shot from above, the card holder in sharp focus, 4:5 image. Keep: the leather color, the stitching, the edge shape and the embossed logo position exactly as in Image 1.
A targeted edit of an approved image. Use this to change one thing.
Using the provided image, change only the surface under the bottle to pale gray concrete. Keep the bottle, the label, the light and the camera angle exactly the same.
The third brief is Google’s own editing template with product words in it. Google’s template for a new product shot is longer: “A high-resolution, studio-lit product photograph of a [product description] on a [background surface/description]. The lighting is a [lighting setup, e.g., three-point softbox setup] to [lighting purpose]. The camera angle is a [angle type] to showcase [specific feature]. Ultra-realistic, with sharp focus on [key detail]. [Aspect ratio].” It covers lines 2 to 5 and has no keep line, because it draws the product from text.
For garments, the facts in line 2 are different: fit, fabric, print and construction. The guide to AI prompts for clothing product photos has 20 briefs for that case.
What to check before an image ships
A brief lowers the risk that the product changes. It does not remove the risk, and the model makers say so. OpenAI writes that its image models “can still struggle with precise text placement and clarity” and “may occasionally struggle to maintain visual consistency for recurring characters or brand elements across multiple generations” (developers.openai.com, October 2026).
Open the result beside the source photo and check five things.
- Label text. Read every word. A letter that changed is the most common fault and the easiest to miss at small size.
- Shape and proportion. Compare the outline. A cap that grew or a handle that moved is a different product.
- Color. Compare the product color under the new light with the source. Warm light shifts it.
- Count. Buttons, stitches, ports and holes. Count them in both images.
- Scale. Check the product against the objects around it. A 30 ml bottle should not stand as tall as a mug.
Then check the slot’s own rules. Amazon’s main image needs a pure white background, and the product should fill 85% of the image (sellercentral.amazon.com, September 2026). Channel by channel, the specs are in the guide to ecommerce product photography.
One more fact belongs in your records. Google states that “All generated images include a SynthID watermark” on its Gemini image models. The watermark is invisible to a shopper. It still marks the file as generated.
To choose a model on evidence, run the five checks on your hardest product first. The method is in the guide to AI product photo accuracy.
One brief for every product
A brief that works once is a start. Anyone can make an AI picture. Making hundreds that still look like your brand is the hard part.
In DesignerBox you save the brief as a workflow. You set the scene, the light, the camera and the keep line once. Your brand rules sit in a brand profile, and the workflow reads them on every run. Product forty gets the same six lines as product one.
Three critic steps score the results of a run, and best-of-N keeps the best one. You still compare the result with the source photo. If one detail is wrong, the image editor makes one edit after another, and the picture keeps its detail and resolution.
You can publish the workflow as an app, so a colleague adds a photo and presses Run. Batch runs it over a whole sheet of products, and you review the results in one pass. The cost is shown before the run.
The same product photo then feeds the ad and the video. The full workflow from the first product photo to the finished ad, in one subscription. Uploading your own photos and the commercial license start on the Pro plan. The image editor starts on the Premium plan. Plans and credits are on the pricing page. For the product side of this job, see AI product photography.
A free plan for your first run
Start from a template, add your brand and your products, and see the cost before you run it. Get started free.
FAQ
Can AI create product images from a text description alone?
It can create an image of a product, and the product will be invented. A model that has only words draws a plausible bottle, with a plausible label. For a listing or an ad, give the model a real photo of the product and write a keep line. Text-only generation fits concepts and mood boards.
How do you generate product images with AI step by step?
Take one clean source photo. Pick the method: a cutout, a targeted edit or a reference image. Write six lines for use, product, scene, light, camera and keep. Run it, then compare the result with the source photo for label text, shape, color, count and scale. Change one thing at a time if a result is wrong.
What is a good prompt for product photography?
A good prompt names the product and its exact facts, the surface, the light, the camera angle and the shape of the image. It ends with a list of what must stay the same. Google’s own template covers the first five parts. The keep list is the part you add when the product comes from a photo.
Do negative prompts work for product images?
It depends on the model. Black Forest Labs states that FLUX.2 does not support negative prompts. Google advises describing the scene in positive words. OpenAI lists exclusions such as “no watermark” as valid constraints. Positive wording is the form that all three accept, so write “a plain white surface” in place of “no props”.
Which AI model is best for product images?
No vendor guide answers that, and a leaderboard will not either. The models differ in how many reference images they take and how they treat text and color. Run the same brief on your hardest product on two or three models, and apply the five checks. The model that keeps that product accurate is the one to use.
Can AI product images go on Amazon?
Amazon’s general image guide judges the image and does not name AI. The main image needs a pure white background and the product at 85% of the frame, and it must represent the product accurately (sellercentral.amazon.com, September 2026). For clothing, Amazon says only photos are allowed. Check the current guide for your category before you upload.
How much does it cost to create product images with AI?
The cost depends on the model and the number of results you ask for. Model makers publish their own API prices on their pricing pages. In DesignerBox the cost is shown before the run, so you can price a set before you make it.
Sources
- Google, Gemini API image generation guide, prompting templates, best practices, reference image limits and SynthID statement, read October 2026.
- Google DeepMind, Gemini 3 Pro Image model page, stated limits, read October 2026.
- OpenAI, GPT Image Generation Models Prompting Guide, read October 2026.
- OpenAI, image generation guide, stated limits, read October 2026.
- Black Forest Labs, FLUX.2 prompting guide, read October 2026.
- Black Forest Labs, single-reference editing guide, read October 2026.
- Amazon Seller Central, product image guide, read September 2026.
- DesignerBox pricing, October 2026.
Prompting rules verified from the Google, OpenAI and Black Forest Labs guides as of October 2026. Model behavior changes with each release. Individual results vary.