
A product photography workflow is the fixed order of steps that turns a new product into finished listing images: plan, shoot, clean, correct, format and review. To scale it, automate the stages where the decision is the same for every product, such as background, crop and export size. Keep a person on the stages where the answer depends on the product.
Suppose 200 new products arrive for the season. Amazon asks for one main image and recommends at least six more for each product. That is 1,400 images for one channel, before the store and the ads. Nobody edits 1,400 images by hand in a week and keeps them all the same.
Most advice answers this with a ratio: automate most of the work and keep the rest manual. A ratio does not tell you which work. This guide splits the product photography workflow into six stages and gives one test for each stage. It is written for brands with 20 to 500 products, and for the agencies that produce listing images for them.
Key Takeaways
- Six stages, one order. Plan, shoot, clean, correct, format and review. Every product goes through all six.
- One test decides the split. Ask whether the decision is the same for every product. If yes, write it as a rule and automate it. If it depends on the product, a person decides.
- Clean and format are rules. Amazon, Google and Shopify publish the background, fill and size rules, so software can apply them to every image.
- Plan, shoot and review stay with people. The plan sets the standard, the shoot sets the truth of the product, and review catches what the rules missed.
- Review becomes the slow stage. After the repeat stages are automated, 1,400 images still need a person to keep or discard each one.
- The repeat stages have three routes. Presets in a desktop editor, an editing service, or one saved workflow over a sheet of products.
What is a product photography workflow?
A product photography workflow is the repeatable path from a physical product to the images on its listing. It names each stage, the decision made in that stage, and who makes it. A written workflow lets a second person, or software, produce the same result as the first person.
The workflow matters more as the catalog grows. With 10 products, one person remembers every decision. With 200, the decisions have to live outside that person’s head, in a product photography style guide and a shot list.
A workflow is also where consistency comes from. Two editors with no shared rules will crop, light and color the same product in two ways. The fix is one written standard that both follow, and our guide to consistent product images lists the six layers that standard has to cover.
The six stages of a product photography workflow
Each stage has one main decision. The table shows the decision and who should make it.
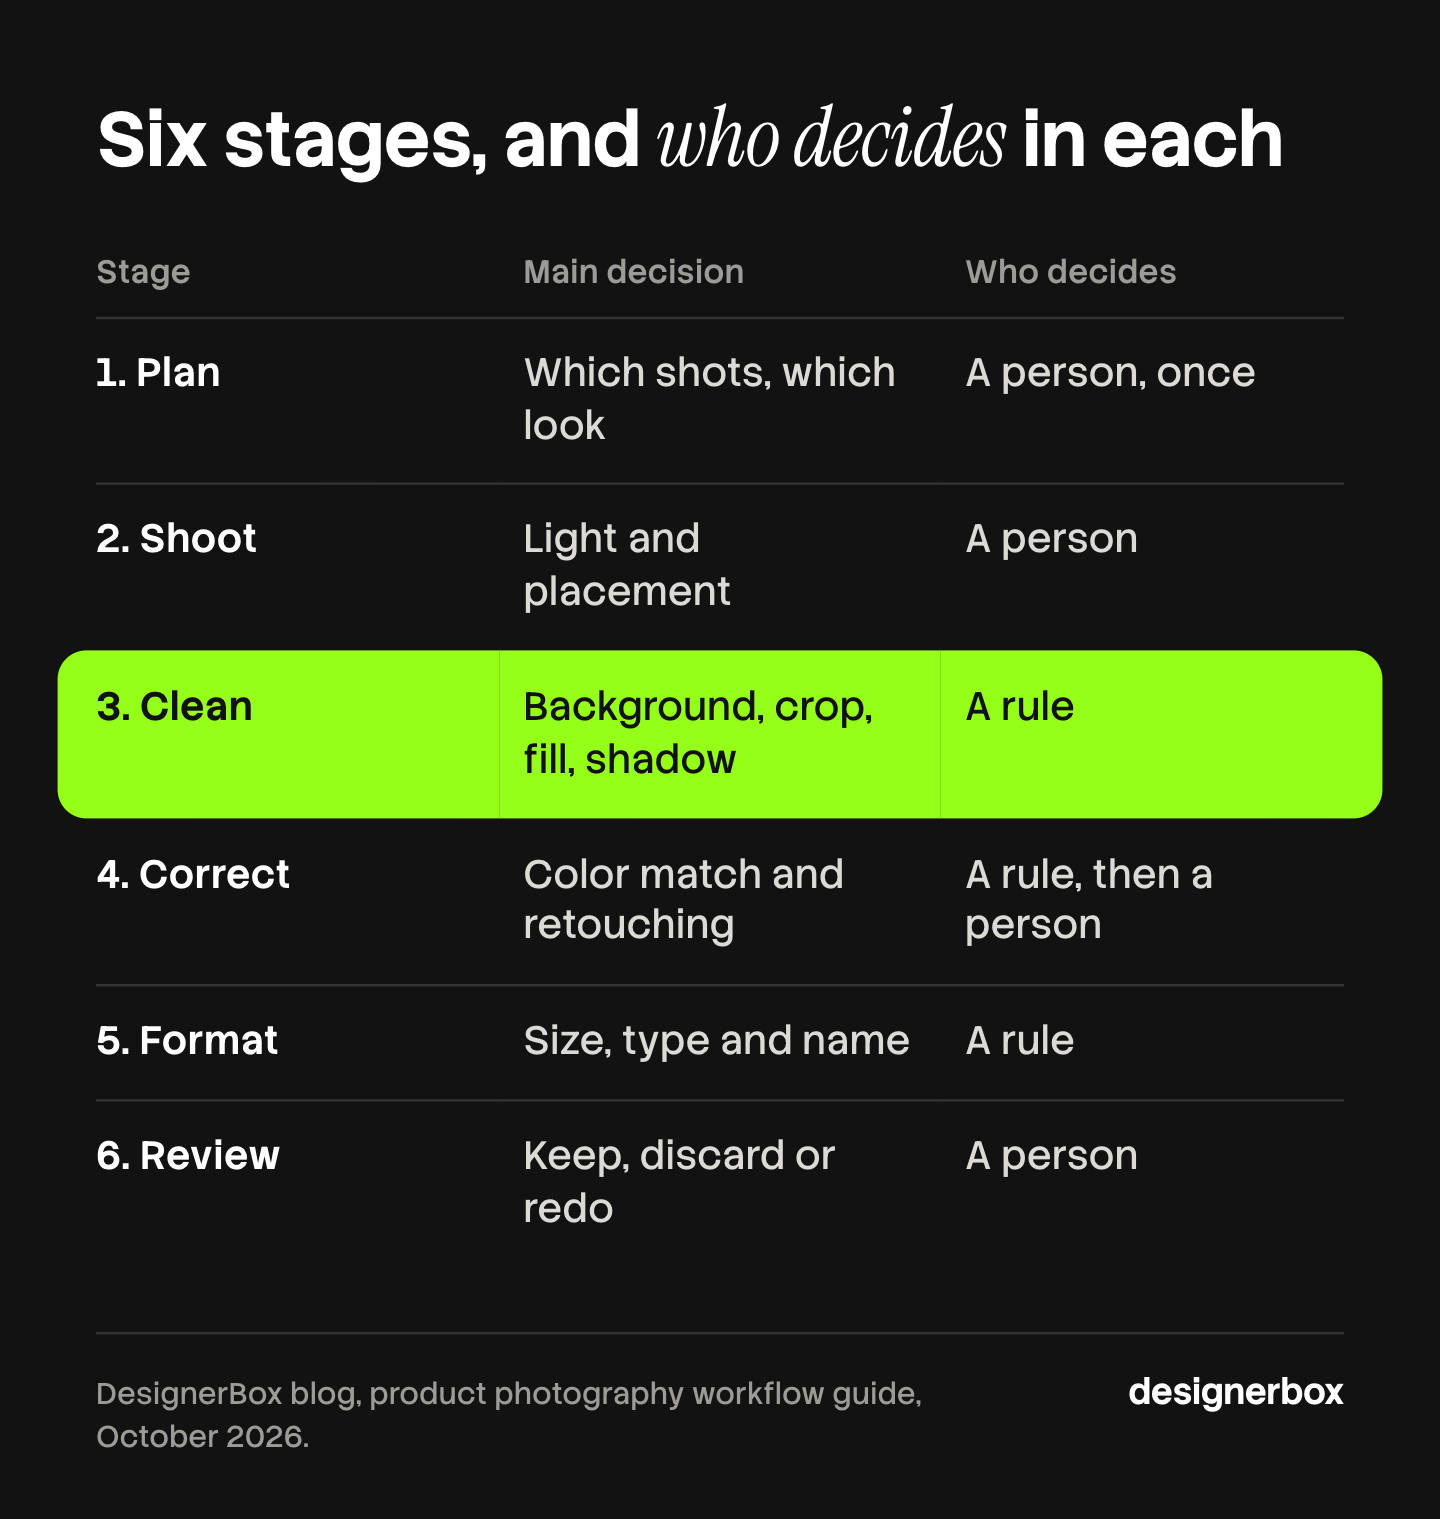
| Stage | The main decision | Same for every product? | Who decides |
|---|---|---|---|
| 1. Plan | Which shots, which look | Set once per brand | A person, once |
| 2. Shoot | How this product is lit and placed | No | A person |
| 3. Clean | Background, crop, fill, shadow | Yes | A rule |
| 4. Correct | Color match and retouching | Partly | A rule, then a person |
| 5. Format | Size, file type and name per channel | Yes | A rule |
| 6. Review | Keep, discard or redo | No | A person |
Plan. You choose the shots each product gets and the look they share. This happens once per brand and again when the brand changes. Baymard’s testing found that 42% of users try to judge a product’s size from the product page images, so an in-scale shot belongs in the plan (Baymard Institute, October 2026).
Shoot. You photograph the product, or you choose the one photo that every later image starts from. Our guide to the source product photo covers what that photo needs.
Clean. You remove the background, center the product, set how much of the frame it fills, and add or remove the shadow.
Correct. You match the color to the real product and repair dust, creases and reflections.
Format. You export each image at the size, file type and name that each sales channel asks for.
Review. A person looks at every result and decides to keep it, discard it or redo it.
The one test for what to automate
Ask one question at each stage: is the decision the same for every product?
If the answer is yes, the decision is a rule. You can write it down in one line. “The background is pure white.” “The product fills 85% of the frame.” “The file is a JPEG, 2048 pixels square.” Software applies a written rule to image 1 and image 1,400 in the same way, and it does not get tired.
If the answer is no, the decision needs a person. “Does this fabric color match the garment on the table?” has a different answer for every product. No rule covers it, because the answer is in the product and not in the standard.
Some stages are mixed. Color correction is the clearest case. A white balance setting is a rule, and you can apply it to a whole shoot. Checking the result against the physical product is a judgment, and it stays with a person.
This test replaces the ratio. You do not need to aim for a percentage. You go through the six stages, write down every decision that passes the test, and automate those.
What to automate in a product photography workflow
Three kinds of work pass the test on almost every catalog.
Clean. Background removal, centering, fill and shadow follow one brand rule. Marketplaces also set this rule for you. Amazon’s main image must have a pure white background with RGB values of 255, 255, 255, and the product should show as 85% of the image (Amazon Seller Central, October 2026).
Format. Every channel publishes its sizes, so the export is a lookup and never a judgment.
| Channel | Published image rule | Source |
|---|---|---|
| Amazon | 500 pixels minimum and 10,000 maximum on the longest side. 1,000 pixels or more turns on zoom. JPEG is recommended | Amazon Seller Central, October 2026 |
| Google Merchant Center | No promotional overlays or watermarks. No image over 64 megapixels or 16MB. At least 500 x 500 pixels for all products from 31 January 2027, with 1500 x 1500 recommended | Google Merchant Center Help, October 2026 |
| Shopify | Up to 5000 x 5000 pixels, or 25 megapixels, and under 20 MB. A square image of 2048 x 2048 pixels usually displays best | Shopify Help Center, October 2026 |
Google’s rules are on its image link specification, and Shopify’s are on its product media types page. Our guide to ecommerce product photography compares five channels in more detail. To get the finished files into a store, see the four routes to bulk upload images to Shopify.
File. The file name, the folder and the product code attached to each image follow one pattern. A fixed image file naming convention lets software sort 1,400 files without a person opening one.
The baseline part of correction also passes the test. Exposure, white balance and sharpening for one shoot can be one setting applied to every frame from that shoot.
What to keep manual
Four kinds of work fail the test, and they should stay with people.
- The plan. Choosing the look is a brand decision. It is made once, by a person, and every automated stage reads it.
- The shoot of the product itself. The source photo is the record of what the product is. Amazon requires the image to accurately represent the real scale, quantity and color of the product (Amazon Seller Central, October 2026). An error here repeats in every image made from it.
- Hard materials. Glass, polished metal, liquids and sheer fabric reflect and transmit light. A rule that works on a cotton shirt often fails on a perfume bottle, so these products need a person to check each one.
- Campaign images. A campaign image is made once, for one idea. Nothing repeats, so there is nothing to automate.
Small runs also stay manual. Writing and testing a rule takes time. If a drop has a few products and will never repeat, editing by hand is faster than building the rule.

Where generated images fit
AI image tools add a branch after the correct stage. You start from the approved product photo and make new scenes, angles or backgrounds around it, without a second shoot.
The same test applies. “Put every product on the same oak table in morning light” is a rule, so it can run on every product. “Does the product in this scene still look like the real product?” is a judgment, so it goes to review.
Generated images raise the review load. A cut-out can fail in a few known ways. A generated scene can change the product itself: a warped print, a garbled logo, a missing seam. Our guide to AI product photo accuracy lists what to check. Marketplaces also set rules for these images, covered in AI product photos and marketplace rules.
Why review becomes the slow stage
Automation removes the editing time. It does not remove the looking time. Every image still needs a person to accept it before it goes on a listing.

Here is an illustrative count. A drop of 200 products at seven images each is 1,400 images. If a reviewer spends two minutes on each image, that is 2,800 minutes, or about 47 hours. The two minutes is an assumption for the arithmetic. Time your own reviewer on 50 images and use that number.
Three habits shorten review without lowering the standard:
- Review in a grid. Put 20 images of the same shot type side by side. A wrong crop or a warm color cast is visible in a second when its neighbors are correct.
- Check against the source. Keep the source photo beside each result, so the reviewer compares and does not rely on memory.
- Redo one image, never the set. A failed image goes back alone. The accepted ones do not move.
A written list keeps every reviewer on the same checks. Our product photography checklist has 30 checks in six stages.
Our guide to bulk product images covers how to price the review time into a catalog run. To size the run first, our catalog photoshoot guide shows how to count the images and sort products into tiers.
Three routes for the repeat stages
Once you know which stages are rules, you choose how to run them. There are three common routes, and each fits a different team.
| Route | How it works | Best for |
|---|---|---|
| Presets and actions in a desktop editor | An editor records the steps once and applies them to a folder | A photographer or in-house editor who already owns the software and shoots in a controlled set |
| An editing service | You send files and a written spec, and a team returns edited images | Teams with steady volume and no editor on staff |
| One saved workflow over a sheet of products | The steps are saved once, and each row of a sheet is one product | Brands and agencies that need the same set for every product, with review built in |
The routes can be combined. Many teams shoot and color correct in a desktop editor, then run the clean, scene and format stages as a saved workflow. If you use a service, our guide to product photo editing services explains what to send and where the price rises.
Whichever route you choose, write the spec first. A preset, a service and a workflow all need the same input: the rules from your plan. Our guide to bulk image editing shows which edits are safe to apply to a whole batch.
One workflow for the repeat stages
DesignerBox is AI creative production for brands and agencies. Anyone can make an AI picture. Making hundreds that still look like your brand is the hard part. DesignerBox covers the repeat stages of this workflow: clean, scenes, format and review. For the product side of this job, see AI product photography.
You build a workflow once with your brand, your products and your rules. A batch then runs that workflow over a sheet, one product per row, with up to 200 rows in one sheet. Every row reads the same brand rules. The cost of the whole sheet is shown before the run (DesignerBox batch page, October 2026).
Review is part of the sheet. Each row shows its state. You keep or discard each result, and you re-run one row without changing the others. Kept results go to Assets beside their source photo.
For one picture that needs more work, the image editor makes one edit after another. Each edit keeps the detail and the resolution of the edit before it (DesignerBox image editor page, October 2026). The same subscription covers ads and video, so the full workflow from the first product photo to the finished ad is in one place.
The limits are worth stating. The plan and the shoot stay with you, and so does the final decision on every image. DesignerBox does not publish to a store. You download the results, or send them with a webhook or an S3 step. Uploading your own product photos and the commercial license start on the Pro plan, and AI video and both editors start on the Premium plan. Every plan below Ultra is one seat. Plans are on the pricing page.
Scale content without limits.
Generate content for your products or services with AI, starting today, and keep your brand on every piece. Start with one product, check the result, then run the whole sheet. Get started free
FAQ
What are the stages of a product photography workflow?
There are six: plan, shoot, clean, correct, format and review. The plan sets the shots and the look. The shoot produces the source photo. Clean, correct and format prepare each image for its channel. Review is where a person keeps, discards or redoes each result.
Which parts of product photo editing can you automate?
Automate every decision that is the same for every product. That covers background removal, centering, fill, shadow, baseline exposure and white balance, export size, file type and file name. Checking color against the real product, and the final keep or discard decision, stay with a person.
How do you run the repeat stages on a whole catalog?
Write the rules first, then pick a route. A desktop editor applies recorded steps to a folder. An editing service works from your written spec. A saved workflow runs the same steps on every row of a product sheet. All three need the same input: one standard for background, crop, color and size.
How many images does one product need?
It depends on the channel. Amazon requires at least one compliant main image and recommends at least six additional images and one video for each product (Amazon Seller Central, October 2026). Your own store and your ads add more, so count the files per product before you plan the run.
What should stay manual in product photography?
Keep four things manual: the plan that sets the look, the shoot of the real product, products made of glass, polished metal, liquid or sheer fabric, and one-time campaign images. Small drops that will never repeat are also faster by hand than by rule.
When is a catalog too small to automate?
Automation is worth the setup when the same decision repeats. If writing and testing a rule takes longer than making the edits by hand, edit by hand. If the same drop shape returns every season, write the rule on the first one and reuse it.
Can I run a product photography workflow in DesignerBox?
You can run the repeat stages. A saved workflow applies your brand rules to each product, and a batch runs it over a sheet of up to 200 products. You see the cost before you press Run, and you keep or discard each result yourself. The plan and the shoot stay with you.
Sources
- Amazon product image requirements: main image count, recommended additional images, pure white background, 85% fill, pixel limits, zoom and accurate representation: Amazon Seller Central, product image requirements, accessed October 2026
- Google Merchant Center image rules: overlays and watermarks, 64 megapixel and 16MB limits, the 500 x 500 pixel minimum from 31 January 2027: Google Merchant Center Help, image link, accessed October 2026
- Shopify product image limits and the 2048 x 2048 pixel recommendation: Shopify Help Center, product media types, accessed October 2026
- 42% of users try to judge product size from product page images: Baymard Institute, the current state of product page UX, accessed October 2026
- DesignerBox batch: one product per row, up to 200 rows, row states, re-running one row, Assets, the cost shown before the run, and plan coverage: DesignerBox batch page (designerbox.ai/product/batch), October 2026
- DesignerBox image editor: each edit keeps the detail and the resolution: DesignerBox image editor page (designerbox.ai/product/image-editor), October 2026
- DesignerBox plan gates: DesignerBox pricing page (designerbox.ai/pricing), October 2026
Amazon, Google, Shopify and Baymard facts verified on each publisher’s own page, October 2026. DesignerBox features verified on designerbox.ai, October 2026. The review time example is illustrative arithmetic. Individual results vary.