 Marble surfaces

Marble background product photography from one photo

Upload one photo of your product. DesignerBox places it on honed or polished marble, with the veining set where it does not cross the product. You choose cool Carrara grey or warm cream, and you get the crops a listing, an ad and a feed post need.

Start free
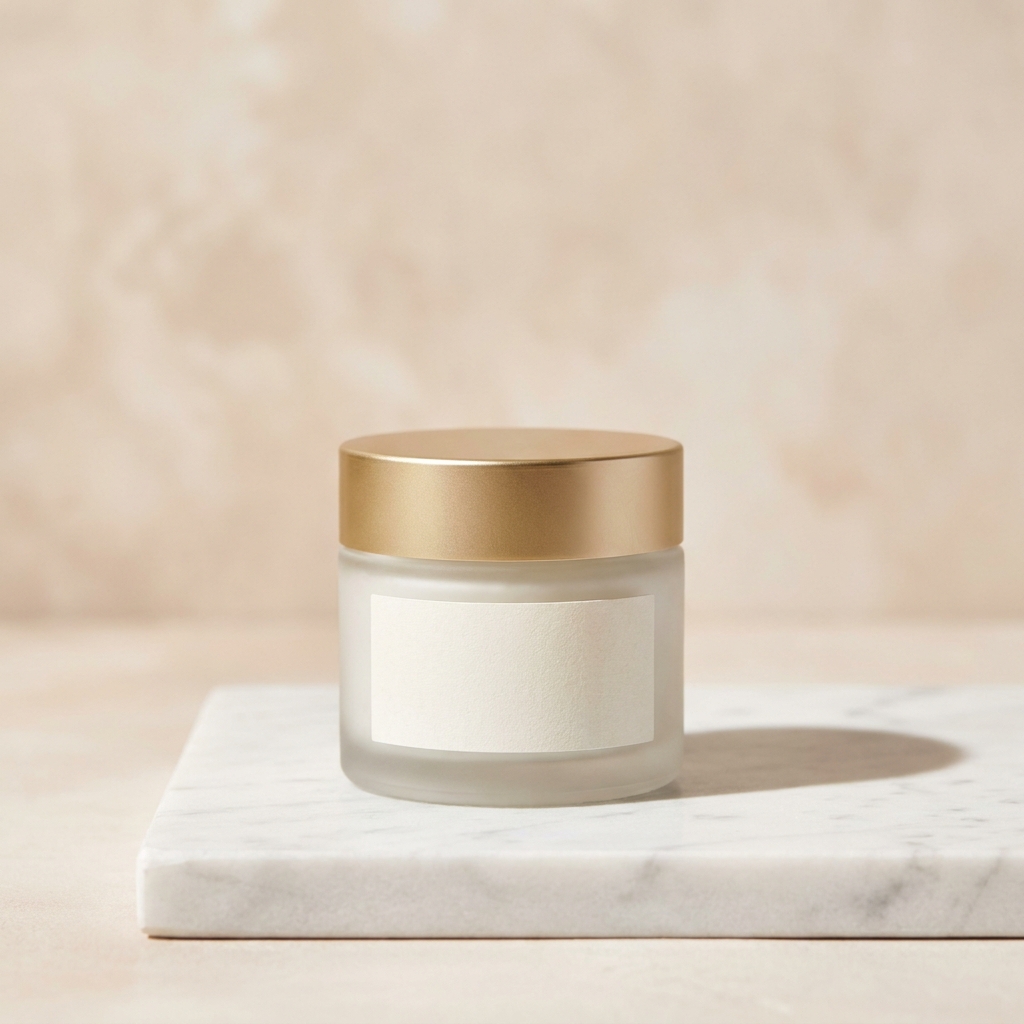
Frosted glass skincare jar with a matte gold lid on a honed white Carrara marble slab with soft grey veining
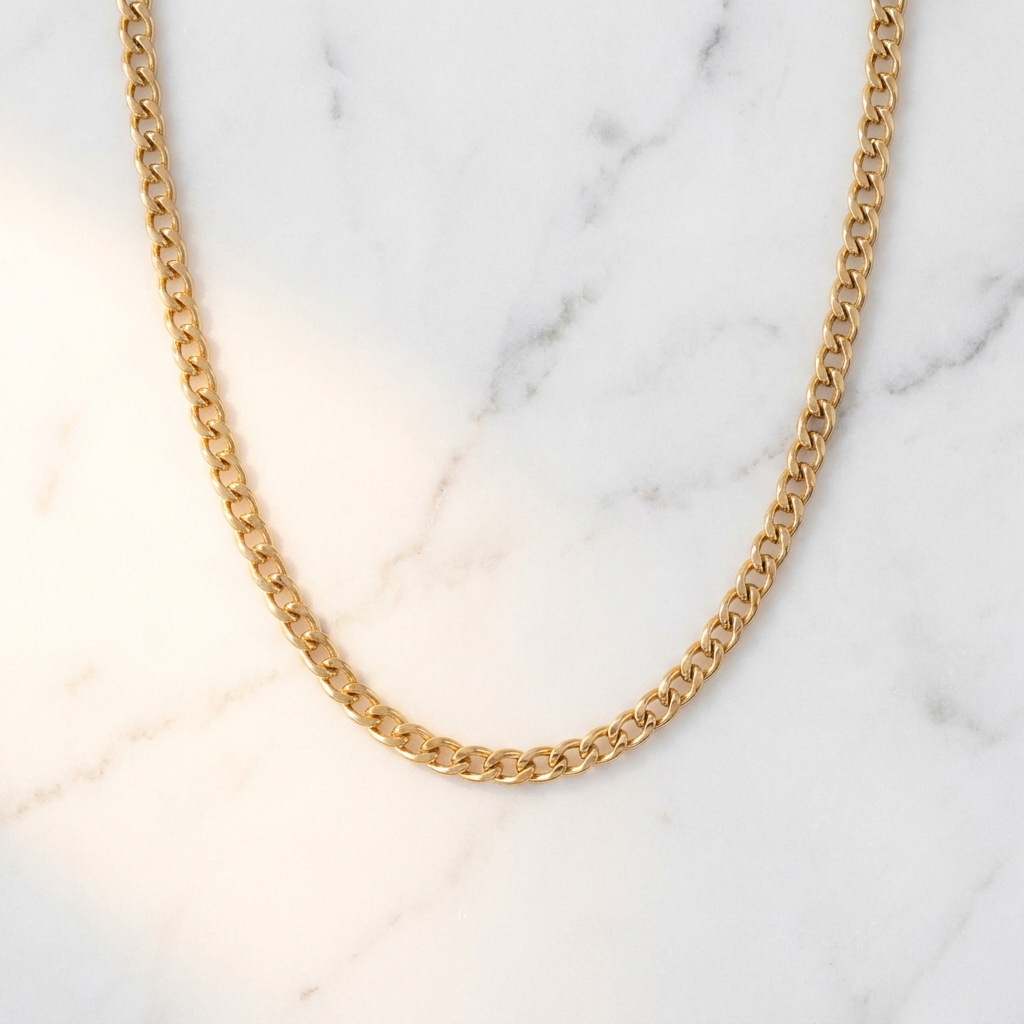
Gold chain necklace laid in an even curve on polished white marble, photographed straight down from above
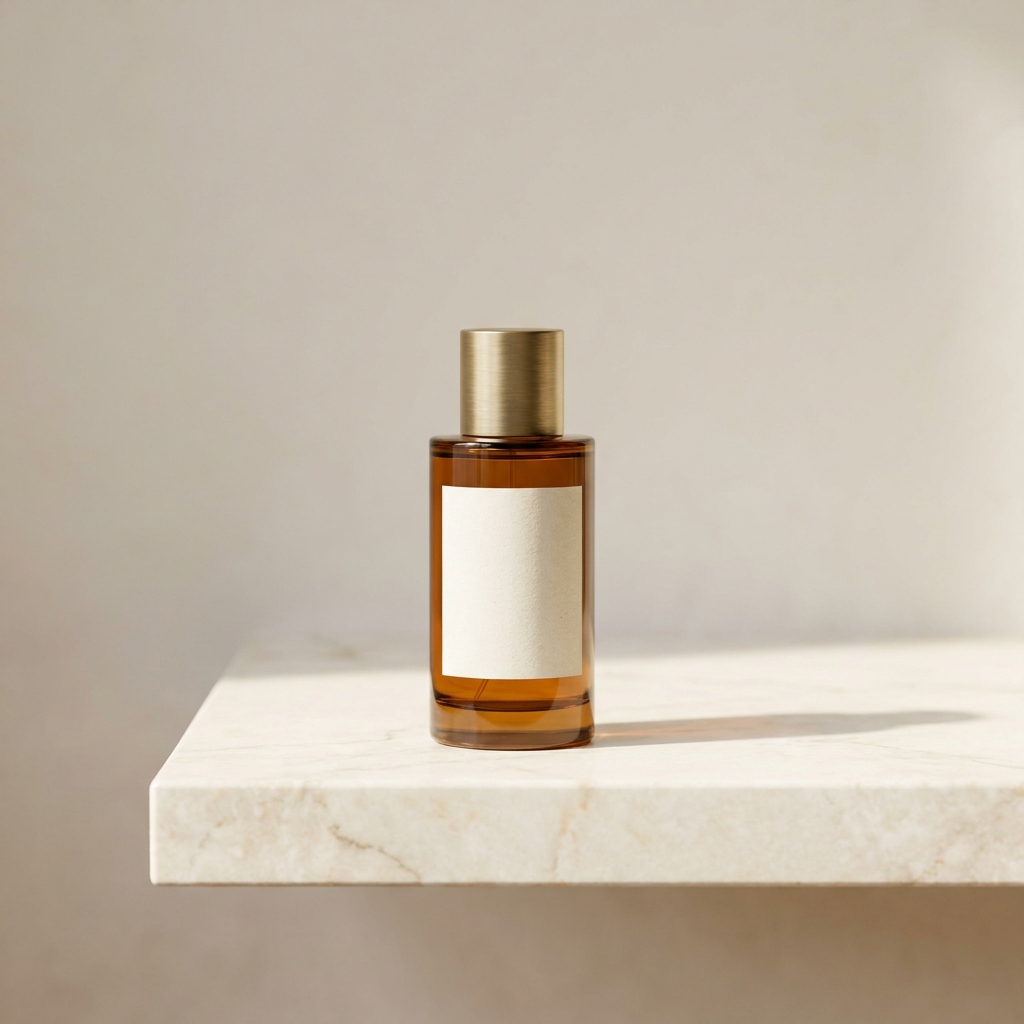
Tall amber glass perfume bottle with a brass cap standing on a cream marble ledge against a warm neutral wall

A marble background is a slab of natural stone under the product, honed for a matte finish or polished for a glossy one. Sellers of skincare, fragrance, jewellery and watches reach for it because stone reads as expensive and holds a high price without a word of copy. Two facts about real marble carry straight into the picture. The veining is a pattern, and a pattern competes with the product unless you decide where it runs. Polished stone behaves like a weak mirror, so it throws light back into the base of the product and carries a cool or warm cast that shifts the colour of your packaging. Marble is the one surface here that arrives with a design of its own. Everything below is about keeping that design behind the product instead of on top of it.

Four craft problems marble creates

What goes wrong on a marble slab, and what to do instead.

Veins that cross the product

Marble veining is a line, and a line reads as an edge. A grey vein running behind a jar can look like a crack or a shadow that is not there. Decide the direction before you generate. Keep the busiest veining in the outer third and leave the area behind the product quiet. A vein that leads in from a corner and stops short of the base works. One that passes under the base does not.

Polished stone bounces light up

A polished slab works like a weak mirror. It throws light back into the underside of the product, so the base loses its shadow and the product looks like it floats. It also creates a soft reflection under the base that can read as a second, upside down product. Honed marble absorbs that light and keeps a real contact shadow. Ask for honed when the product has a flat base. Ask for polished only when you want the reflection.

The stone tints your product

White Carrara reads cool, in the region of 6000K, with blue grey veins. Cream and Calacatta marble read warm, closer to 4500K. Whatever the slab is, some of that colour lands on the product. A white cream jar on cool Carrara goes slightly blue. A silver ring on cream marble goes slightly gold. Set the white balance on the product, not on the stone, and check the label colour against your real packaging before you publish.

White products lose their edge

White marble and white packaging sit at almost the same brightness. The product edge disappears and the shape goes soft. Three fixes work. Light the product from one side so one face is a stop darker than the stone. Keep a real contact shadow under the base. Or place the product where a grey vein passes just behind it, so the outline has something darker to sit against. Check by turning the frame to greyscale.

Tools for a marble set

Four apps, each doing one part of the job on stone.

Place the product on marble
Styled Scene Generator

Place the product on marble

Styled Scene Generator puts your uploaded product onto the stone you describe. Say the type, the finish and the vein direction, not just marble. A prompt like honed white Carrara, soft grey veins running from the top left corner, matte surface gives a usable frame. A prompt that says marble background gives you a random slab with veins in the wrong place.

Open the tool


Fix the bounce and the cast - Before
Before
Fix the bounce and the cast - After
After
Spotlight Relight

Fix the bounce and the cast

Spotlight Relight changes the lighting on a marble frame you already have. Use it when a polished slab has filled the shadow under the base, or when the stone has tinted a white product. Ask for a single soft source from the left and a short contact shadow. The stone stays the same, so a set of frames keeps one slab and one look. Spotlight Relight is on Premium.

Open the tool
Overhead layouts on the slab - Before
Before
Overhead layouts on the slab - After
After
Flat Lay Studio

Overhead layouts on the slab

Flat Lay Studio builds the straight down view, which is the angle marble suits most. Shot from above, the slab becomes the whole frame and the veining is the only pattern in it. Arrange the product in the quiet part of the stone and leave a veined corner empty for a headline. The gold chain shot above is this angle.

Open the tool
A plain white file too - Before
Before
A plain white file too - After
After
Background Remover

A plain white file too

Background Remover cuts the product away from the stone and returns a clean white file and a transparent file. You need both. Marble is a lifestyle frame, and many stores ask for a plain white main image. The transparent file also lets you drop the same product onto a different slab later without a new upload.

Open the tool

Each before and after above demonstrates the tool named on the card, using that app's own sample image, so the subject you see may not be from this industry. Run the same tool on your own photos to see it on your work.

Four steps to a marble set

What to do, in order, from upload to finished frames.

1
Upload one sharp product photo
Uploading your own product photo is on Pro and above. Photograph the product on any plain surface in daylight. Keep the label straight and in focus. The upload is the only place the real colour of your packaging exists, so shoot it under neutral light. If the base of the product is scratched, clean it, because a marble frame shows every mark at full size.
2
Choose the stone and the finish
Pick honed or polished first, because that decides how much light comes back up. Then pick the colour. White Carrara with grey veins suits silver, glass and cool packaging. Cream marble suits gold, brass and amber. Write both into the prompt, plus the vein direction you want, before you press generate.
3
Generate four crops and compare
Run the scene four times and look at the veining in each. Reject any frame where a vein crosses the product or ends behind it in a hard line. Then check the white parts of the packaging against your upload. If they have gone blue or gold, the stone colour is wrong for this product. Each run costs 4 to 10 credits.
4
Relight, upscale and save the setup
Two checks decide whether a stone frame is finished. Look at the base first. If the slab has bounced light back and thinned the contact shadow, send the frame to Spotlight Relight and ask for a short shadow on one side. Then hold the frame next to your upload and read the white parts of the label, because the stone tints whatever sits on it. Send it to Image upscale, which is on Premium, if the frame is going to print. Then save the setup as a workflow, so product two lands on this exact slab.

Order of work

Stone first, light second. The finish decides the lighting, so setting the light before you choose polished or honed means doing it twice. A polished slab fills the shadow from below. A honed slab does not. Crop next, because a vein that sits behind the product in a wide frame can sit under it in a tight one. Check the colour after the crop and before the upscale, since a larger file only gives you a larger blue cast. Cut the white listing file last, from the frame you already approved.

What a marble set contains

Four files, and the test each one has to pass.

A honed hero frame

One three quarter view on honed stone, with the product left of centre and the veining running behind it. The test is the base. You should see a short, soft contact shadow where the product meets the slab. Without it the product looks pasted on, and the whole frame stops reading as a photograph.

An overhead frame with space

The straight down view, with the product in the quietest part of the slab and one veined corner left empty. The test is the empty corner. Lay your headline over it at the real size and read it. If the veining runs through the text, move the crop, do not shrink the text.

A plain white listing file

The same product on plain white, plus a transparent version. The test is the edge. Zoom to 200 percent and look for grey marble left in the cut, especially around a glass shoulder or a chain link. A clean cut on a busy stone background is harder than a cut on plain grey.

The same hero on two stones

One hero on cool Carrara and the same hero on cream marble, kept as a pair. Marble comes in two colour temperatures, and your packaging will only look right on one of them. The test is your own upload. Open both frames next to the original photo and look at the white and silver parts. Pick the stone that leaves them the colour they really are, then use that stone for the whole range.

Model traits that matter on stone

Marble puts more strain on the surface than on the product. Two failures give a fake slab away. The vein pattern repeats across the frame, or the stone has no grain in it and reads as painted paper. Seedream is the one to try first, because it renders fine mineral speckle, and speckle is what makes a slab look cut rather than printed. FLUX is the second, because it takes vein direction from the prompt, so you can push the busy stone into a corner instead of hoping. Run the same stone prompt through both and judge the surface at full size before you look at the product at all.

Marble background questions

Answers to what sellers ask before they shoot on stone.

Should I use honed or polished marble for product photos?
Use honed marble for most products, and polished only when you want a reflection. Honed stone has a matte finish, so it absorbs light and keeps a real shadow under the base. Polished stone acts like a weak mirror. It bounces light back into the underside of the product and adds a reflection that can double the shape. Jewellery on polished marble often looks good, because the reflection reads as an extra sparkle. Skincare on polished marble usually looks like it floats.
Why does my white product look blue on marble?
The stone is tinting it. White Carrara is a cool grey stone, so the light bouncing off it carries a cool cast, and a white or cream product picks that up. Two fixes. Set the white balance on the product rather than the slab, so the packaging stays the colour it really is. Or move to a cream or Calacatta marble, which carries a warm cast and suits cream, gold and amber packaging.
How do I stop the veins from fighting the product?
Decide the vein direction before you generate, and keep the busiest area away from the product. Ask for veins that run in from one corner and fade before they reach the base. Then crop so the product sits on a quiet part of the slab. A useful check is to squint at the frame, or blur it. If your eye goes to a vein instead of the product, the crop is wrong. Moving the crop 100 to 200 pixels often solves it.
Can I put marble behind the product as well as under it?
Use one stone plane at a time. A marble wall behind a marble surface doubles the veining, and the product gets lost between two patterns. Keep the stone under the product and ask for a plain warm or grey wall behind it. If you do want stone standing up, ask for a nearly plain slab at the back and keep the veined one on the surface, so only one plane carries a pattern. Ask for a soft shadow where the two planes meet, or they merge into one flat wall.
What does a marble photo set cost in credits?
One run costs 4 to 10 credits, and a credit is about one cent. A working set here is four scene runs and one relight, because vein position is the thing you are choosing between and you cannot judge it from a prompt. Set that against the real slab. A honed offcut big enough to shoot on has to be bought from a tile shop, carried home, and stored somewhere it will not chip at the corners. Then a gold product wants a warm stone, so you buy a second one. The slab is the expensive part of marble photography, and it is the part you are not buying here.
Which products suit a marble background?
Small, high priced products suit marble best: skincare, fragrance, jewellery, watches and candles. The stone reads as expensive, so it supports a high price and looks wrong under a cheap item. Size matters too. The veining should be smaller in scale than the product, so a 30mm ring on a slab with huge veins looks like a toy. For large items, a plain wall or a paper sweep holds the shape better.

All twelve backgrounds

The hub page lists all twelve product backgrounds side by side, so you can compare marble against concrete, paper and linen before you choose.

See all backgrounds

Put your product on marble

The free plan gives you 112 credits, so you can generate marble frames and see how the stone behaves. Free output carries a watermark. Pro is the tier that takes a photo of your own piece and lets you sell the frame.

Start free