 Plaster and stone plinths

Podium product photography from a single photo

Upload one photo of your product. DesignerBox builds the plinth around it, sets the height against the product, and keeps the contact shadow on the plinth top. You get a hero frame with clean space for a headline, plus square and 4:5 crops for ads.

Start free
Glass fragrance bottle standing on a cylindrical warm off white plaster podium, with a second empty block beside it
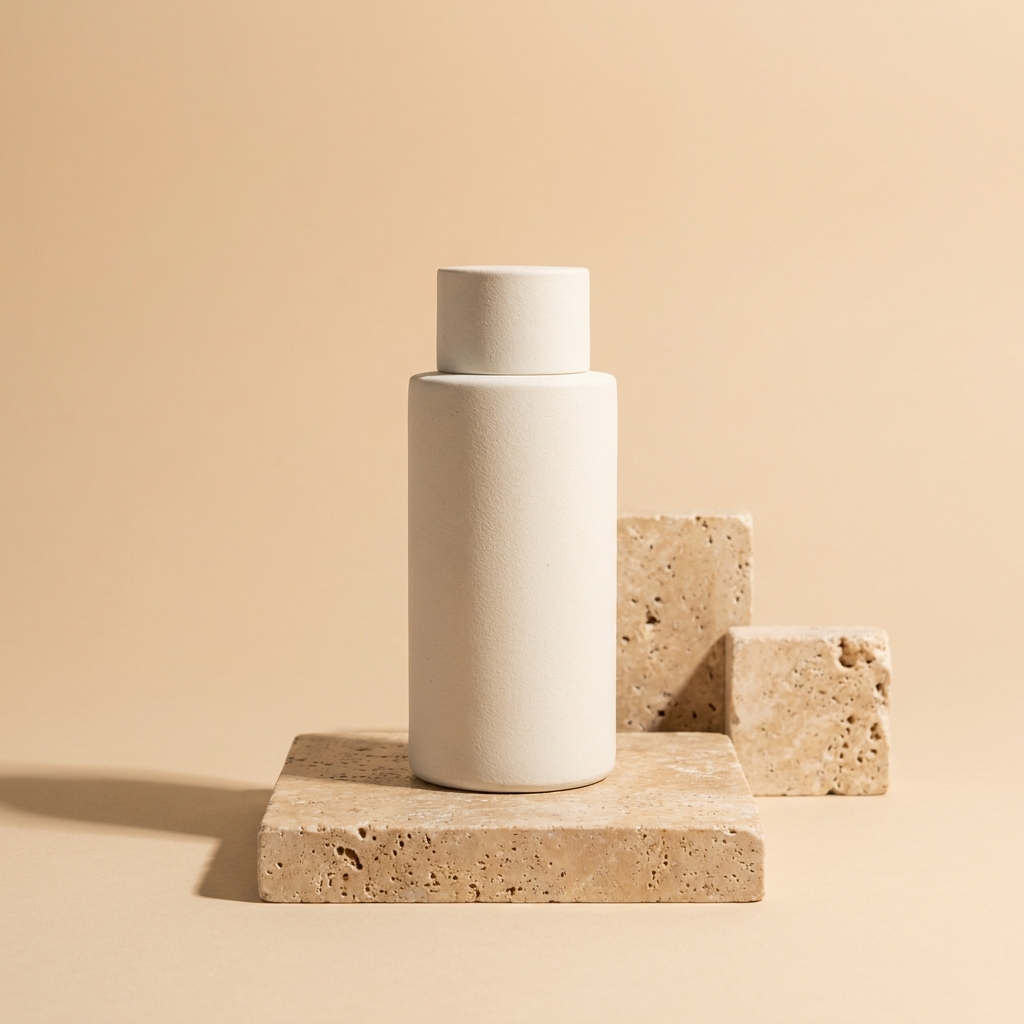
Matte ceramic skincare bottle raised on a low travertine stone podium, with two empty stone steps behind it
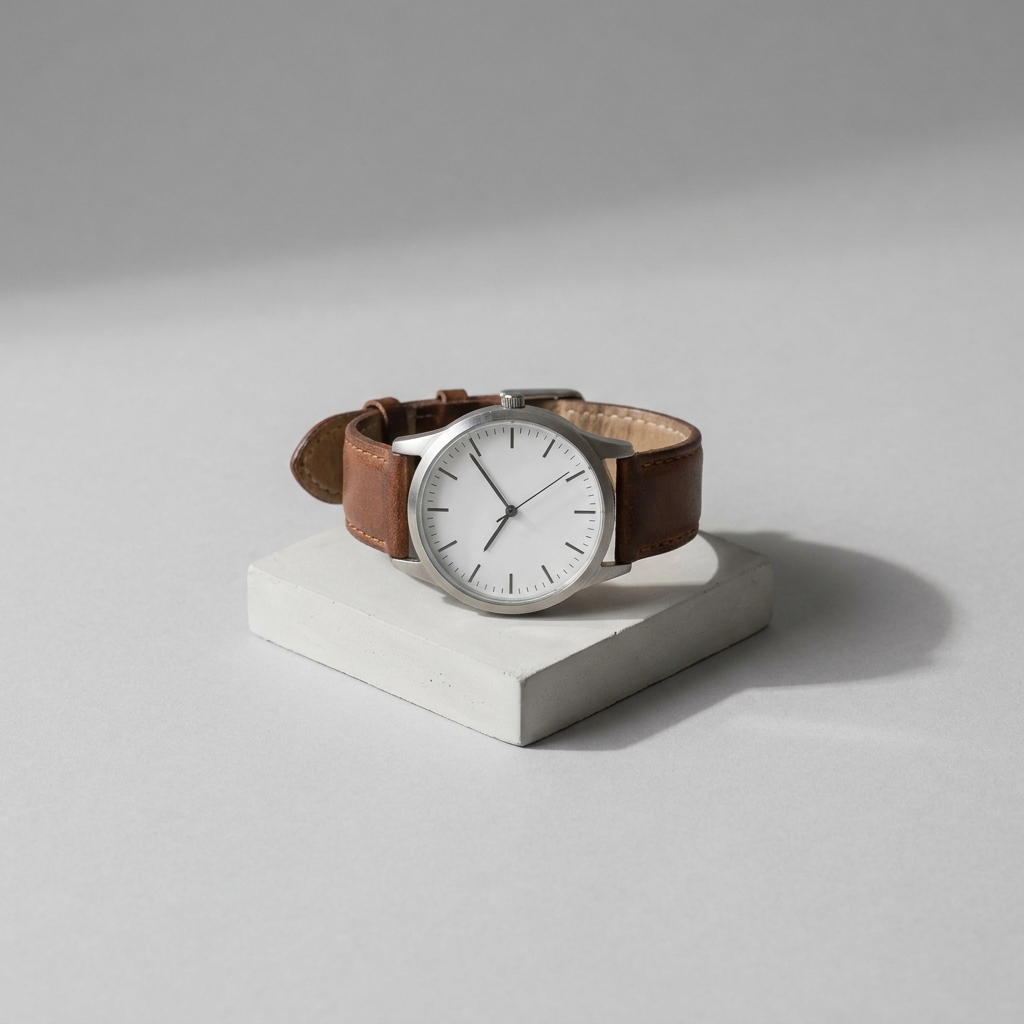
Leather watch resting on a small square pale grey plaster plinth in front of a plain grey backdrop

A podium background is a built plinth of plaster, stone or travertine that raises a product above the floor of the frame. It suits small sculptural goods: fragrance, jewellery, watches, skincare and small electronics. It belongs at position two or three in a listing, because most stores ask for a plain white shot in the first slot. The whole job is one ratio: plinth height against product height. A safe start is a plinth about one third to one half as tall as the product. Taller than that and the plinth becomes the subject, with the product sitting on top as decoration. The second limit is width. The plinth top has to be wider than the product base on every side, which rules out soft goods, wide boxes and anything that hangs over. A product hanging over the edge looks ready to fall, and better light does not fix it.

Podium craft problems

Height, edge, camera and shadow all change once a product leaves the floor.

Plinth height against product height

Measure the product first. A plinth around one third to one half of the product height keeps the product as the subject. A 200mm bottle sits well on a 70mm to 100mm block. Go taller and you see the plinth first. Go shorter and the raise stops working, because the product looks like it is on a coaster.

The edge a product can fall off

A plinth top has a hard edge. Leave at least 15mm of clear plaster on every side of the product base. Less than that and the product looks ready to fall. A round product on a round plinth is easy. A square base on a cylinder is harder, because the corners hang over the curve at the front. Name the plinth shape in the prompt to match the product base.

Camera height and the top ellipse

Raising the product by 100mm also raises the camera. Keep the lens near the middle of the product. If the camera stays low, the round top of the plinth closes into a thin line and the surface disappears. If the camera goes too high, you look down into the plinth and the product loses height. Ask for a shallow ellipse on the plinth top. That one detail tells the viewer the product stands on something solid.

Two shadows, not one

A product on the floor has one shadow. A product on a plinth has two. One sits tight under the product on the plinth top. The other falls from the plinth onto the floor and the backdrop. Both must run in the same direction from the same light. When they disagree, the frame looks fake, even if every other detail is right. Raising the product also makes the floor shadow longer.

Tools for a podium frame

Each one handles a different part of building and finishing a plinth shot.

Build the plinth and blocks
Styled Scene Generator

Build the plinth and blocks

Styled Scene Generator places your product on a described surface. For this background, write the material, the shape and the height: a cylindrical warm off white plaster podium 90mm tall, with one lower block on the left. The tool builds the plinth around the product and keeps the product's own shape, so the label stays readable.

Open the tool


Make the two shadows agree - Before
Before
Make the two shadows agree - After
After
Spotlight Relight

Make the two shadows agree

Spotlight Relight changes the lighting on a photo that already exists. Use it when the shadow under the product and the shadow the plinth throws point in different directions. Ask for one soft key from the left at 45 degrees. The tight shadow on the plinth top and the long shadow on the floor then come from the same light, so the product looks like it rests on the stone. Spotlight Relight is on the Premium plan.

Open the tool
Remove the old table shadow - Before
Before
Remove the old table shadow - After
After
Background Remover

Remove the old table shadow

Background Remover cuts the product out and returns a clean white file and a transparent file. Run it before you build the plinth. The dark contact shadow from your table travels with the product otherwise, and it lands on the plaster as a second smudge that no light direction explains.

Open the tool
Put a price beside the plinth - Before
Before
Put a price beside the plinth - After
After
Product Ad Generator

Put a price beside the plinth

Product Ad Generator puts a finished frame into an ad layout with room for a headline and a price. A podium shot suits this better than most backgrounds. The plinth holds the product in one narrow column, and the empty blocks and flat backdrop leave a wide clear panel. Keep the plinth on the right third and the text sits on the left.

Open the tool

Each before and after above demonstrates the tool named on the card, using that app's own sample image, so the subject you see may not be from this industry. Run the same tool on your own photos to see it on your work.

Steps to a podium frame

Level photo, clean cutout, built plinth, matched light. In that order.

1
Shoot the product level
Stand the product on a table and put the camera at the middle of its height. Do not shoot down at it. A photo taken from above shows the top of the base, and that view cannot sit on a plinth later. One sharp photo in daylight is enough. Keep the whole product in frame with a little space around it.
2
Cut the product out first
Upload the photo, run Background Remover and keep the transparent file. Uploading your own product photo is on Pro and above. The cutout drops the table, the old backdrop and the contact shadow that came with them. A leftover shadow is a common reason a plinth shot fails, because it appears on the plaster in the wrong place. The run costs 4 to 10 credits.
3
Name the plinth, then the blocks
Write the material, the shape and the height in one line. For example: a cylindrical warm off white plaster podium, 90mm tall and 120mm wide. Then add the empty blocks. Ask for one block lower than the podium and one taller, both set back. Put the podium on the right third so the left side stays free.
4
Match the light, then upscale
Put the two shadows side by side before you accept the frame. The tight one on the plinth top and the long one on the floor have to run the same way from the same light. If they disagree, run Spotlight Relight and name one direction. Then look along the vertical edge of the plinth. A bowed or soft edge is the tell that the block was drawn rather than built, and it hides in a small preview. Send the accepted frame to Image upscale so plaster grain and travertine holes survive a large screen. Image upscale is on Premium.

Order of work

The cutout comes first because a plinth shot carries two shadows, and you only want the ones the new light makes. If the old table shadow is still attached, it lands on the plaster and no light direction can explain it. The plinth is built second, because the height decision depends on the product you have just isolated. Light comes third. You cannot match the shadow on the plinth top to the shadow on the floor until both surfaces exist. Upscale is last, because plaster grain and stone holes are the detail a 4K file is for.

The finished podium set

Four things a plinth shot has to deliver before it goes live.

A hero frame with headline space

One wide frame with the plinth on a third and the rest of the backdrop empty. This is the frame a banner or a hero section uses. Test it by covering the product with your thumb. If the clear side still holds two lines of large text without touching the empty blocks, the layout works.

A close frame of the contact edge

A tighter crop that shows where the product base meets the plinth top. This is the frame that proves the product rests on stone. Check that the shadow is darkest right at the base and fades within a few millimetres. A soft even grey under the whole product means it floats.

Square and 4:5 crops

Ads and feed posts need 1:1 and 4:5. A podium is tall, so a square crop is where it breaks. Keep the base of the plinth inside the frame in every crop. A plinth cropped at the bottom loses the reason it exists, because the viewer cannot see that the product is raised.

A frame that shows the real size

A raised product has nothing familiar beside it. The floor is out of reach and the plinth has no known height, so buyers guess the size wrong. Add one plain frame of the product on a flat surface at the same angle, and put the measurements in the listing text. A buyer who expects a 90mm bottle and opens a 200mm one sends it back.

Model choice for plinth shots

A plinth is a machined shape, and that is what breaks models. The top of a cylinder has to be a true ellipse, the sides have to stay parallel, and the vertical edge has to run straight from the top down to the floor. A model that bows that edge turns stone into clay, and the eye catches it before it reads the product. GPT Image 2 is the steadier one on that geometry. The second problem is surface. Plaster is fine sand and travertine is full of small holes, and both go flat and painted when a model smooths them. FLUX keeps the texture. Run the same line on both and compare two things only: the top ellipse and the vertical edge.

Podium background questions

Height, shadows, stone choice and what to use the frame for.

How tall should a product photography podium be?
Aim for a plinth about one third to one half of the product height. A 200mm fragrance bottle sits well on a plaster block of 70mm to 100mm. A 40mm watch case needs a low plinth of 20mm to 30mm, or it looks lost. Two rules help. The product must stay the tallest thing in the frame. And the plinth must be wide enough to leave 15mm of clear surface around the base.
Why does my product look like it floats above the podium?
The contact shadow is missing or wrong. On a plinth the shadow under the product should be darkest right where the base touches, then fade within a few millimetres. If it is one soft even grey patch, you see a gap under the product. Two fixes. Remove the old shadow with Background Remover before you build the scene. Then run Spotlight Relight and name one light direction, so a single hard-edged contact shadow forms.
Plaster or travertine, which podium suits my product?
Choose plaster for products with fine detail, and travertine for plain products. Plaster is matte and almost featureless, so a printed label, an engraving or cut glass stays the only thing to look at. Travertine has holes and pale veins that add interest, which helps a plain matte bottle or a single-colour tin. Two textures fight. If your product already has a pattern, keep the plinth plain.
How many empty blocks should be in the frame?
One or two, and never at the same height as the main podium. The empty blocks give the frame rhythm and depth. Matching heights turn them into a fence, and the eye stops on the row instead of the product. A good set is one block clearly lower and set to the left, and one taller block behind and to the right. Keep their shadows off the product.
Does the floor under the podium have to match the plinth?
No, and matching it often hurts. The floor carries the long shadow the plinth throws, so it has to read as a separate surface. Same material and same tone makes the plinth melt into the floor, and the raise stops showing. Keep the floor plain and one or two shades away from the plinth. A warm off white plaster block on a pale grey floor works, and so does a travertine block on a plain sand backdrop. Where the floor meets the backdrop, ask for a soft curve rather than a hard line, so nothing competes with the plinth edge.
Can I keep the same podium across a whole range?
Yes. Save the setup once in Workflows, then rerun it for every new product. The plinth material, the block heights, the camera height and the light stay fixed, so twenty products look like one range. A real plinth set does not work that way. Each block is one height, so a 200mm bottle and a 40mm watch need two of them, and plaster corners chip the first time a block is carried. Swapping plaster for travertine means buying stone again, then finding somewhere to keep it. Here the height and the material are two words in the line you already wrote, and each run costs 4 to 10 credits.

All twelve backgrounds

The hub lists all twelve product photo backgrounds side by side, so you can compare plaster against marble, concrete and linen before you shoot.

See all backgrounds

Raise your product on plaster

Set the plinth height, the stone and the block heights, then take the hero frame and the crops. The free plan gives you 112 credits, enough to try two plinth heights and see which one keeps the product as the subject. Free frames carry a watermark, and loading your own product begins at Pro.

Start free