 Outdoor daylight scenes

Outdoor natural light product photography without a weather delay

DesignerBox places your product in real daylight, on a rock, a bench or beach sand. You choose the hour, the sun direction and how far the background sits behind. The shadow and the colour follow that choice, on every product in your catalogue.

Start free
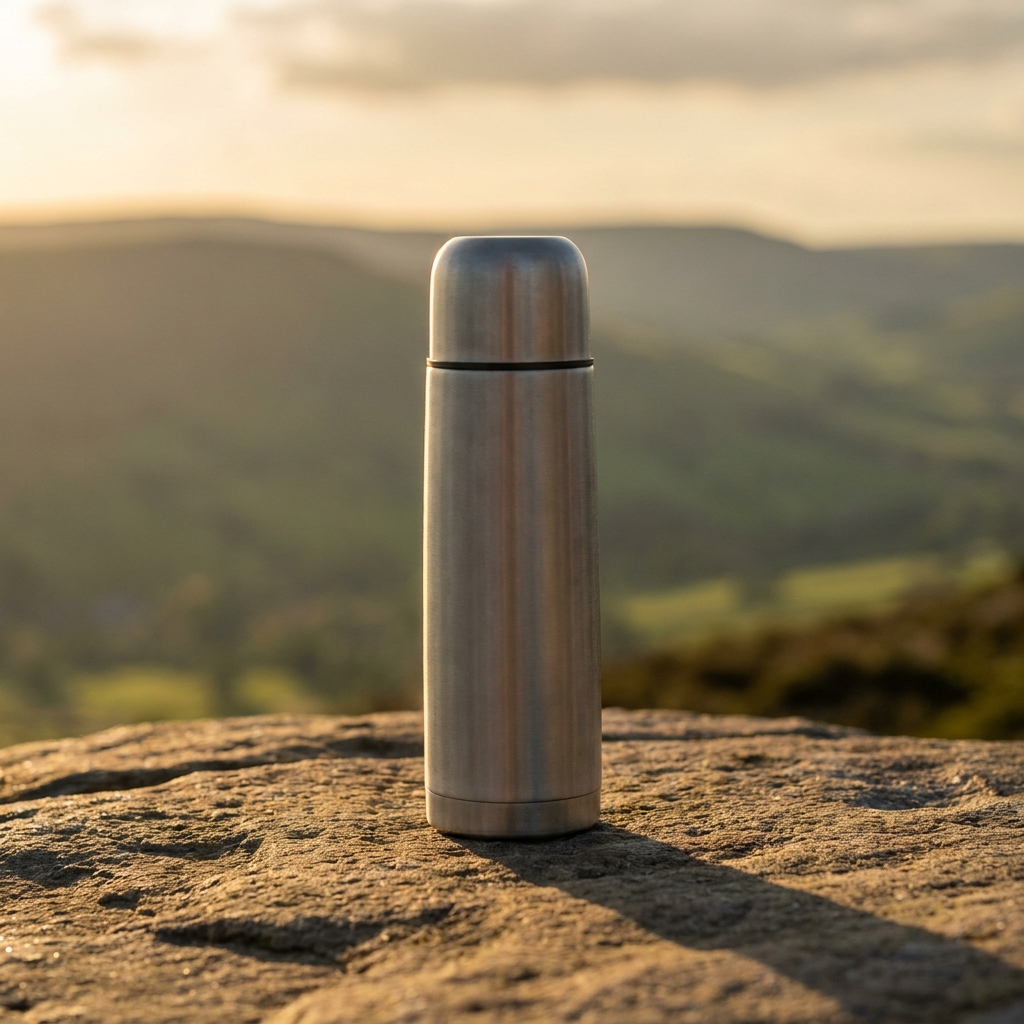
Brushed stainless insulated flask standing on a sunlit rock, with soft green hills far out of focus behind it
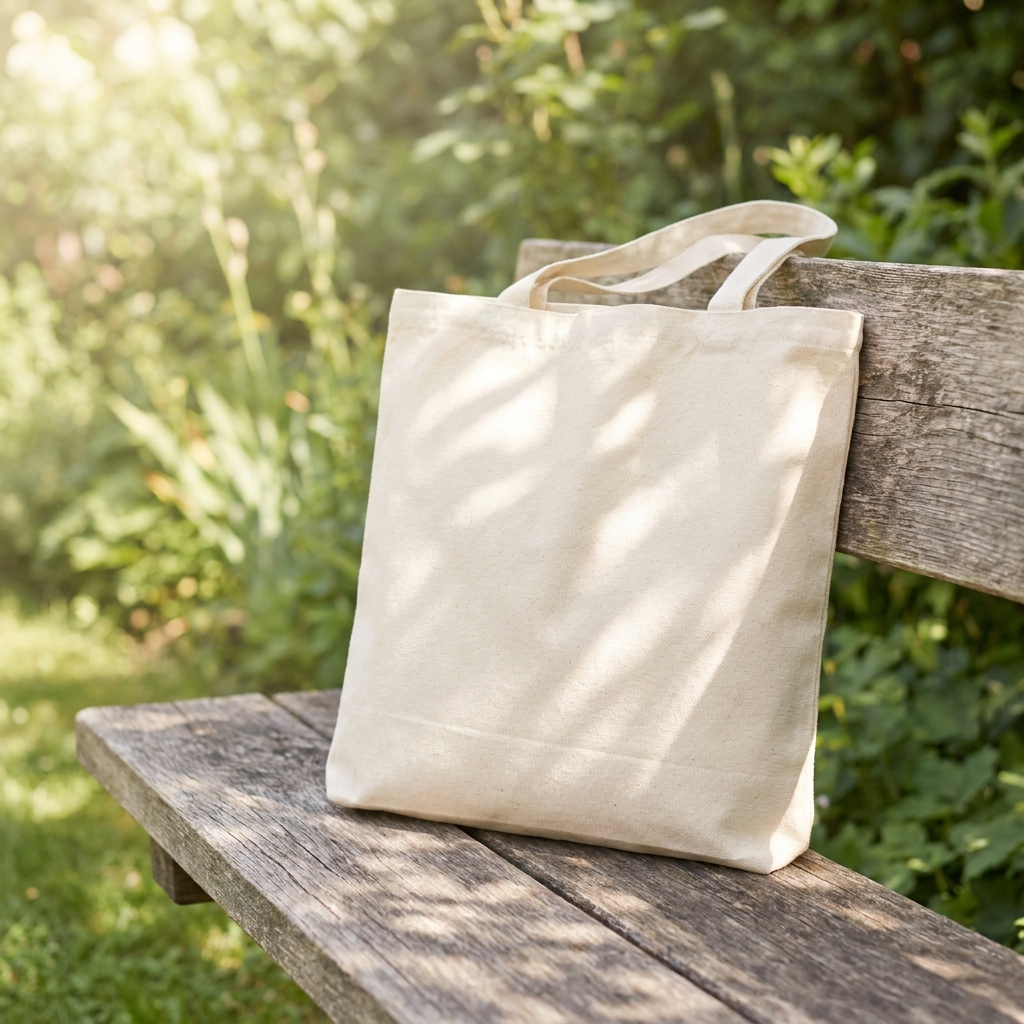
Ecru canvas tote bag on a weathered wooden bench, dappled tree shadow across it, blurred green garden behind
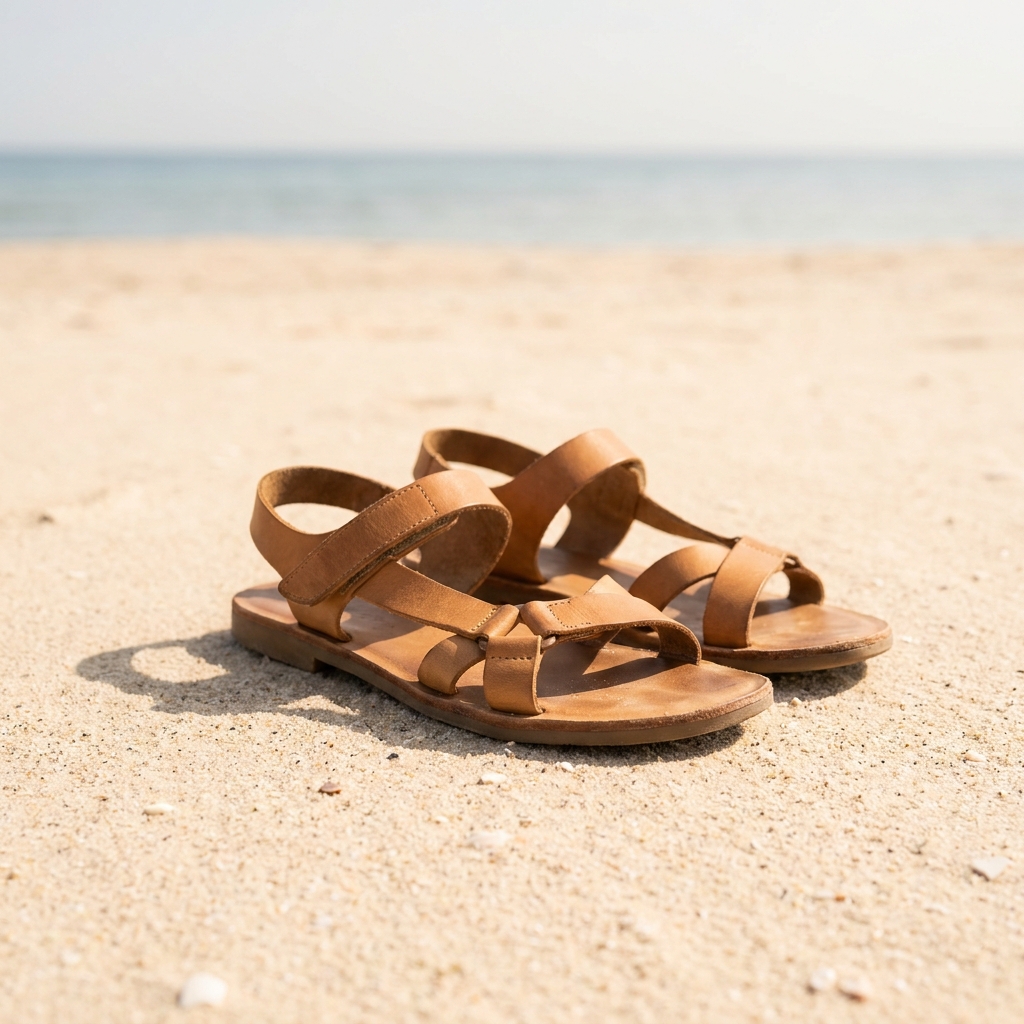
Tan leather sandals arranged on warm pale beach sand, with soft out of focus sea and sky behind

Outdoor natural light product photography means a product photographed in real daylight, in a found outdoor place. The surface is a rock, a wooden bench, grass or beach sand. It suits active, travel, outdoor and lifestyle goods, because the buyer sees the item where it is meant to be used. Outdoors you do not control the light. You control three things instead: the hour, the direction you face, and the distance between the product and the scene behind it. Those three set the shadow, the colour and the blur, and nothing else does. That trade has a cost. Real daylight will not give you a plain white first listing image, an exact colour sample, or a clean close view of small jewellery detail. It gives you place, and place is what a lifestyle frame is for.

Four limits of real daylight

Sun angle, shade, background distance and weather each change the frame.

Sun angle sets the shadow

Low sun near sunrise or sunset throws a long shadow. It also measures about 3000K to 4000K, so metal and leather turn warm. Midday sun sits high, so the shadow shrinks to a hard patch under the product and the colour runs near 5500K. Pick the hour first. In the flask frame the shadow points away from the camera, which keeps the label clean.

Direct sun or open shade

Direct sun gives a hard shadow edge and a bright white highlight on gloss. Open shade under a tree or a wall gives a soft edge and even colour. Shade is cooler, often 6500K to 7500K, so white fabric can go blue. Ask for open shade when the product has a printed label. Ask for direct sun when the scene should feel hot and dry.

Distance makes the background blur

A blurred background needs real space behind the product. At f/2.8 with the hills 30 metres away, the green becomes soft shape and colour only. Place the product one metre from a hedge and every leaf stays sharp, so the leaves compete with the product. Say how far the scene sits behind. That single number changes the frame more than the aperture does.

Weather and wind waste days

Cloud can arrive between two frames, so a set shot over one afternoon rarely matches. Wind moves fabric and knocks small products flat. It also drops leaves into the frame. A photographer books a real outdoor shoot around the forecast. Generated frames carry none of that. You set the hour and the sky once, then run the same setup for every product in the catalogue.

Tools for a daylight set

Four DesignerBox tools that build and finish an outdoor daylight frame.

A found place in daylight
Styled Scene Generator

A found place in daylight

Styled Scene Generator places your product on a real outdoor surface. Name the surface, the hour and the direction of the sun. Write 'sunlit rock, low afternoon sun from the left, green hills 40 metres behind'. It returns the flask on that rock with the hills soft. Change one word to move the sun, then run it again.

Open the tool


Move the sun after the shot - Before
Before
Move the sun after the shot - After
After
Spotlight Relight

Move the sun after the shot

Spotlight Relight, on Premium, changes the light on a photo you already have. Shoot outside at noon, then ask for low warm side light. The shadow lengthens and the colour moves towards 3500K. It also lifts a frame taken under flat cloud. You keep the real place and the real product, so only the hour changes.

Open the tool
Daylight frames for feed and reels
Social Media Ad Studio

Daylight frames for feed and reels

Social Media Ad Studio builds the vertical and square versions of an outdoor frame. A wide hill or beach scene loses most of its width at 9:16, so the crop has to be planned, never cut later. The studio rebuilds the frame at each size and keeps the sky and the horizon. Paid and organic formats come out of one run.

Open the tool
Outdoor frame with room for price - Before
Before
Outdoor frame with room for price - After
After
Product Ad Generator

Outdoor frame with room for price

Product Ad Generator puts a finished outdoor frame into an ad layout. Sky, water or open grass gives clean empty space, so a headline and a price sit there without covering the product. Ask for the product low in the frame and the sky wide. You get the ad back with the text area already open.

Open the tool

Each before and after above demonstrates the tool named on the card, using that app's own sample image, so the subject you see may not be from this industry. Run the same tool on your own photos to see it on your work.

Steps to a daylight set

Hour first, then surface, then distance, then the shadow check.

1
Pick the hour and direction
Decide the time of day before anything else. Write it plainly: early morning sun low from the left, or open shade at 11am. The hour sets shadow length and colour temperature together, so it fixes the mood of every frame. Write the same hour for every product, so the whole set matches.
2
Name the surface and the scene
Say what the product sits on and what sits behind it. A weathered wooden bench with a garden 15 metres back is a different frame from a bare rock with hills a kilometre off. Give the distance as a number. Distance decides how soft the background goes.
3
Run it and check the shadow
Run the setup on a photo of your product. Uploading your own product photo is on Pro and above. Then look at the shadow before anything else. It must fall in one direction, match the sun you asked for, and touch the product where the product meets the ground.
4
Match the whole set to one sun
Outdoors a set fails as a group. One frame can be right while the six together are wrong. Put them side by side and check that every shadow runs the same way and that the light stays the same warmth across all of them. A product lit from the right, sitting in a set lit from the left, reads as a different day. Export last. Image upscale, on Premium, takes the frame to 4K, which outdoor scenes need because leaves, sand and bark break up long before the product does.

Order of work

The hour comes first because it decides two things at once. Shadow length and colour temperature both follow the sun angle, so changing the hour later changes everything else. The surface comes second, since a rock takes hard light well while a painted bench shows every bright spot. Background distance comes third, because it only matters once the light is settled. The shadow check comes last. Outdoors the shadow is the part a viewer reads first. A shadow that points the wrong way makes the whole frame look false, even when the product is perfect.

Files from a daylight set

What a finished outdoor set has to prove before you publish it.

One hero frame in low sun

The main frame has to prove the light is real. One sun direction, one shadow for each object, and a shadow edge that is sharper near the product than far from it. If two shadows point different ways, a buyer will not name the fault. The picture will still look false.

Vertical crop with the sky kept

The 9:16 version has to hold the horizon and some sky. Cutting a wide hill scene down to vertical usually removes the depth that made it outdoor. Rebuild the frame at 9:16 instead of cropping it, so the background still stays soft behind the product.

A colour-checked white balance

Open shade runs cool, near 7000K, so a white or ecru product can print blue. The delivered frame has to hold the true colour of the product while the scene stays cool around it. Compare the product against your own reference photo before the frame goes on a listing.

A background checked at full size

Zoom into the scene before you publish. A found place is full of small detail: leaves, gravel, a far window, a fence line. Generated frames get some of that detail wrong, and a bent post or a smeared sign is easy to miss at thumbnail size. A plain white surface gives you nothing to check. An outdoor scene gives you plenty.

Model traits that matter outdoors

Outdoors a model has one job that matters more than the rest: keep every shadow on the same side. Nano Banana Pro holds one light direction across a run of frames, so six products can look shot in the same hour. GPT Image 2 follows a written instruction closely, so 'sun low from the left, hills 40 metres back' comes back with that distance really in the frame. Judge the result on the shadow. A background can look lovely and the frame still be wrong. If the flask throws its shadow to the left and the rock throws its shadow to the right, throw the frame away.

Questions about outdoor daylight frames

Sun angle, shade colour, weather and cost, answered for outdoor frames.

What time of day is best for outdoor product photos?
The hour after sunrise and the hour before sunset give the most useful light. The sun sits low, so shadows run long across the ground and the colour warms to about 3000K to 4000K. Midday sun is high and hard, which flattens shape and leaves a small dark patch under the product. Open shade works all day if you want soft, even light instead.
How do I get a blurred background outdoors?
Put real distance between the product and the scene behind it. Twenty to forty metres of separation turns hills, trees or sea into colour and soft shape. A wide aperture such as f/2.8 helps, but distance does more work than the f-stop does. In DesignerBox you write the distance into the scene, for example 'green hills 40 metres behind', and the frame returns with that depth.
Can I shoot outdoor product photos on a cloudy day?
Yes, but the picture changes. Flat cloud removes the shadow, so the product loses its sense of place and the frame can look grey. If you want the look of sun on a cloudy day, take the plain frame and run Spotlight Relight to add a low warm side light. That gives you the shadow direction you wanted without a clear sky.
Why does my white product look blue in the shade?
Open shade is lit by blue sky, not by the sun, so it runs cool, often 6500K to 7500K. A white, ecru or grey product takes that colour and prints blue. Set the white balance to shade, or ask for warm bounce light back onto the product. Check the delivered frame against a photo of the real item before you publish it.
How much does an outdoor product photo set cost?
A run costs about 4 to 10 credits, and a credit is around one cent. A first set of three outdoor frames stays under a dollar in credits. Credits come with the subscription, so the cost per product falls as you run more of them. A real outdoor shoot costs a travel day, plus a second day when the weather turns.
My product is small. Will it get lost in an outdoor scene?
It can. Outdoors there are no walls and no table edge, so nothing tells the eye how big the product is. A lip balm on a wide beach reads as a speck. Two moves fix it. Put the camera low and close, so the product fills about a third of the frame. Then keep the wide view for the background only, 20 metres or more behind. Ask for 'camera low, product close, sea far behind' and the scale comes back right.

The full background catalogue

The hub lists all twelve backgrounds side by side, so you can compare outdoor daylight with studio white, concrete, marble and the rest.

See all backgrounds

Put your product in real daylight

The free plan comes with 112 credits, so you can build a daylight scene and see where the shadow falls. Free frames carry a watermark, and you cannot use them to sell. Uploading your own product photo, and selling with the result, both start on Pro.

Start free